
Getting Started with Zoom
Zoom unifies cloud video conferencing, online meetings, and group messaging into one easy-to-use platform. In addition, it offers the best video, audio, and wireless screen-sharing experience across multiple platforms.
Video sessions in Zoom are similar to sessions conducted in a traditional classroom, where small groups of students meet separately to brainstorm and collaborate. You can set up video sessions in your Zoom meeting room to engage in real-time, private, and group discussions.
On this page:
- Download Zoom App
- Log in to Zoom App
- Set up your Profile Picture
- Access Zoom Classroom from VU Collaborate
- Change Virtual Background
- Set Schedule Privileges
We recommend that you use and update Google Chrome regularly for usability and security.
Download Zoom App
1. Go to the Victoria University Zoom Portal ( https://victoriauniversity.zoom.us/ ),
then select Download Client.
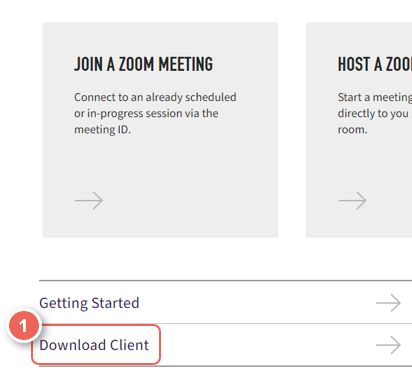
2. Under Zoom Desktop Client, select Download.
3. Once downloaded the file to your device, follow the installation steps.
Having trouble? Contact IT Service Desk team.
Log in to Zoom App
1. From your Desktop, open or launch the Zoom App.
2. To sign in, select the SSO button.
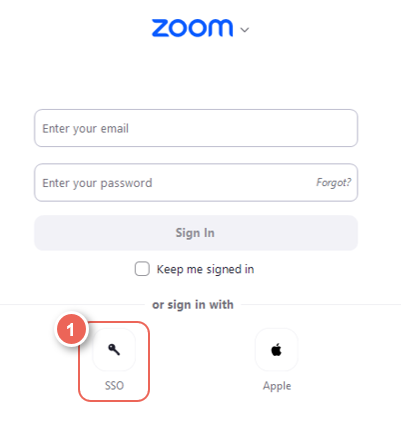
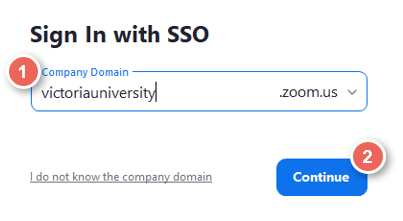
3. Enter victoriauniversity (with no space) in the text box and select Continue.
Ensure the search bar ends with .zoom.us
4. Then log in using your Staff credentials (e.g.: This email address is being protected from spambots. You need JavaScript enabled to view it.)
Set up your Profile Picture
From Desktop App
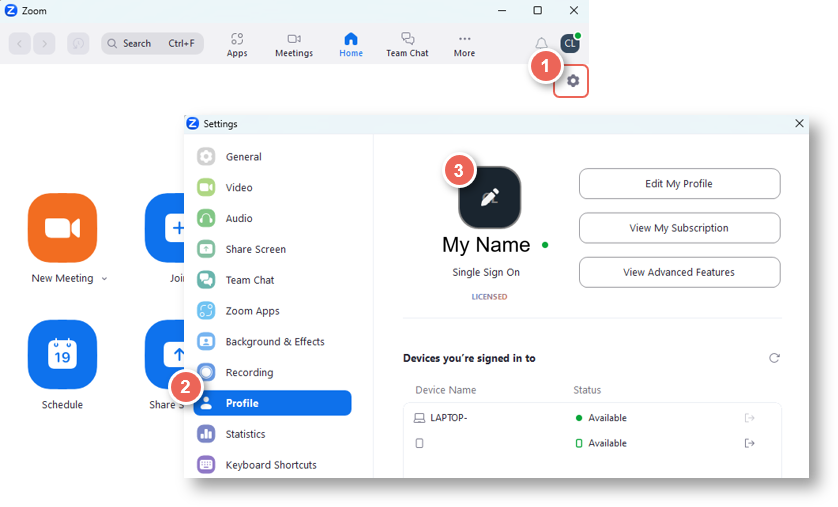
1. Launch the desktop Zoom app.
2. Click the Settings (1) icon.
3. From the side menu, select Profile (2).
4. Click the profile image to locate and select a profile image.
5. If required, crop your image, then select Save.
From VU Zoom Portal
1. Log in to the VU Zoom Web Portal.
2. From the side menu, select Profile, then click on the profile picture to add or update a profile picture.
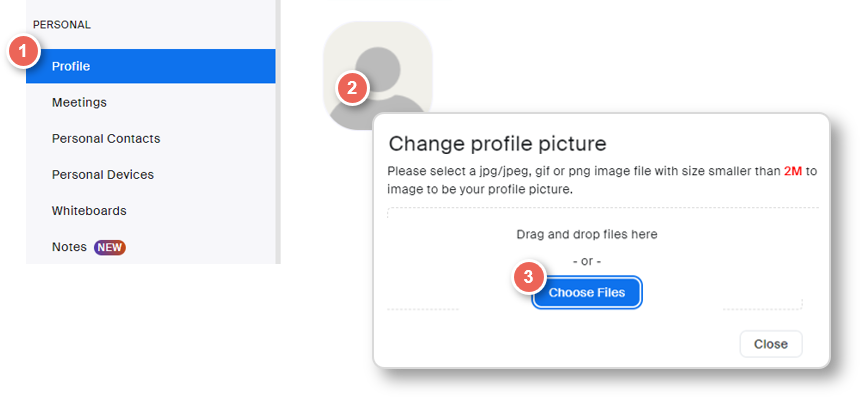
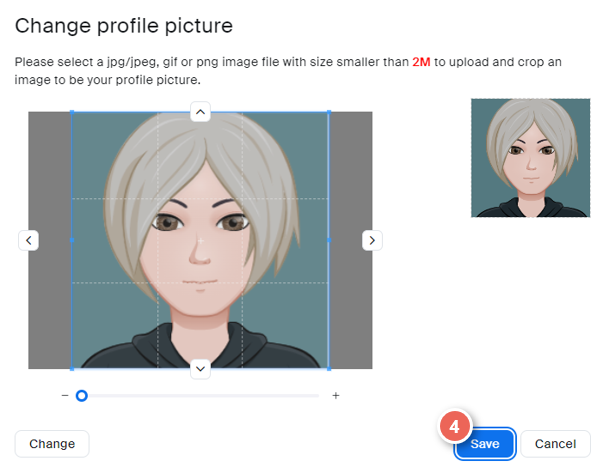
3. Upload an appropriate picture, adjust the crop area and select Save.
Change Virtual Background
You can change or add a virtual background directly from your meeting or Zoom Desktop App, see the video instructions below:
Access Zoom Classroom from VU Collaborate
How to schedule your Virtual Classroom Sessions
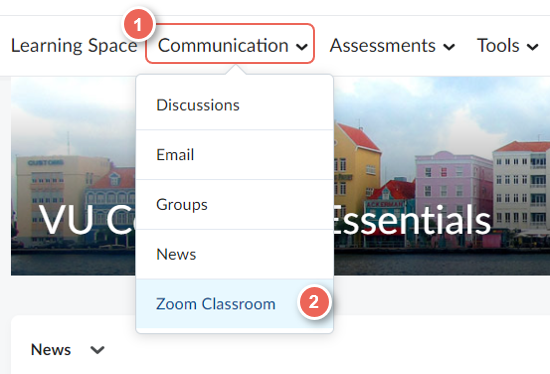
1. Navigate to your unit space.
2. Select Communication on the navbar.
Then select Zoom Classroom from the drop-down.
Read through Schedule a new class on Zoom to learn how to create Zoom sessions on VU Collaborate.
Optional - Set Schedule Privileges
1. Log in to the VU Zoom Web Portal.
2. Select Settings on the top left-hand corner of the webpage.

2. Select Other under Meeting settings.
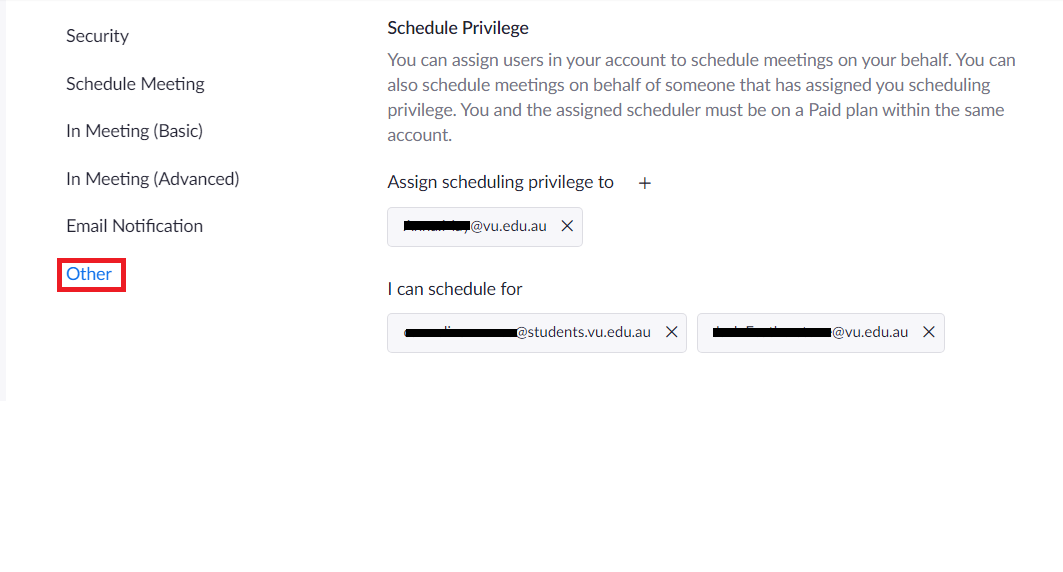
3. To assign schedule privileges, go to the bottom of the screen and click on + next to Assign scheduling privilege to.
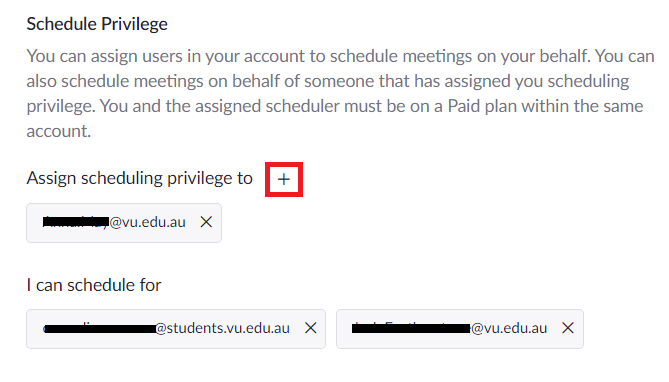
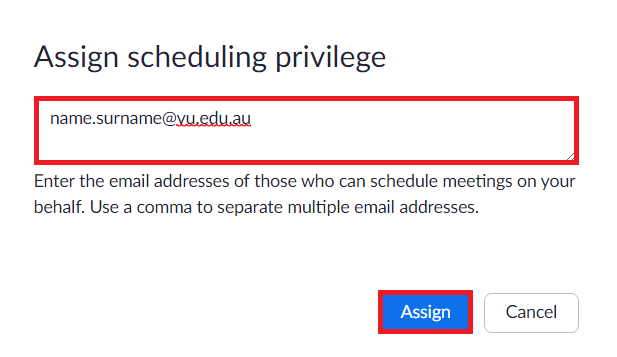
4. Fill in the VU email address of the person you want to assign the privilege to and click on Assign.
The email address of the people you can assign privileges to will appear under the Assign scheduling privilege to as shown in the above photo.
To find who enabled schedule privileges for you, look under what I can schedule for.
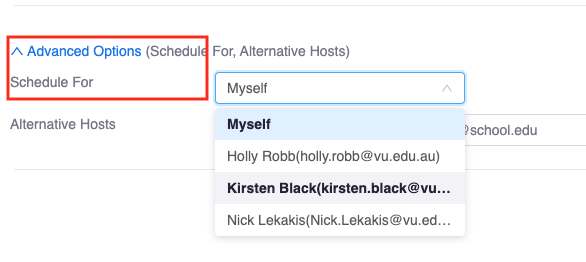
5. After you have been added to schedule a meeting on behalf of somebody else, the option will show up under the heading Advanced Options, as shown in the picture below.
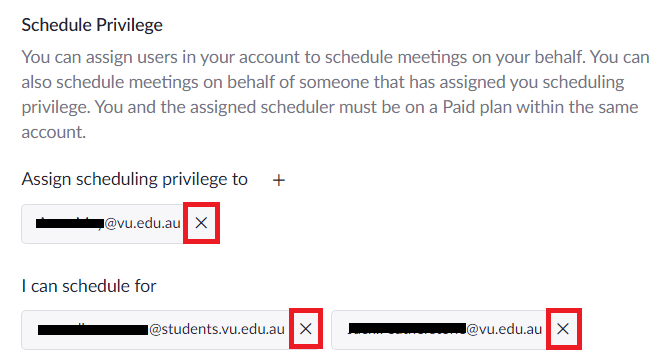
Removing Schedule Privileges
To remove schedule privileges that you assign to other users or those you have been assigned to, click on x. This will automatically remove the users you no longer want privileges assigned to or remove yourself from others' profiles.
Further Support
Contact us This email address is being protected from spambots. You need JavaScript enabled to view it., for information and resources on technology-enhanced learning, or visit VUCollaborateHelp.vu.edu.au.
Contact ITS Service Desk on (03) 9919 2777 or via self-service servicedesk.vu.edu.au for technical support.