
Manage Participants in Zoom
As the meeting host, you can manage the administrative side of the meeting and the participants. For example, participants in the meeting cannot share their screens by default, yet the host can change that.
Below are the different aspects of managing participants in Zoom.
- Host vs Co-Host
- Make Someone a Host and Reclaim Host Status
- Make Co-Host
- Rename Participant
- Put a Participant in Waiting Room
- Remove Participant
- Accessing the Zoom Chat in a Meeting
- While Screen Sharing
- Accessing a Zoom Chat with a Mobile Device
- Changing In-Meeting Chat Settings
- Ensuring Privacy and Security in Zoom
- Attendance in Zoom
Host vs Co-Host
In Zoom the two highest roles include Host and Co-Host.
The host role allows the host to control all aspects of a Zoom session, such as managing the participants and accepting and removing participants.
The co-host role allows the host to share hosting privileges with another user, allowing the co-host to manage the administrative side of the meeting, such as managing participants or screen sharing.
Use the following Zoom Help Guide - Roles in a meeting to learn about what a Host, Co-Host and Participant can do in a Zoom session and when you should make someone a Co-Host.
Make Someone a Host and Reclaim Host Status
This option takes place during a live Zoom Session.
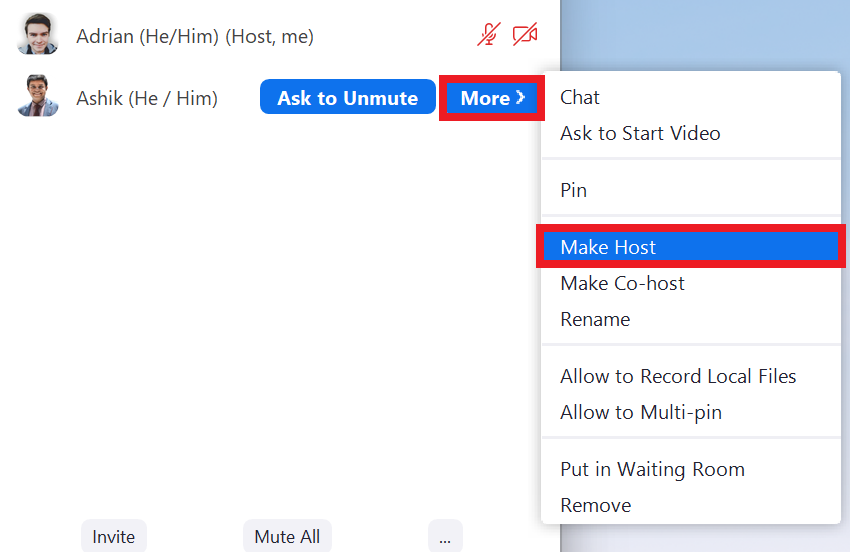
1. Select Participants on the Zoom Toolbar to display the participant's list.

2. Hover over a participant's name and select the option More to activate a dropdown menu. Then select Make Host.
This feature is only available for hosts.
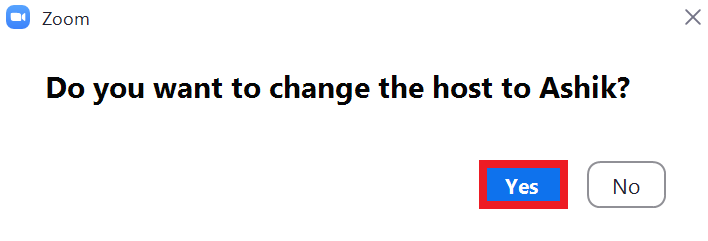
3. An alert will pop up on your screen. Select Yes if you wish to make the participant the host of the session.
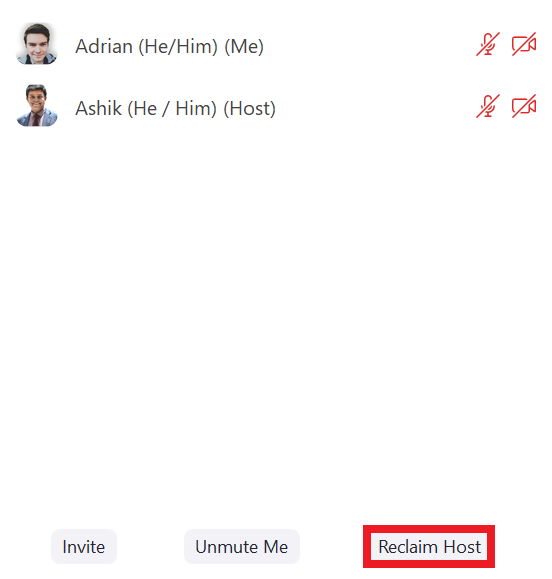
4. Select Reclaim Host, located in the footer of the participant's list, to get your host role back instantly.
Make Co-Host
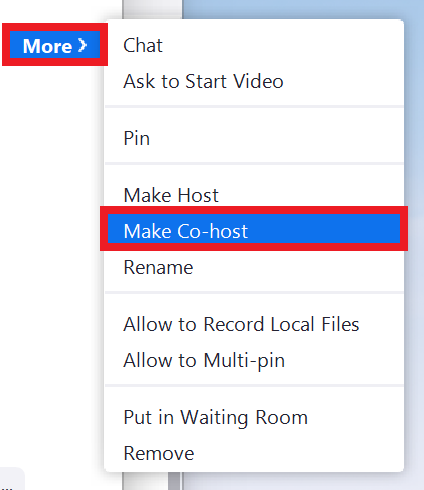
1. Select Participants on the Zoom Toolbar to display the participants' list.
2. Hover over a participant's name and select More and then select Make Co-Host.
This feature is only available to the host. However, you can assign an unlimited number of co-hosts.
Rename a Participant
1. Select Participants on the Zoom Toolbar to display the participants' list.
2. Hover over a participant's name and select More and then select Rename to change an attendee's name that is displayed to other participants. This change applies only to the current meeting.
Students must use their real name or the name used for VU enrolment when entering a class.

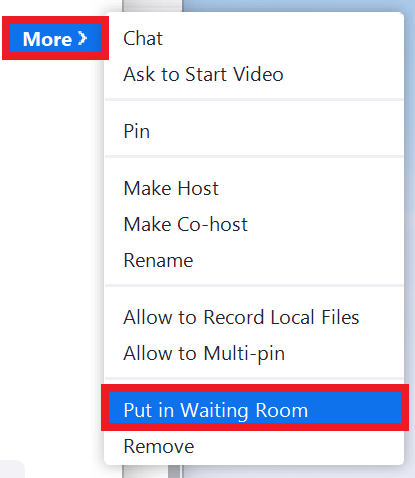
Put a Participant in a Waiting Room
1. Select Participants on the Zoom Toolbar to display the participants' list.
2. Hover over a participant's name and select More and then select Put in Waiting Room to place the attendee in a virtual waiting room.
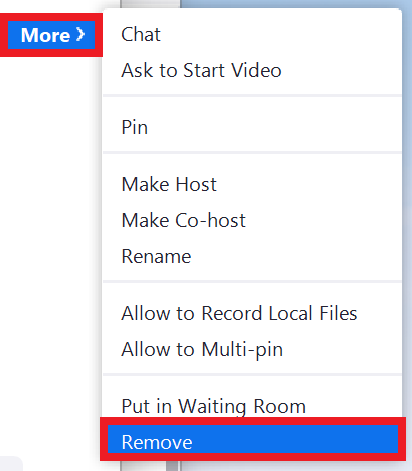
Remove a Participant
1. Select Participants on the Zoom Toolbar to display the participants' list.
2. To dismiss a participant from the meeting, Hover over a participant's name and select More and then select Remove at the bottom of the list to remove the selected participant from the Zoom session.
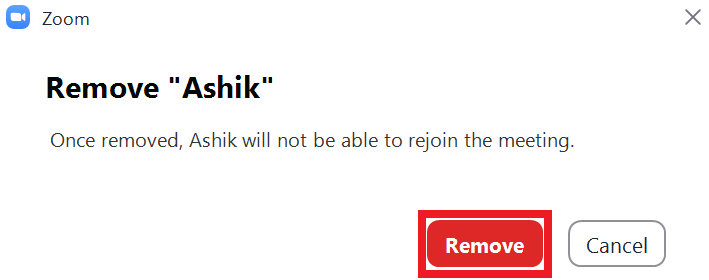
3. A pop up will appear. Select the Remove button to finalise the removal of the selected student from the Zoom session.
Once a participant is removed from the meeting, they won't be able to re-join without your permission.
Accessing the Zoom Chat in a Meeting
The Zoom chat feature allows attendees, the host, co-hosts, and participants to communicate for the session duration. Participants can send a private message to the host only or send a message to the entire group. Private messages between the participants and the host/teacher are not viewable by the rest of the group. In addition, the host can send messages to everyone in the session or one participant at a time.
Due to security, privacy, and copyright concerns, VU will not record any Zoom classroom sessions and chat conversations moving forward. Changes to the Chat permissions preventing private Chats between students during a class as also been introduced for similar reasons.
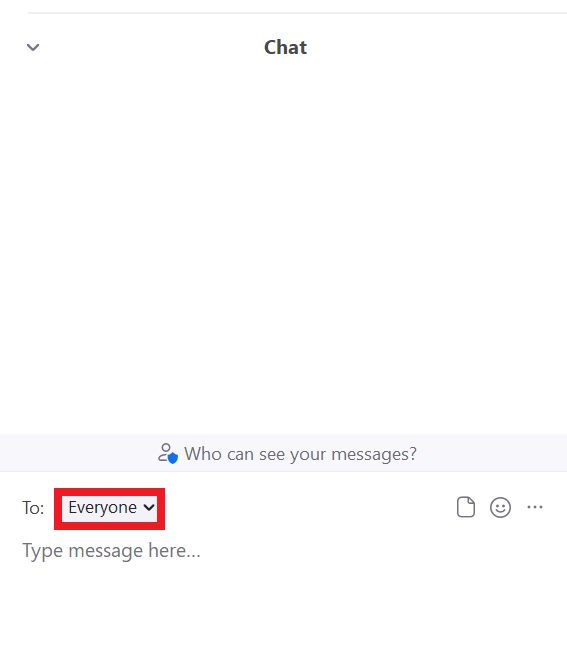
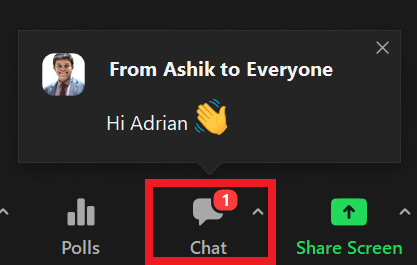
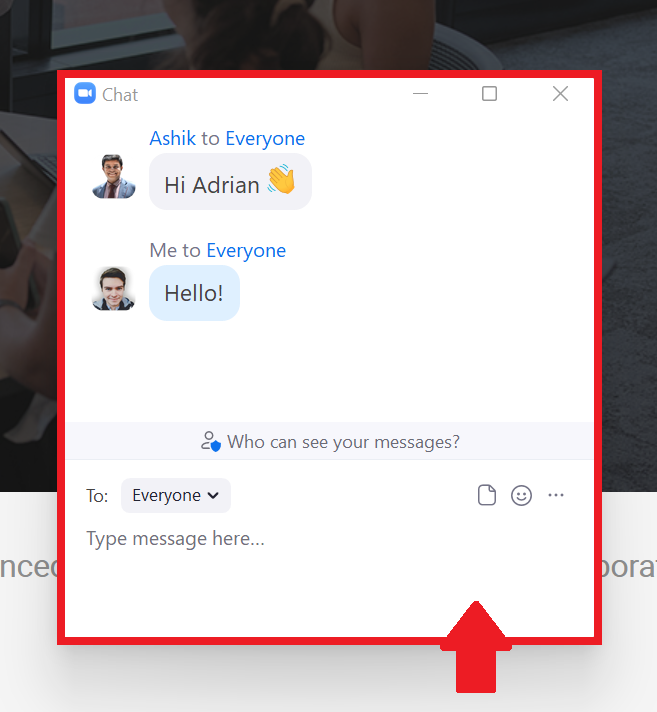
1. While in a Zoom meeting, select Chat in the Zoom Toolbar to access the chatbox.

2. This will open the chatbox on the right-hand side. You can type a message that states 'Type a message here...' into the chatbox and send it to everyone in the group.
You can change the Everyone chat selection to a specific individual to send private messages above the chatbox as a host or co-host.
3. When new chat messages are sent to you or everyone, a preview of the message will appear briefly, while a red circle and a number indicating how many messages currently exist within the chat are located on the Chat Symbol on the Zoom Toolbar.
While Screen Sharing
The chat feature is located on a different Zoom Toolbar when sharing a screen in Zoom.
1. While screen sharing, select Chat to open the chatbox.

2. A floating chat window will appear for use. You can move the floating window around your screen for better use by holding left-click with your mouse on the window and dragging it around your screen.
3. When new chat messages are sent to you or everyone, a preview of the message will appear briefly, while a red circle and a number indicating how many messages currently exist within the chat are located on the Chat Symbol on the Zoom Toolbar.
Accessing a Zoom Chat with a Mobile Device
If you are using an Android or iOS mobile device you can check this step by following these Help Guides:
Please refer to the Using Zoom App for Android Help Guide, Meet and Chat on Zoom App step 3.3, to learn how to use the chat feature correctly.
Please refer to the Using Zoom App for iOS Help Guide, Meet and Chat on Zoom App step 3.3, to learn how to use the chat feature correctly.
Changing In-Meeting Chat Settings
If you are the host, you can change the in-meeting chat settings.
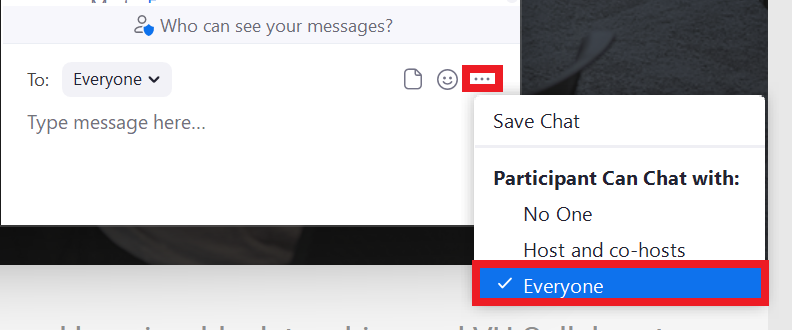
1. While in a meeting, select Chat in the Zoom Toolbar.
2. Select More, the three dots, to display the in-meeting chat settings.
VU will not be recording any Zoom classroom chat conversations moving forward due to security, privacy, and copyright concerns.
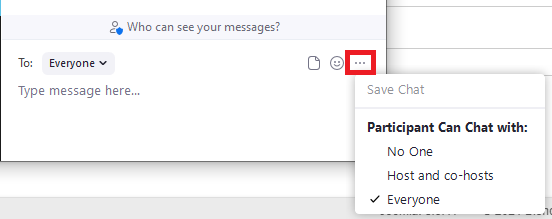
3. Enable participants to send only public messages by selecting Everyone.
Public messages are visible to all participants. In addition, participants can send private messages to the host but not to other participants.
Ensuring Privacy & Security in Zoom
For added security features, please look at the Ensuring Privacy & Security in Zoom Help Guide.
Attendance in Zoom
If you need to record attendance when holding a Zoom classroom, there are two options available. Zoom has a report feature that may assist with checking attendance and other things that happen within the virtual classroom.
Students must know that they need to use their real names for attendance and security reasons.
Whichever option you choose for checking attendance, there are a few steps. Just as you cannot mark attendance in one fast step within a class on campus, it takes a few steps to check the attendance in Zoom. You can use Zoom reports or mark attendance as students enter the Zoom session.
Option 1: The Report for Attendance in Zoom Settings
Please refer to the Zoom Essentials Help Guide, Accessing Zoom step 2.1, to learn how to log into your VU Zoom Staff Account correctly.
1. Log in to the Zoom Web Portal following step 2.1 in the Zoom Essentials Help Guide.
You can access the Zoom reports for classes and meetings, as well as the settings for Zoom on the Zoom Web Portal Website.
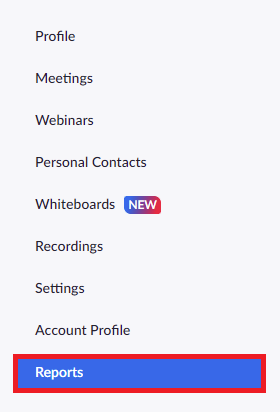
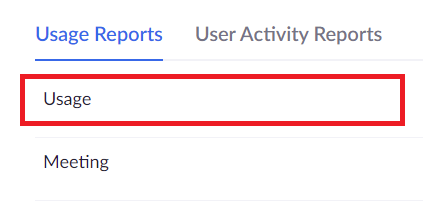
2. On the left side toolbar, choose Reports then Usage.
3. When you open up the Usage report, you have the option to set dates for viewing the information of meetings that have been held.
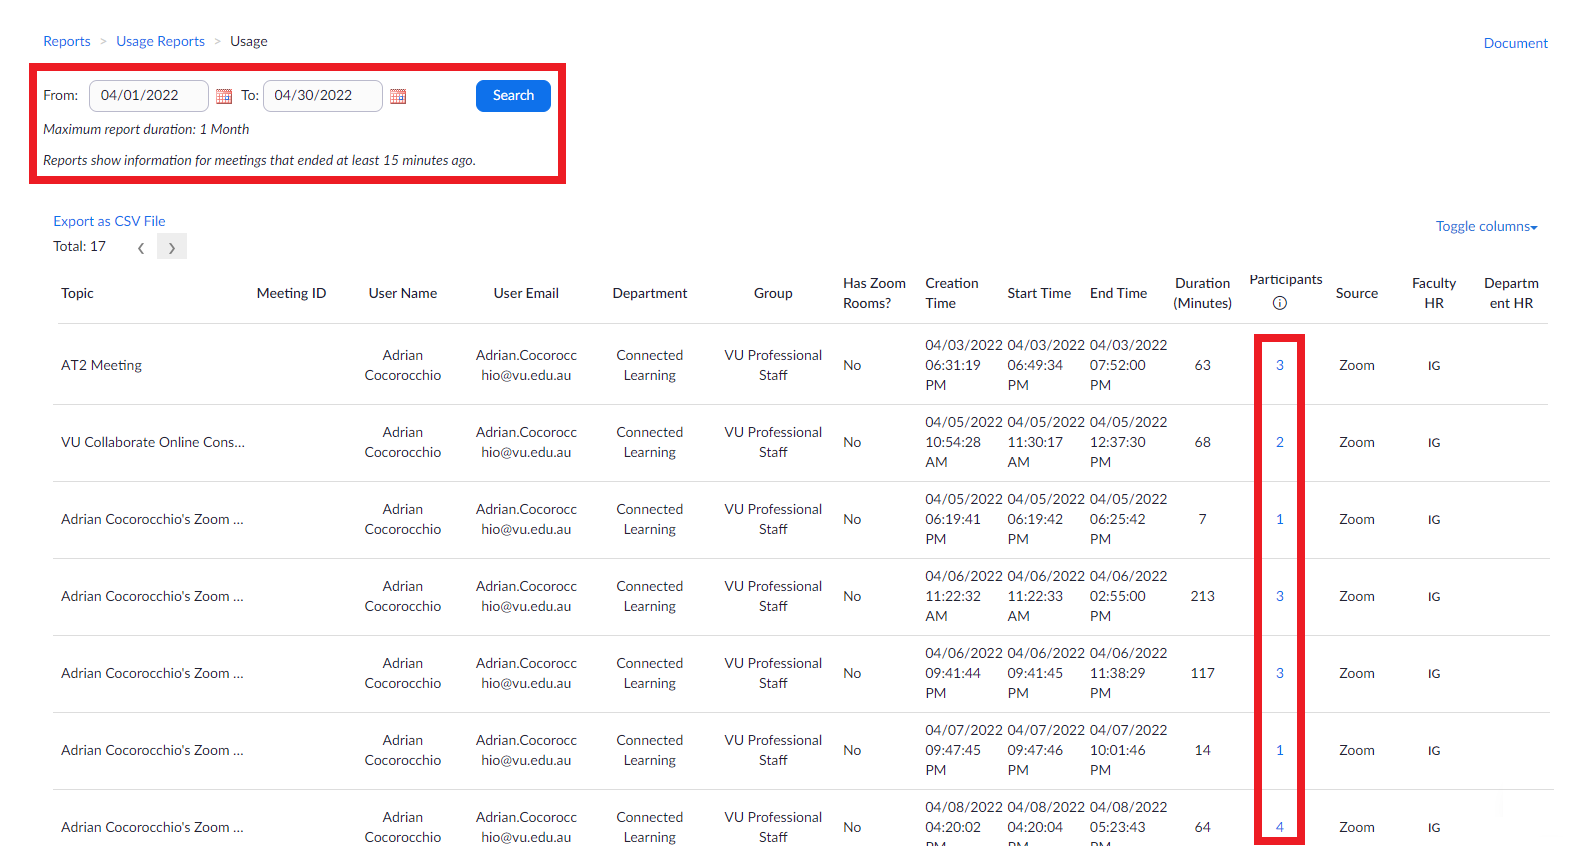
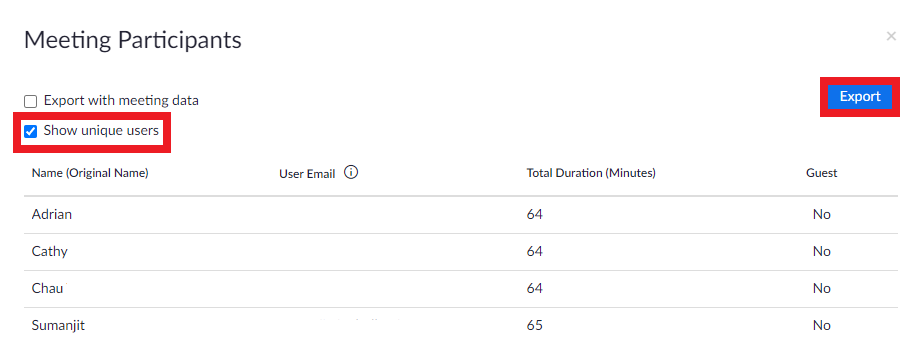
The list of participants shows how many logins there were for that meeting, not how many individuals attended that meeting.
4. Select the number in the Participants column ( in the image above ) to view the people in the session.
5. The picture below shows how many logins occurred and for which participants. You can see that some are listed more than once with the amount of time they were logged in each time logged in.
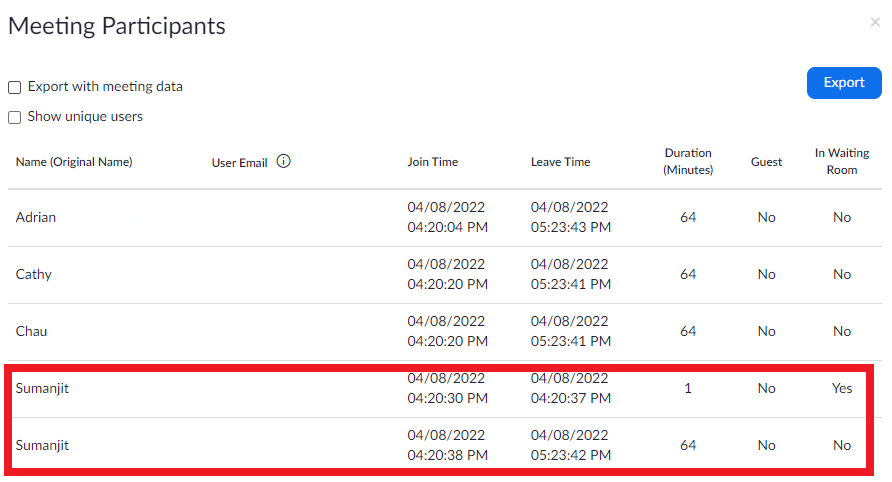
6. Select the tick box, Show unique users. This will allow you to see each participant listed only once with the total amount of time that they were logged in to the session. You are also able to Export this data into a .csv spreadsheet.
Once you have the Zoom report, you can manually copy this information into the VU Collaborate attendance register when required.
Option 2: Marking Attendance in Person
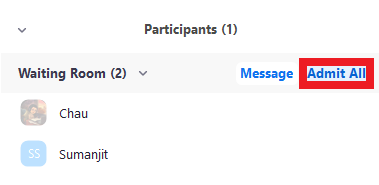
1. If you have the Zoom meeting/session settings activated for participants to be in a waiting room before they enter a session ( Check the help guide Configuring Personal Settings in Zoom Step 3.3 for further reading ), you are able to see the name of each participant as they enter the room.
2. As they enter the room, you can choose to Admit one participant at a time or Admit All at once. You can also select Remove if the person is not in the classlist for your unit.
This allows you to tick off their names on a hard copy of the attendance roster.

3. To mark attendance straight into VU Collaborate attendance registers, you can have the VU Collaborate attendance register open as you go through this process so you can mark people as present as they enter the session.
This is another excellent reason for students to use their real names.
Further Support
Contact us This email address is being protected from spambots. You need JavaScript enabled to view it., for information and resources on technology-enhanced learning, or visit VUCollaborateHelp.vu.edu.au.
Contact ITS Service Desk on (03) 9919 2777 or via self-service servicedesk.vu.edu.au for technical support.