

Creating a Checklist
A checklist is a way to highlight important tasks to make it easier for students to understand what is required of them to complete the unit. It may list all of the items students need to address before class, in class and after class including assessment information and videos to watch, or the items may appear as they complete other items.
To create a checklist, complete the following steps:
- Access the Checklist Tool
- Create a New Checklist
- Add a Category
- Add Items to a Checklist
- Manage and Preview Checklist
This guide will cover each of the steps involved in Checklist creation. Once a checklist has been created you will need to create categories where you can add particular items. For example, Before Class, After Class etc. Once the categories are created, the checklist will need items (such as complete readings, watch the video on articulation, etc.). Plan ahead to have all this ready when you begin creating a checklist.
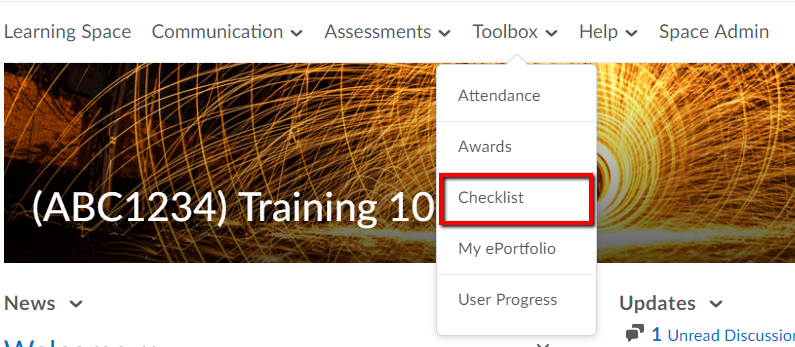
Step One: Access the Checklist Tool
1. Log into the space you wish to create a checklist.
2. Click Tools (or Toolbox) in the navigation bar at the top of the space.
3. From the dropdown menu, select Checklist.
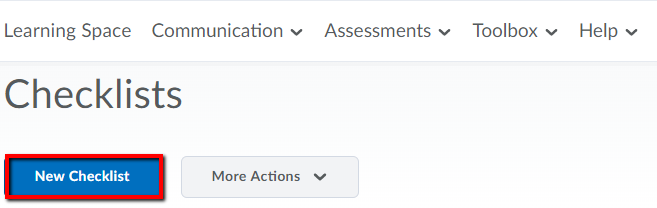
Step Two: Create a New Checklist
You will be able to see the Checklists page - here you can add, reorder, delete and edit the checklists in this space.
1. Click New Checklist to create a checklist.
2. Use the Name field to enter the name of the new checklist.
3. (Optional) Enter a Description to identify what the checklist contains.
4. (Optional) Select the New Window option to ensure the Checklist opens up in a new window.
By default, checklists will open in the current window.

5. Click Save to move on to the Edit Checklist screen.
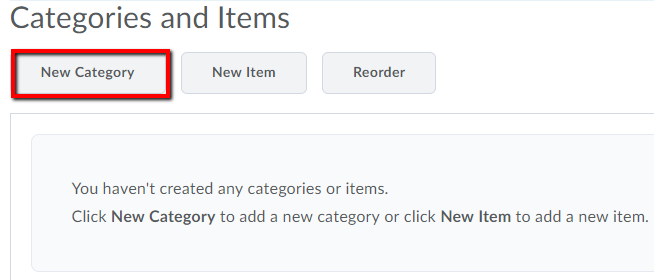
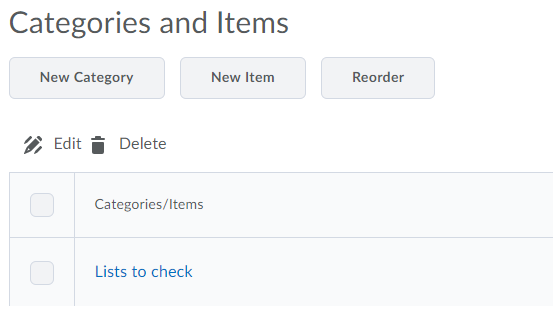
Step Three: Add a Category
Categories help to organise items if there is a lot of them; they appear to students within the checklist as a collapsible header. Checklists need to contain at least one category. On the Checklists page, click on the checklist you want to add a category to. If you have just created a new checklist, this will appear below the existing description.
1. Click New Category in the checklist edit screen.
2. Enter a Name for the new category.
3. (Optional) Enter a Description for the new category.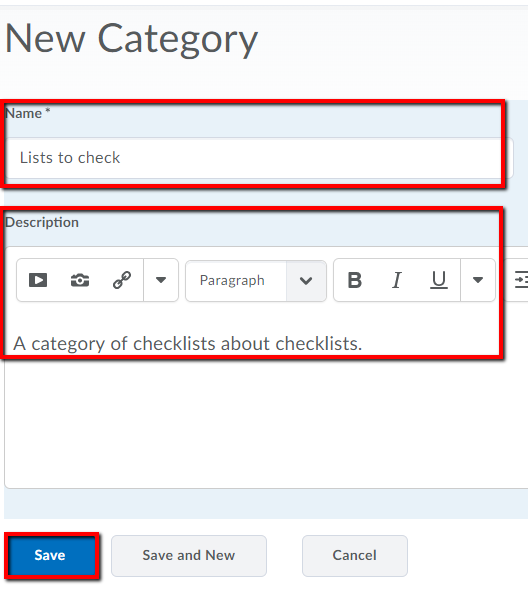
For example this could be broken down into Before, During and After Class. 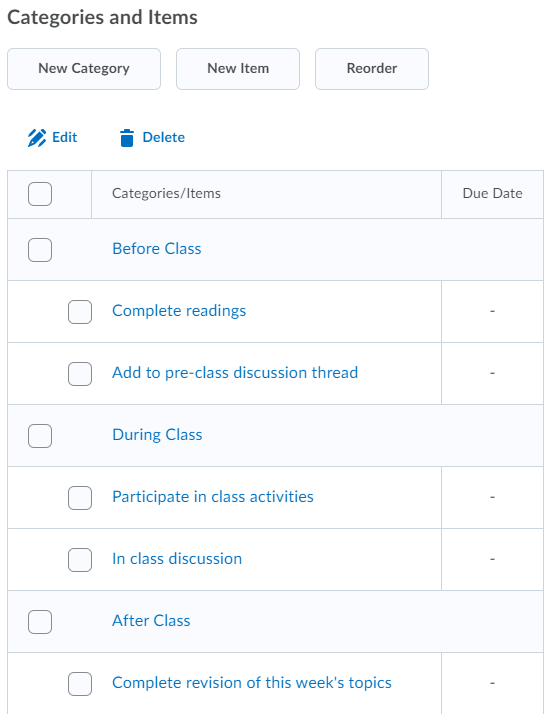
To input a link or new content to any of the Items listed in the category follow the steps laid out in the help guide 'Adding Content to a Module'.
4. Click Save to assign the category to your new checklist.
Clicking the Save and New button will save the category and immediately create another category that will also be assigned to this checklist.
5. The new category will appear in the checklist edit screen under Categories and Items, where you can edit or delete it later.
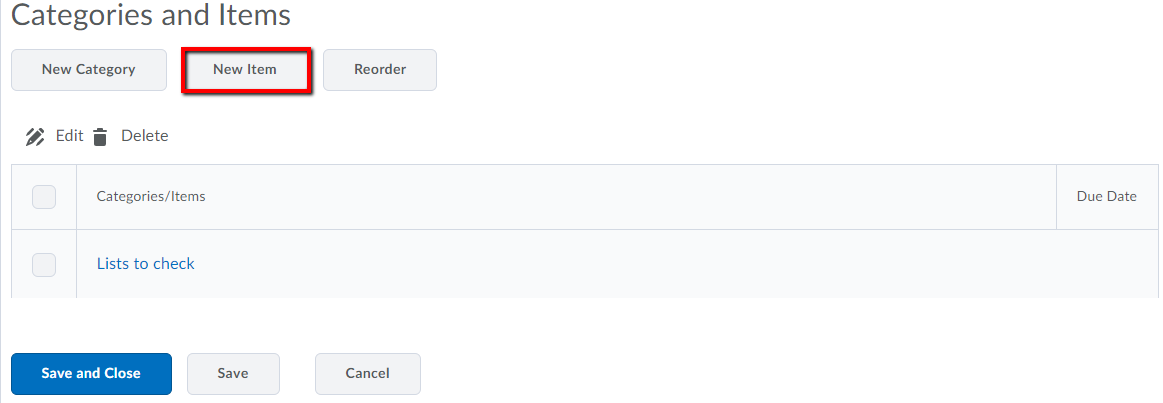
Step Four: Add Items to a Checklist
Items appear to students as tickboxes they can check off as they work their way through course material and objectives. They are usually linked to a particular task or set objective.
1. In the checklist edit screen click New Item.
2. On the New Item page, use the dropdown Category menu to select the appropriate category for this item.
You can also click the New Category link to add a new category. In the New Category pop-up, enter a Name and optional Description for the new category (as before) and click Save.
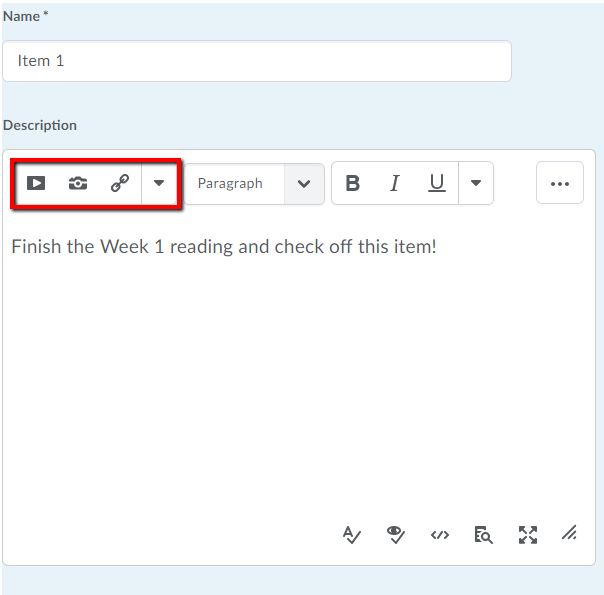
3. Enter a Name for the new item.
4. Enter a Description for the new item that explains to students what to do.
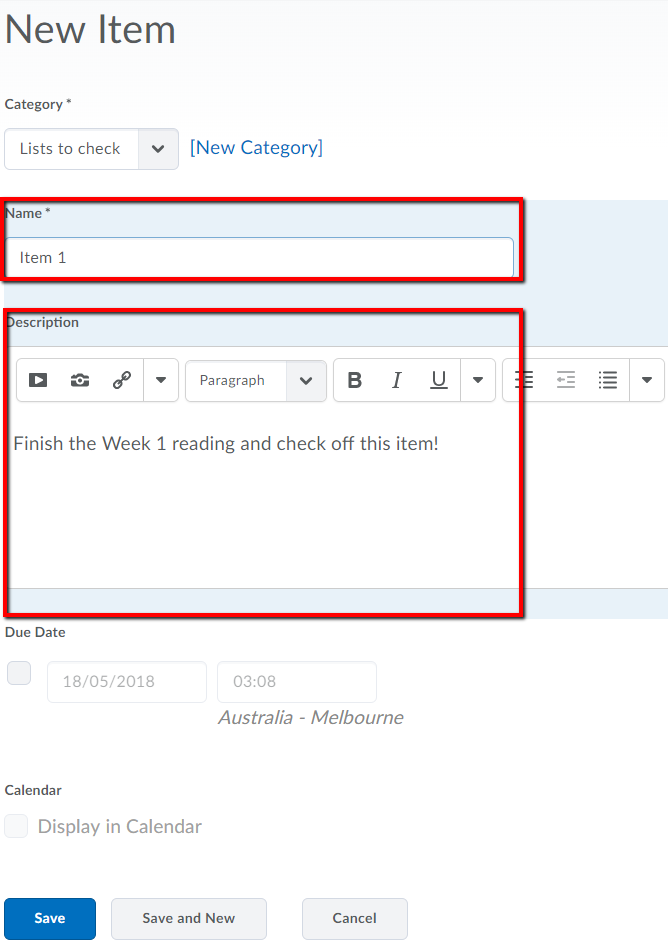
5. You can add media such as images, links or videos into the item description by clicking one of the insert media buttons at the top of the rich text field.
4.1 Setting a Due Date and Adding an Item to the Calendar
1. You can set a Due Date for any item and add it to your Space calendar. Check the tickbox under the Description field and enter in a time and date. Select the checkbox for Display in Calendar to have this add to a students academic calendar. Once this has been input click Save.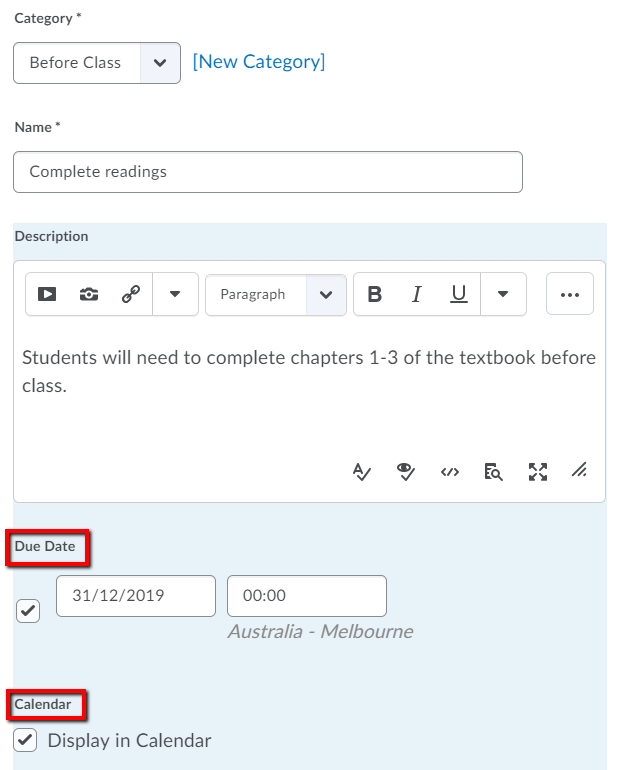
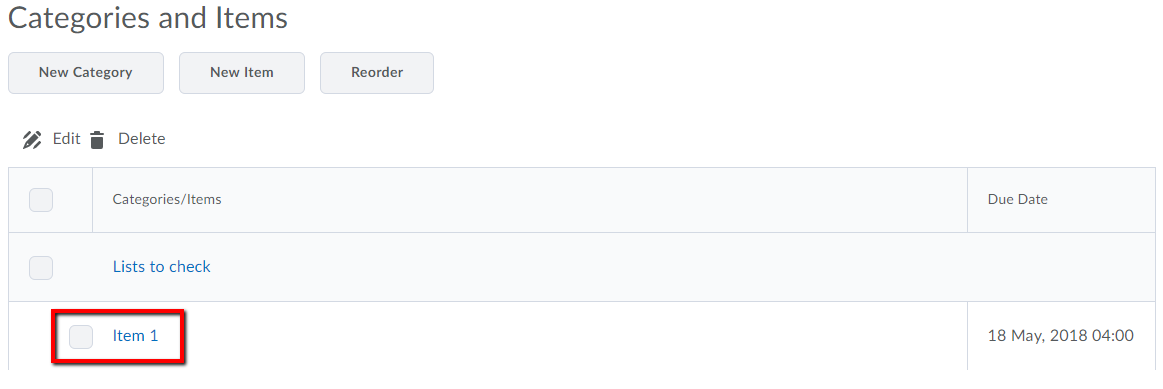
2. The new item will appear in the Categories and Items section under the specified category.
3. Keep adding items and categories until your checklist is populated with a series of tasks for students to check off as they go.
Step Five: Manage and Preview Checklist
You can copy, edit, reorder and delete items or categories after you create them. Checklists can also have release conditions and restrictions attached to determine when they appear to students in your space.
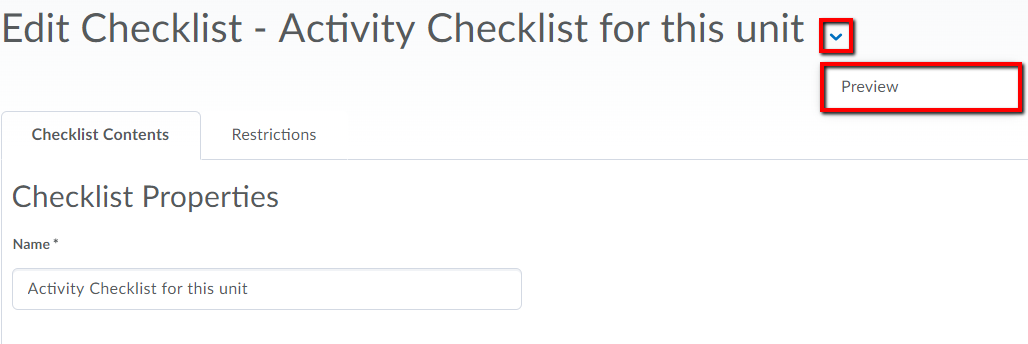
1. Next to the title of the checklist, click the small arrow to open a dropdown menu.
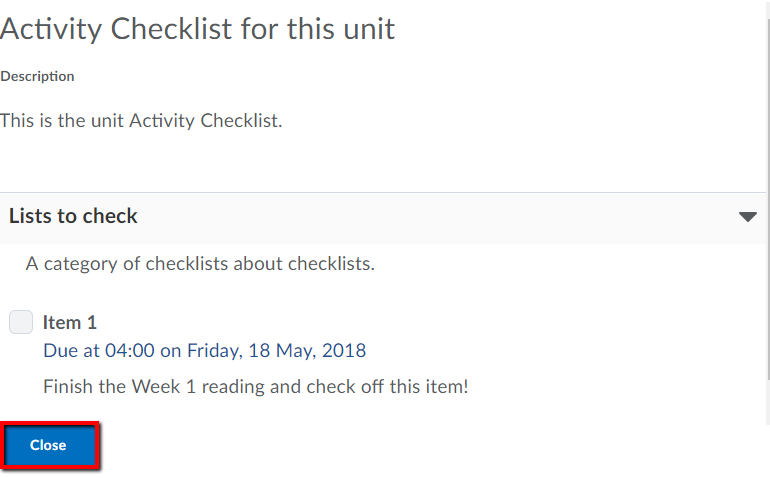
2. Click Preview to view the checklist as it will appear to students.
3. This will let you see all of the items and categories you have created. When you're finished with your preview, click Close to return to the checklist edit screen.
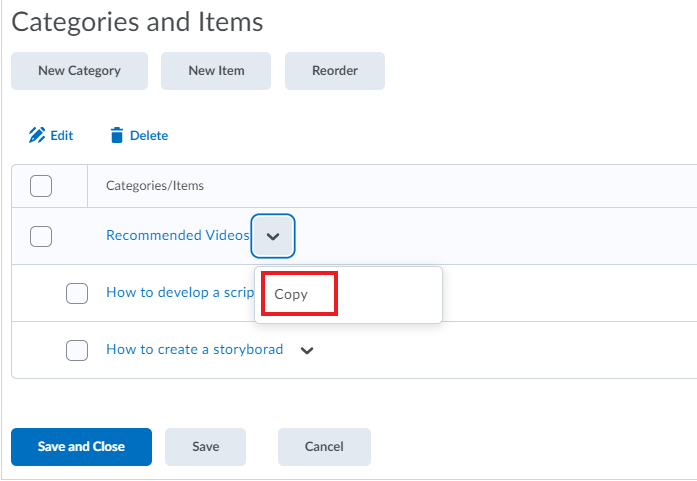
4. If you would like to copy a checklist click the dropdown menu and select Copy.

The copied checklist will appear as 'Copy of (Checklist name)'. Clicking on the title of the checklist will take you to the editing options where you can change the title.
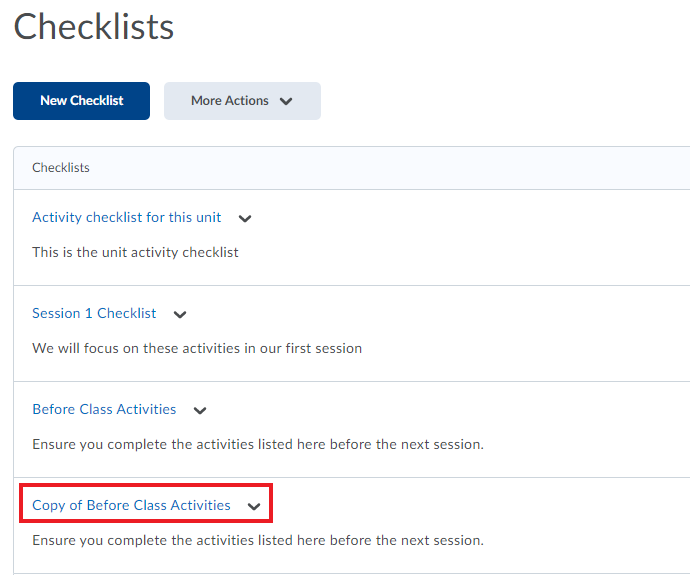
In the editing options you can also copy a whole checklist category or individual items of the checklist. Click on the dropdown menu and select Copy.
5.1 Reorder, Edit or Delete Items in the Checklist
If you notice items are out of place or missing something in the preview, you can make changes in the edit checklist screen under the Categories and Items section.
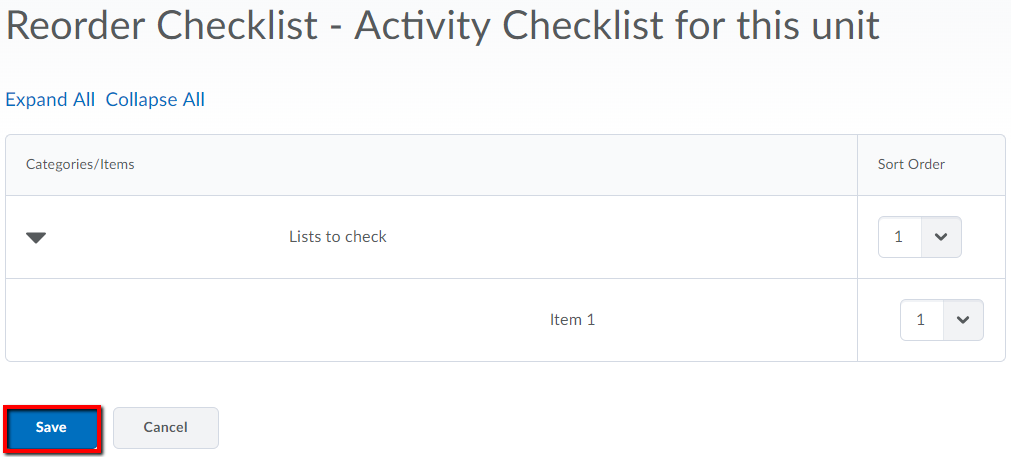
1. Click Reorder to change the order of items and categories.
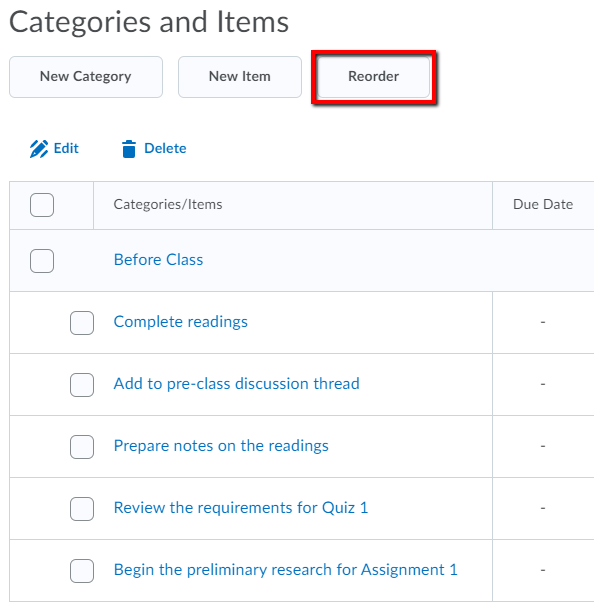
2. To the right of each category or item, a dropdown numbered list will let you change the values in the Sort Order column, lower numbers will appear first.
3. When you are confident with your changes, click Save to return to the main edit screen.
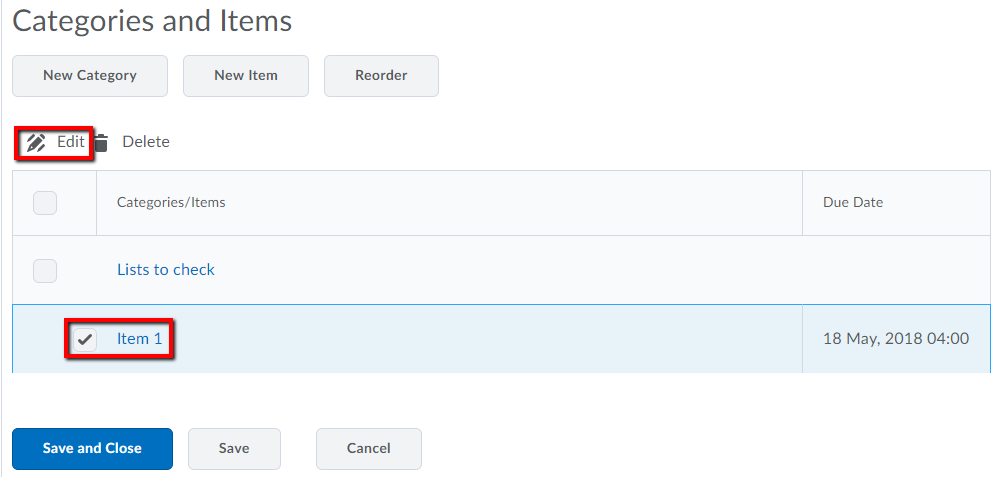
To edit an item or category, check the tickbox next to its name to select it and click Edit.
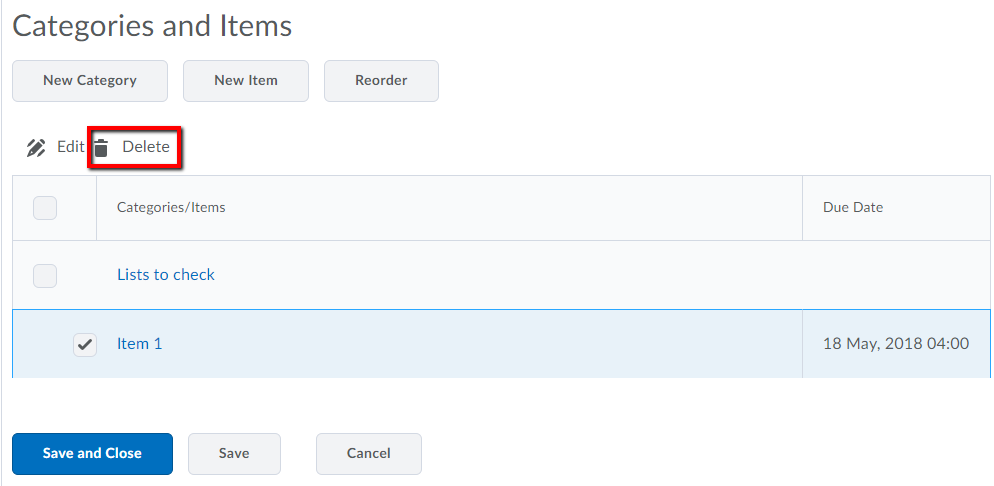
To Delete a item or category, check the tickbox next to it's name to select it and click Delete.
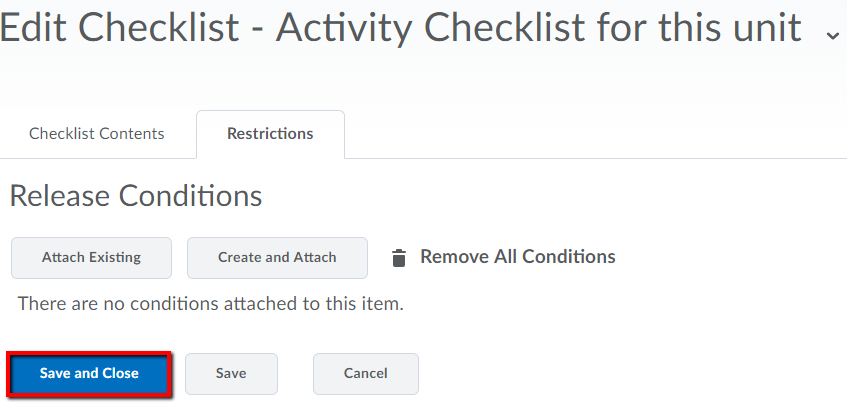
5.2 (Optional) Assign Release Conditions to the Checklist
The Restrictions tab allows you to assign and create Release Conditions. Release conditions are an activity a student must complete before they can view the checklist, like viewing particular content in a space.
1. At the top of the screen underneath the checklist title, click Restrictions. Here you will be able to Attach Existing conditions (drawn from restrictions placed on other checklists) or Create and Attach new restrictions. For more information about Release Conditions read over the Using Release Conditions guide.
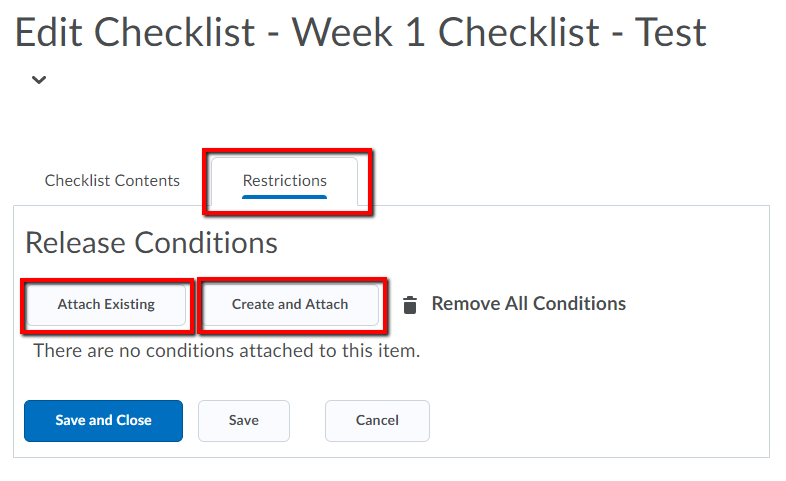
3. Click Save and Close when you are finished setting your conditions.
5.3 Publish the Checklist
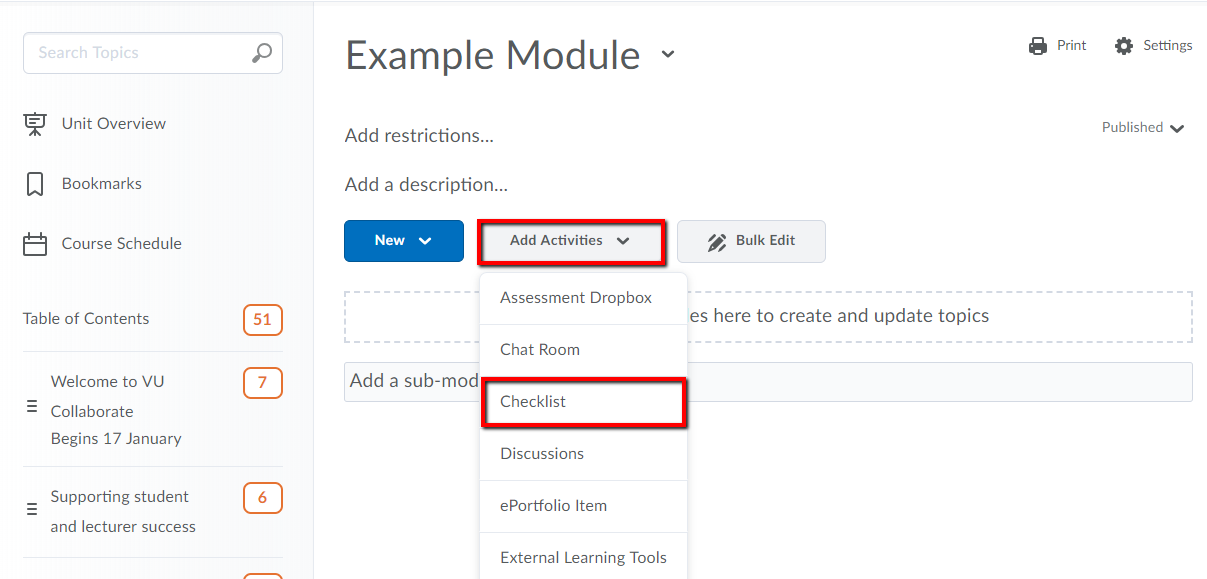
When you have completed a checklist, you can publish it to students in any module in a space.
1. Click Add Activities in a module.
2. In the dropdown menu, select Checklist.
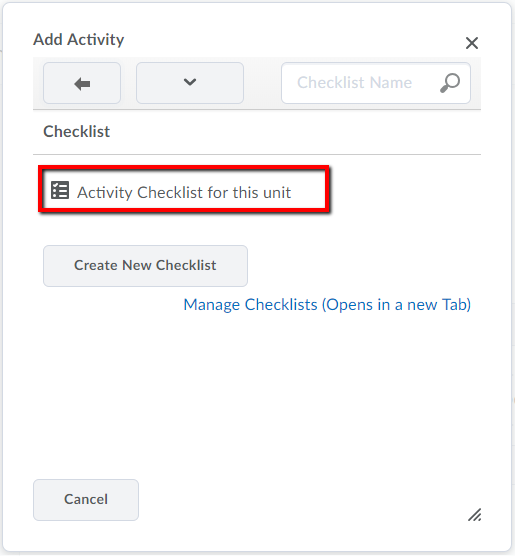
3. In the Add Activity pop-up, find your new checklist and click on it.
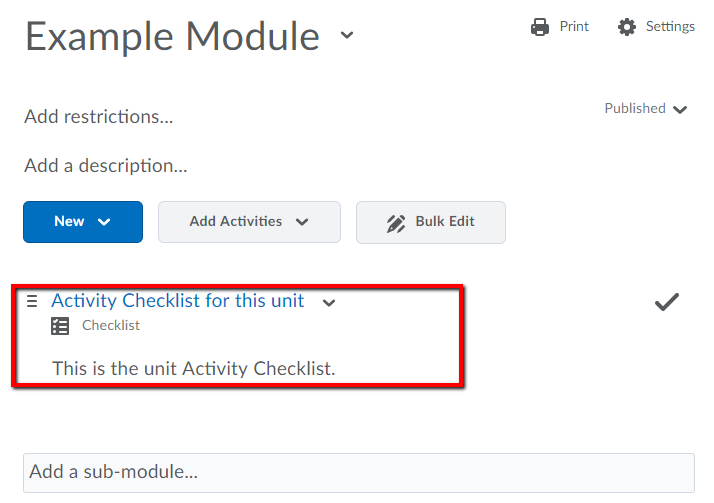
4. Your new checklist will now appear in the module.
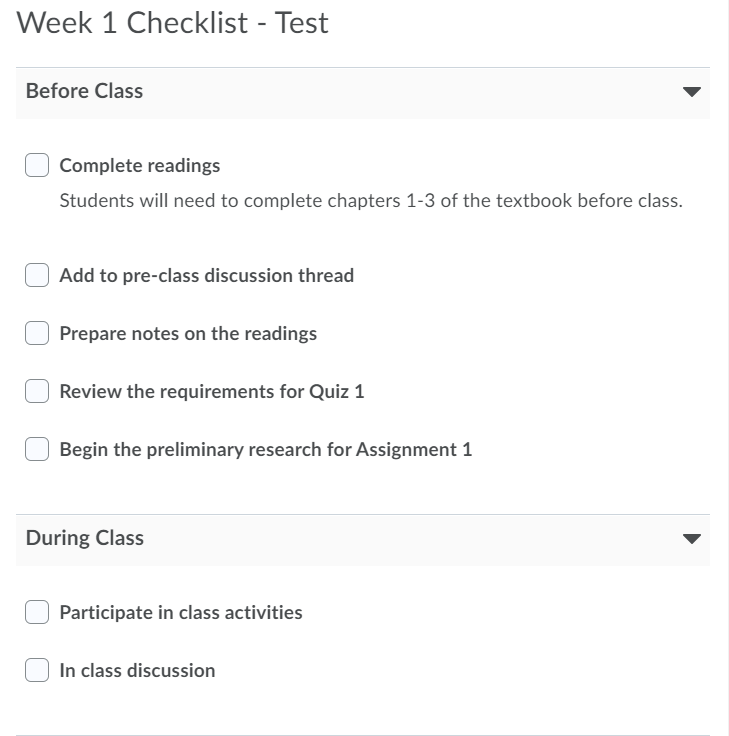
Here is what the checklist will look like for an enrolled student:
Further Support
Contact us This email address is being protected from spambots. You need JavaScript enabled to view it., for information and resources on technology-enhanced learning, or visit VUCollaborateHelp.vu.edu.au.
Contact ITS Service Desk on (03) 9919 2777 or via self-service servicedesk.vu.edu.au for technical support.