Marking with Rubrics in the Dropbox
Marking with a rubric, allows you to grade assessment tasks by selecting performance levels achieved on a pre-defined set of criteria.
On this page:
- Go to the Assessment Dropbox folder
- Go to the submission evaluation view
- Mark with the Rubric
- Provide Overall Feedback, then Save or Publish
Additional information
Step One: Go to the Assessment Dropbox folder
1. In your unit space on the navigation bar, select Assessments then Dropbox
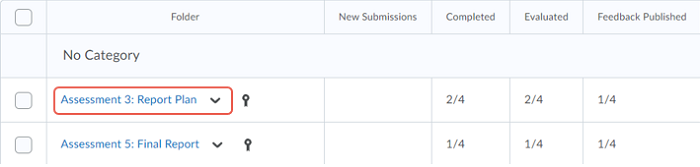
2. In the Assessment Dropbox Folder select the assessment name.
Step Two: Go to the submission evaluation view
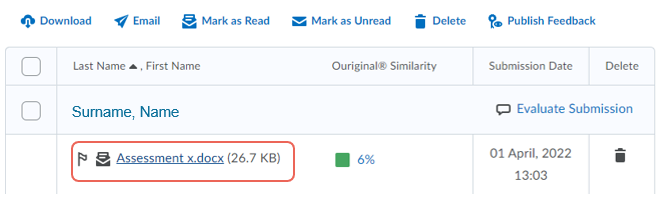
In the Assessment folder you will see a list of students and their submissions. Select the submission file name to enter the evaluation view.
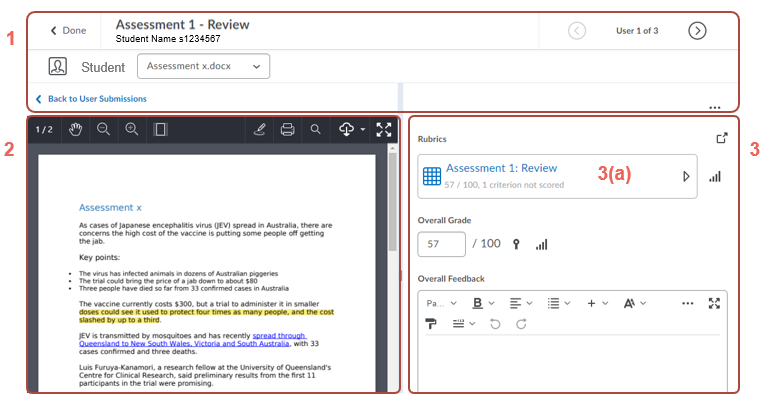
The evaluation view has three main areas (1) Navigation, (2) Document view, and (3) Evaluation panel.
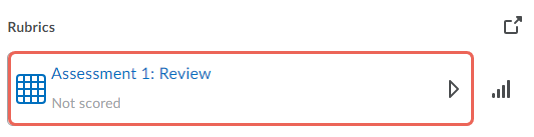
On the evaluation panel, you will find 3(a) Rubrics.
Step Three: Mark with the Rubric
There are two options to view and mark with a rubric:
- Expand view - view and mark with the rubric in-line with the assessment submission
- Pop-up window view - view and mark with the entire rubric in a new pop-out window
Option 1 - Using the Expanded View
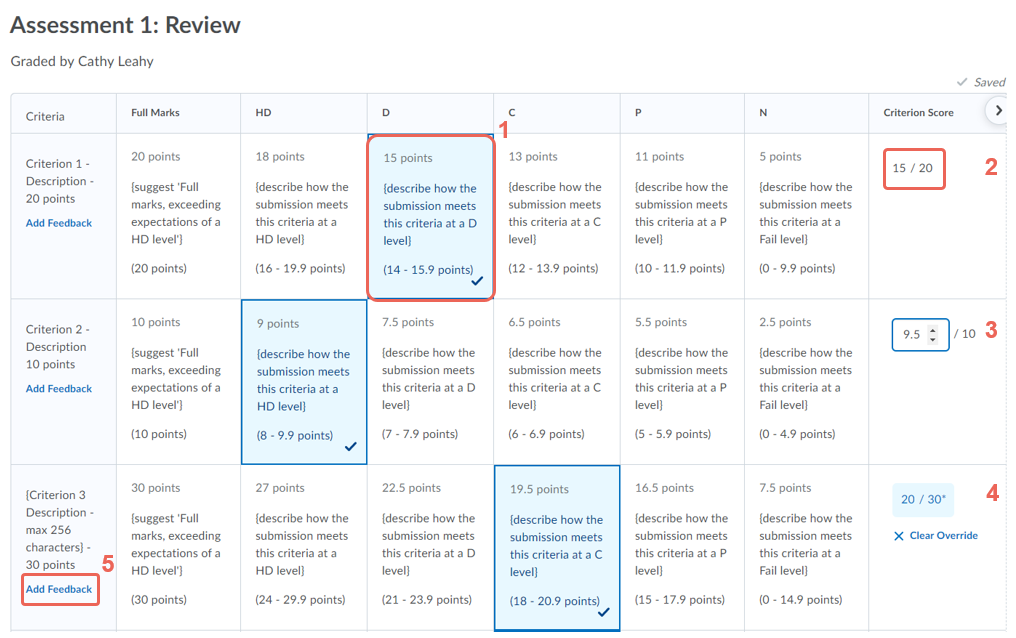
1. Click the rubric name or arrow to expand.
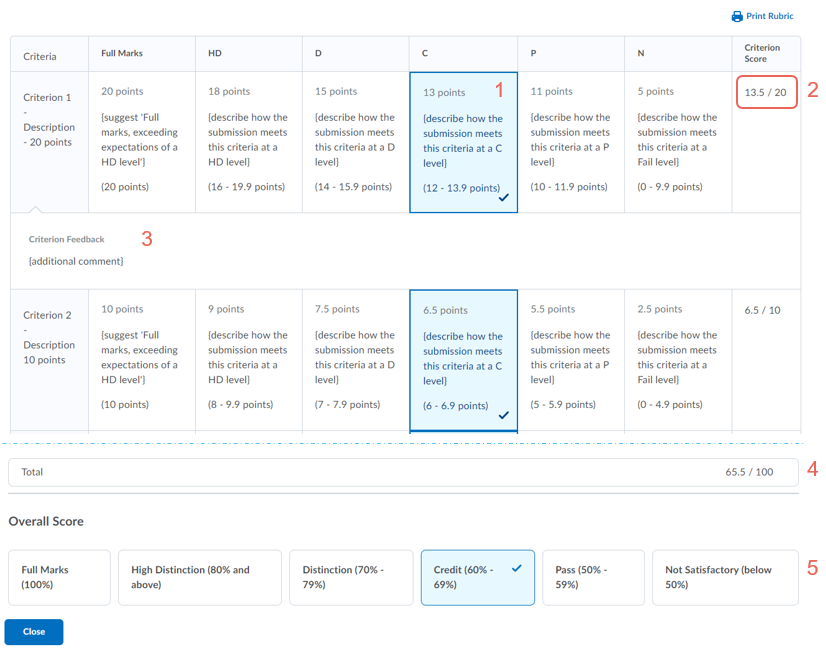
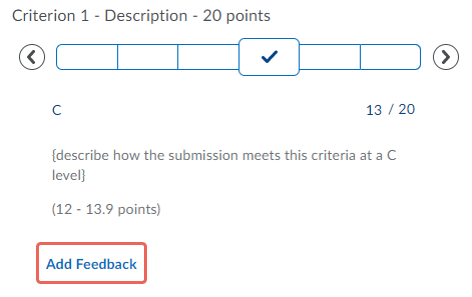
For each criterion, hover over the scale levels to read the description, then (1) select the performance level achieved.
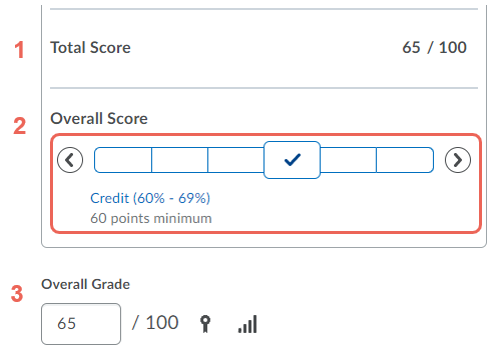
The (2) criterion score will be displayed under the scale and the (3) Total Score will be update.
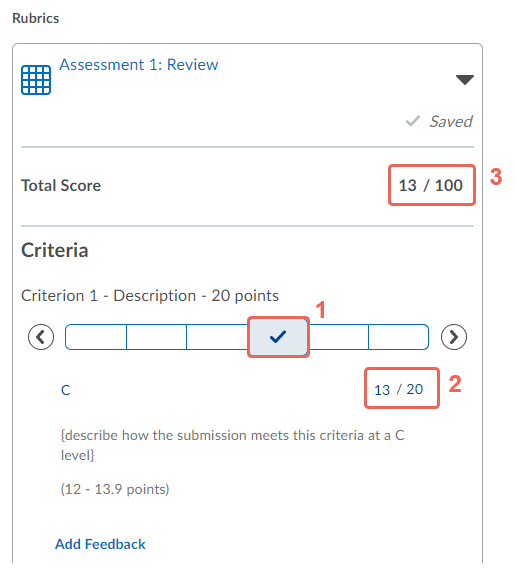
On selecting a performance level the default value will be selected, this can be manually adjusted.
In the example below, the credit range is (12-13.9 points), the default value is the mid-point (13 points), this has been adjusted up to (13.5 points).
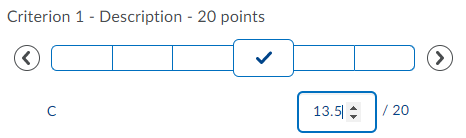
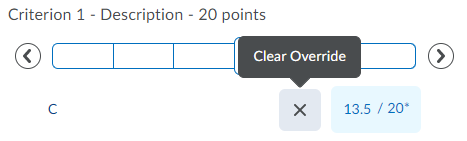
Adjusted points will be displayed with an asterisk. To return to the default value select the Clear Override.
If required, select Add Feedback, to add specific feedback for a criterion.
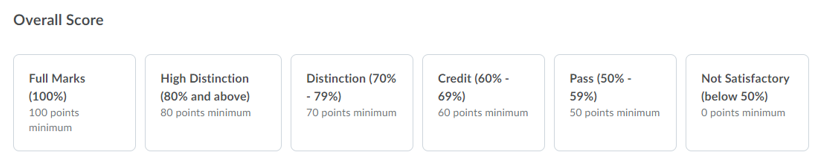
When all the criteria have been scored, the (2) Overall Score will automatically be selected.
If there is no tick in the Overall Score, go back to find the criteria has not yet been marked.
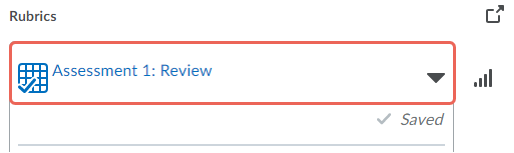
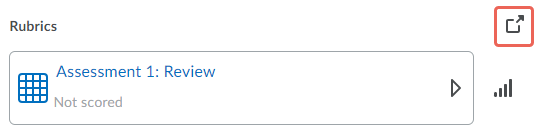
You can also check if any criteria haven't been marked by scrolling to the top of the rubric, and then clicking the rubric name or arrow to collapse the rubric.
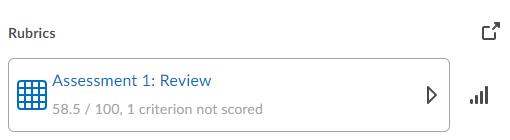
If the rubric feedback is not complete, the number of unscored criteria will appear on the tile after collapsing.
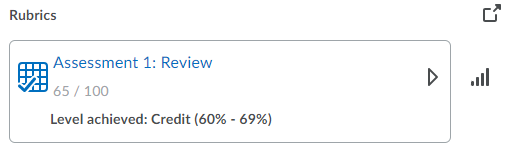
When all criteria are selected the performance level achieved will be displayed
Option 2 - Using the Pop-up Window
1. Click the new window icon, on the top right-hand side of the rubric.
2. A pop-up window of the rubric will now appear.
- Select a criterion box to choose the relevant performance level and score for each criterion.
- The default criterion score will automatically be displayed
- Select and adjust the score if required
- Adjusted scores will be displayed with an asterisk, click clear override to return to the default score
- If required, select Add Feedback, to add specific feedback for a criterion.
All scores and feedback are saved automatically as you progress through the rubric.
3. Scroll to the bottom of your window. If the overall score has not been automatically selected, go back and find any criteria that have not been marked.
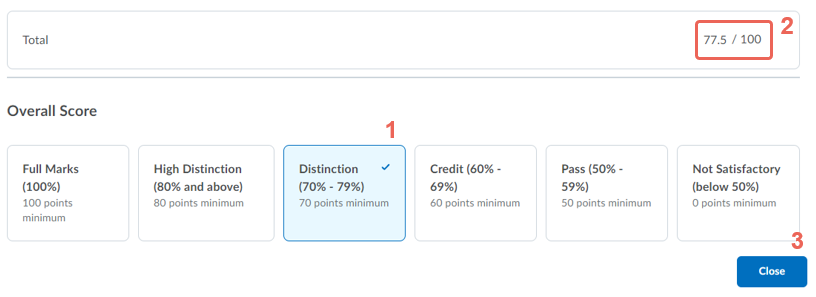
4. Review and close:
- Check that the Overall score has been selected
- Review the total score, then
- Click Close
Step Four: Provide Overall Feedback, then Save or Publish
After completing the rubric feedback, you will have an option to provide additional Overall Feedback relating to the submission with
- written feedback
- file upload, links, audio recordings and video recordings.

3. Scroll to the bottom of the page and, depending on your preference, select either Publish ( the student will see their mark ) or Save Draft ( the rubric will be saved with the allocated mark; however, the student will not be able to view their result ).

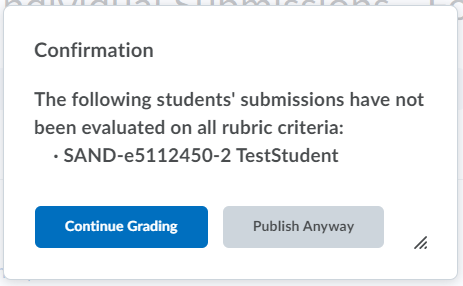
4. In an instance where a rubric is only partially evaluated, you will see a confirmation prompt when you attempt to publish or bulk publish the feedback for that assessment.
![]()
Additional Information
What do students see when they view their rubric?
The student view of the graded rubric is similar to the pop-up window view. This view includes:
- Performance level achieved
- Criterion Score (in this example the score has been adjusted from the default score of 13 to 13.5)
- Criterion Feedback if provided
- Total
- Overall Score