

Creating Automatically Allocated Groups
If group projects are a part of a unit, VU Collaborate’s Groups tool is a great resource to set up areas for students to submit group assignments and have discussion areas specifically for members of these Groups. Furthermore, where students are enrolled into groups, you can release specific content or other assessment tasks to provide an individualised online experience.
There are several ways to create groups, this guide show how to set up and automatically allocate students to groups.
To see How to Create Automatically Allocated Groups, see the video below:
Creating automatically allocated groups:
- Access Groups
- Create a Group Category
- Advanced Properties
- Additional Options &Save and Close
- Change Group Names
- Viewing Group Member Information
Step One: Access Groups
1. In your VU Collaborate space on the navigation bar, click Communication then Groups.

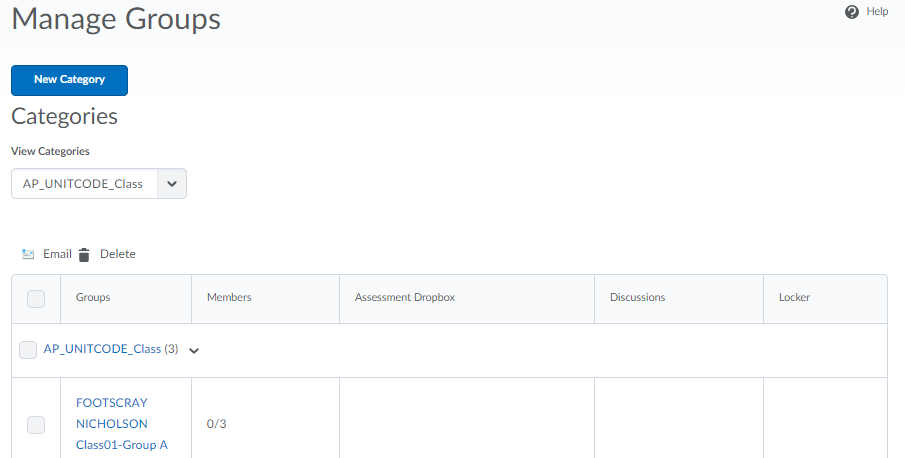
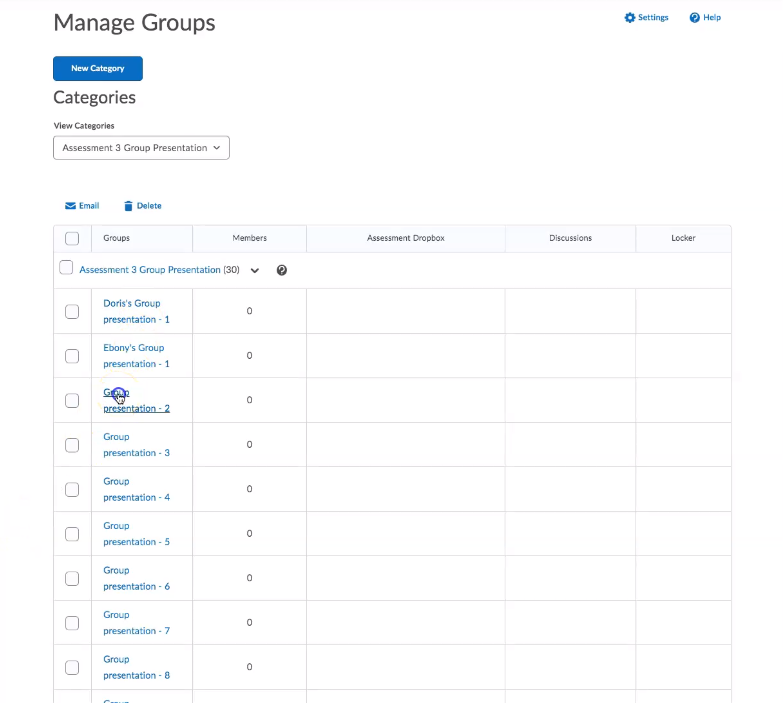
2. The Manage Group page is where all your group categories will be listed.
Allocate+ groups are the first listed groups. These groups are automatically created, and group membership is synced from Allocate+ timetable daily. You can identify these groups as they begin with AP_ (Allocate Plus), followed by the unit code and class (AP_UnitCode_Class). DO NOT modify these groups as changes can cause errors.
Step Two: Create a Group Category
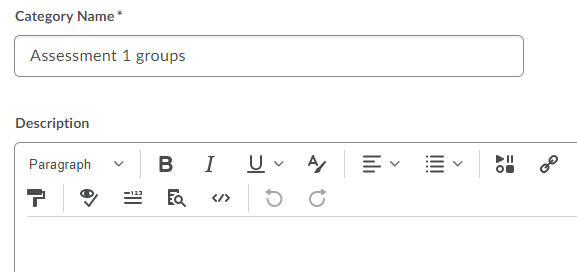
1. Select New Category under the Manage Groups heading.

2. Enter a Category Name and you may also provide a brief description of your groups.
3. From the Enrolment Type dropdown menu, select either "Groups of #" or "# of Groups".
Option 1: Use Groups of # if you would like to specify how many students are to be allocated per group. When prompted, insert the Number of Users per group.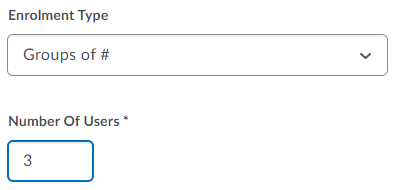
Option 2: Use # of Groups if you would like to specify how many groups you would like to create, and students will be divided accordingly. When prompted, insert the Number of Groups.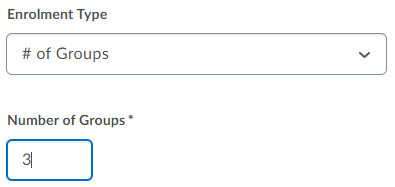
When working in the master space, please note the differences in Groups:
Groups of # = once copied into a delivery space from the master space, consider the total number of users enrolled in the unit space and create the required number of groups.
E.g., If you have created 3 groups of 10 users, however, your class only has 20 enrolled students, then only 2 groups of 10 users will be created. Group names will also be lost, in order to retain group names, you will need to select - # of Groups instead.
# of Groups = once copied into a delivery space from the master space, will retain the group name as well as the total count of groups, as they are independent to the users in a class list.
E.g., If you have created 3 groups of 10 users and have labelled each group with a specific title, then the exact settings and group names will transfer across into a delivery space, irrespective of the total number of users enrolled.
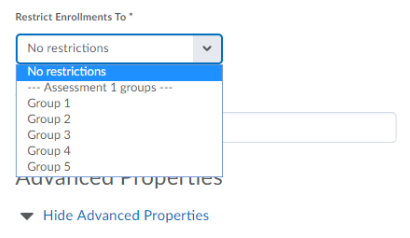
6. Below this, there is an option to Restrict Enrolments To.
This is used to create Groups within a Group. For instance, if in a tutorial you have devised a Group Exercise that does not apply to any of the other tutorials for the same Unit, you can use this to restrict your Group to only that tutorial. It can also be used to restrict to Sections. For instance, if you needed to create Group Dropboxes that only apply to Bachelor of Nursing but the unit is offered to other Courses, you can use this restriction to do so.
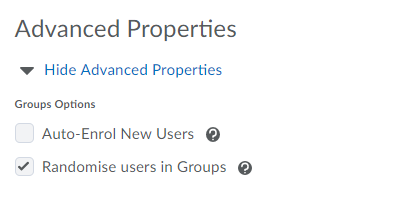
Step Three: Advanced Properties
1. If you would like new students to be auto-enrolled or students to be randomised in groups, select the appropriate tick box.
If the ‘Randomise users in Groups’ option is not selected, students will be allocated alphabetically.
Step Four: Additional Options & Save and Close
1. When creating groups you are also able to set up additional tools for groups such as a separate discussion area, locker and Assessment Dropbox. This will allow groups to collaborate further with each other and submit a group assignment if required.
If creating a discussion area or an Assessment Dropbox, once you click Save additional options will appear allowing you to create the required discussion area or Assessment Dropbox folder.

2. Once you have finalised the properties and options of the group, click Save to create them.
Although the purpose of these enrolment types is to ensure the process of creating groups is automated, you are still able to manually add and remove students from groups. To manually allocate students, view Step 7 of the Creating Manually Allocated Groups How-To guide.
Step Five: Change Group Names
Do not amend the name of a group created through Allocate+ (defined by the "AP" prefix); this will not change permanently, it will revert back overnight.
1. If you wish to re-name each individual group to something more relatable, click on the name of the group.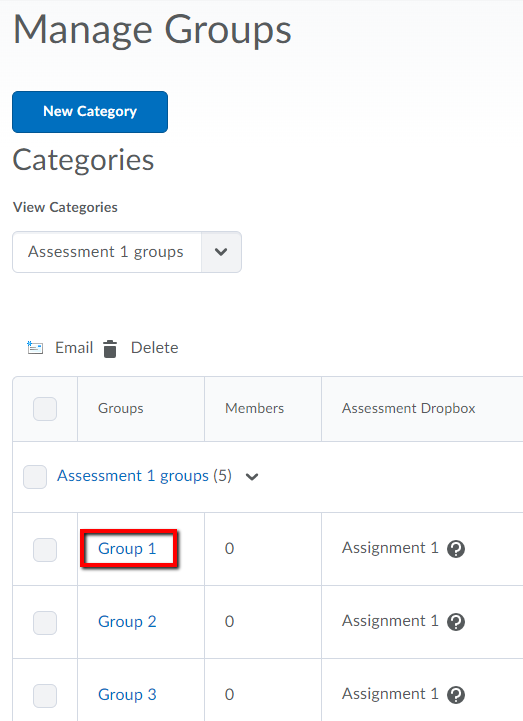
Do not amend the text in the 'Group Code' section as this will cause errors.
2. Enter the new name in the Group Name field. Click Save to return to the previous screen.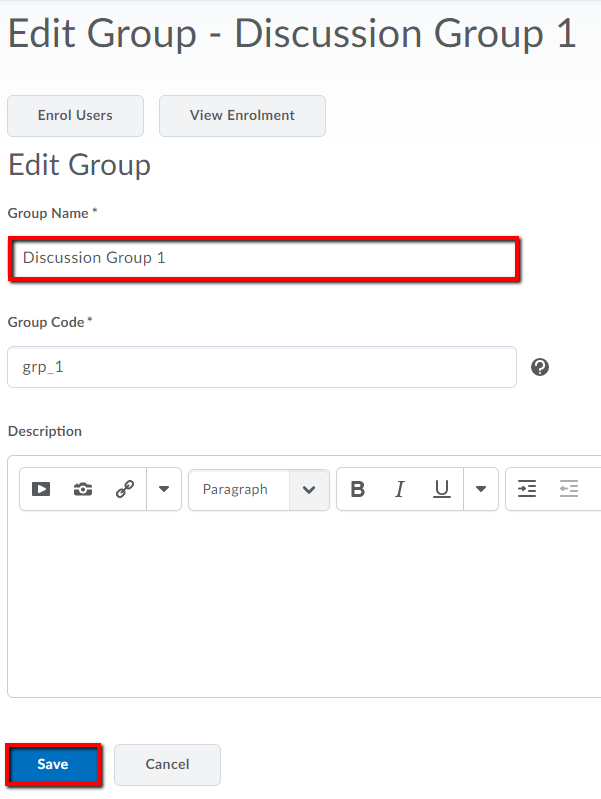
3. Click on the picture below to see a video showing how to change group names and how to enroll students.
This is not one of our lovely professionally done videos, just a quick demonstration.
Step Six: Viewing Group Member Information
1. To view which students are allocated to a specific group, click on the number in the Members column.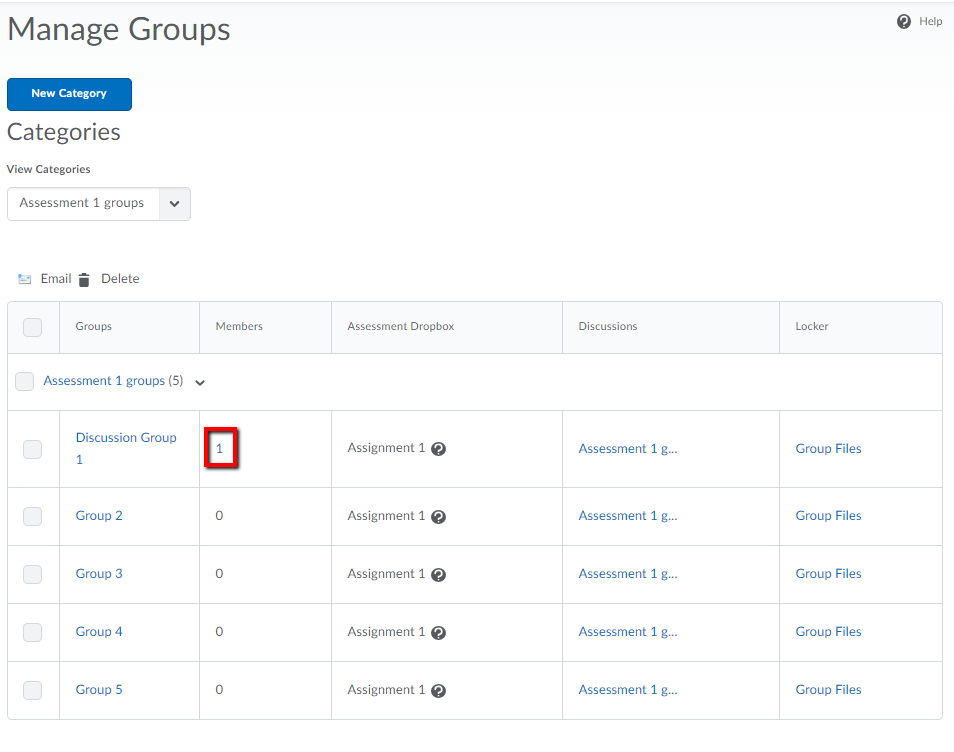
Further Support
Contact us This email address is being protected from spambots. You need JavaScript enabled to view it., for information and resources on technology-enhanced learning, or visit VUCollaborateHelp.vu.edu.au.
Contact ITS Service Desk on (03) 9919 2777 or via self-service servicedesk.vu.edu.au for technical support.