Getting Started with Zoom
Zoom unifies cloud video conferencing, online meetings, and group messaging into one easy-to-use platform. In addition, it offers the best video, audio, and wireless screen-sharing experience across multiple platforms.
Video sessions in Zoom are similar to sessions conducted in a traditional classroom, where small groups of students meet separately to brainstorm and collaborate. You can set up video sessions in your Zoom meeting room to engage in real-time, private, and group discussions.
On this page:
We recommend that you use and update Google Chrome regularly for usability and security.
Watch: Getting Started with Zoom App
Optional - Set Schedule Privileges
Set schedule privileges to allow other VU staff members to schedule meetings on your behalf.
1. Log in to the VU Zoom Web Portal.
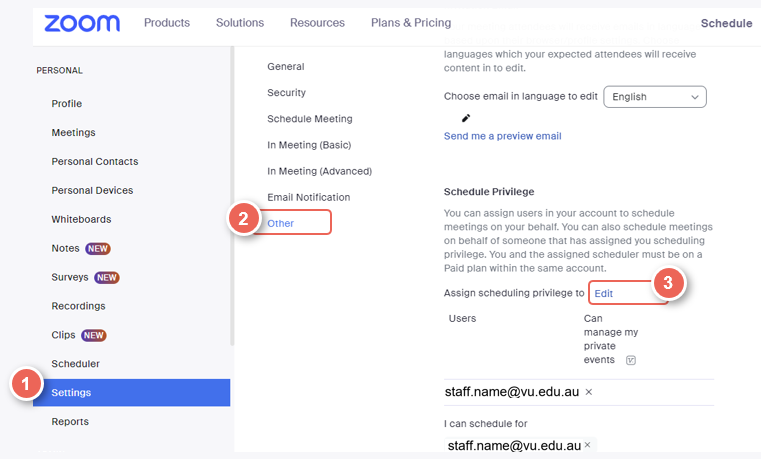
2. In the left-hand side menu, select Settings (1).
3. Under Meetings, select Other (2).
4. Scroll down to Schedule Privilege, then select Edit (3).
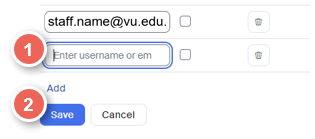
5. Enter a VU email address (1), then select Save (2).
Removing Schedule Privileges
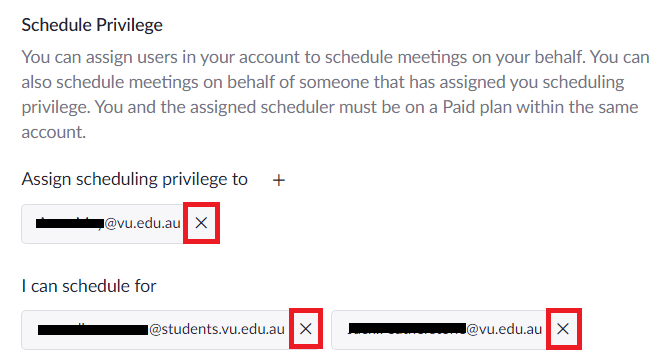
To remove schedule privileges that you assign to other users or those you have been assigned to, click on x. This will automatically remove the users you no longer want privileges assigned to or remove yourself from others' profiles.
Record Attendance in Zoom
Access the participant list of your Zoom meeting to record attendance.
Make sure your students are using their real names or preferred names when joining your Zoom Classroom to have the most accurate report.
Access Participant Report in Zoom Portal
1. Log in to the Zoom Web Portal.
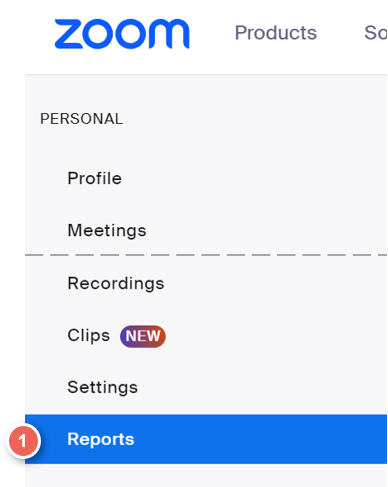
2. On the left side menu, select Reports.
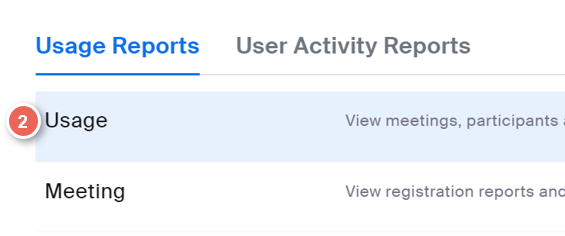
Then, select Usage.
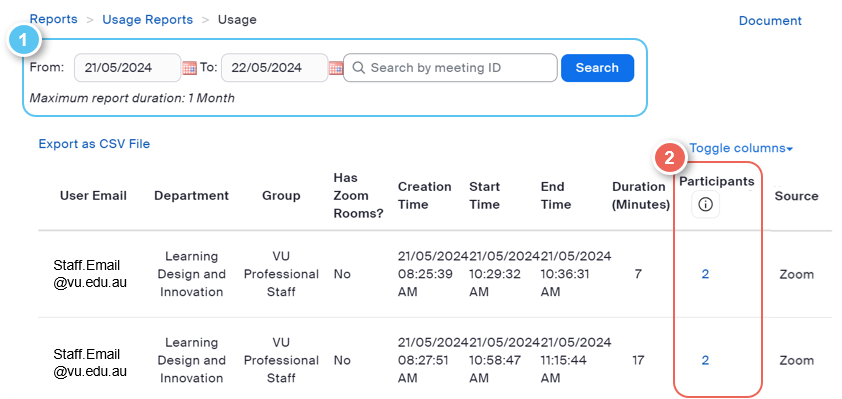
3. Within the Usage report, you can:
- (1) Filter down your meeting to a specific date or date range, or by meeting ID.
- (2) Check the Participant list by clicking on the hyperlinked number.
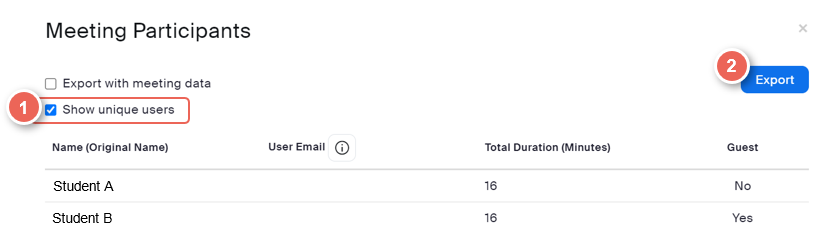
Display Unique Participants
4. You may see the same participants that appear more than once in your list.
This is due to the report showing the number of logins there were in that meeting, not the number of attendees.
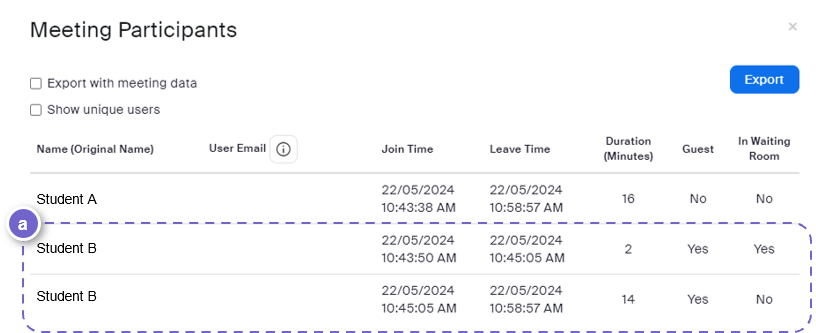
5. You can remove duplications using Show unique users (1).
And, Export this data (2) into a .CSV file.