Using the Panopto Video Editor
This guide provides an overview of how to use the Panopto video editor and the editor's features.
On this page:
- Access the video editor
- Edit the title, description and tags
- Trim to remove sections
- Add automatic captions
- Change the preview image
- Add a table of contents
Access the video editor
Open the editor
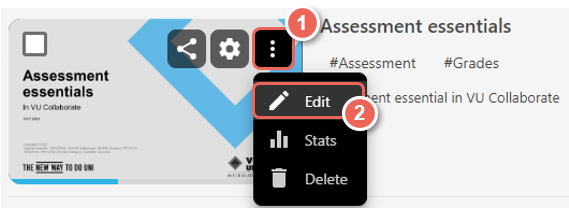
1. In your video library, locate the video you want to edit then from more actions (1) select Edit (2).
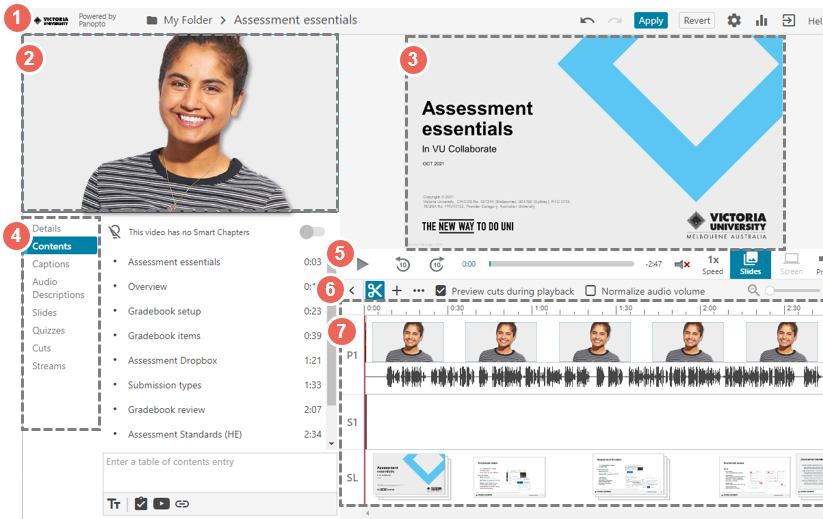
2. This will display the video editor.
- Top tool bar (1), includes the folder, file name, and Apply and Revert buttons.
- Primary stream (2), usually this is the presenter.
- Secondary steam (3), usually this is the presentation or shared screen.
- Video controls (4), select to edit details, table of contents, captions, cuts and more.
- View controls (5), play the video, select player speed, view captions and more.
- Editing tool bar (6), access the cut tool, add content, and set preview image.
- Timeline (7), displays the content streams for the duration of the video.
3. To learn more, see Learn About the Video Editor, by Panopto.
Edit the title, description and tags
Edit the Title
1. Click the title (1) in the top tool bar to edit.
2. To save changes, select Apply from the top tool bar.
3. To learn more, see How to Change the Name of a Video, by Panopto.

Edit Description and Tags
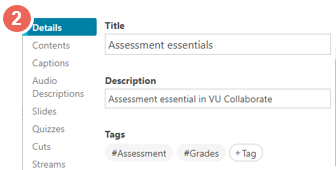
1. Navigate to Details (2) in the video controls, to edit the Description and Tags.
2. To save changes, select Apply from the top tool bar.
3. Both the description and tags are useful to search and locate your videos.
4. To learn more, see How to Change Video Descriptions in the Editor, and How to Use Tags, by Panopto.
Trim to remove sections
1. In the timeline, press and drag to select sections to trim out of the video. Trimmed sections will be highlighted in grey, and will not be displayed when played back.
2. In Panopto, trimming is non-destructive, so if required, you can add this content back in later.

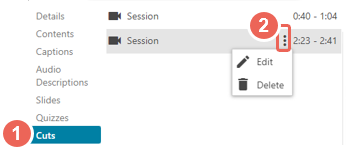
3. The Cuts (1) tab in the video controls, displays all cuts, and allows you to edit (2) to make fine adjustments.
4. To save changes, select Apply from the top tool bar.
5. To learn more, see How to Trim a Video in the Editor, by Panopto.
Add automatic captions
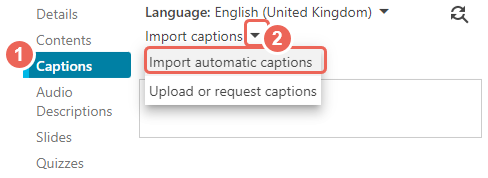
1. Navigate to Captions (1) in the video controls.
2. From Import captions, select Import automatic captions (2).
3. Review and edit captions (if required).
4. To save changes, select Apply from the top tool bar.
5. To learn more, see How to Add ASR (Automatic Speech Recognition) Captions into a Video, by Panopto.
Change the preview image
1.1 Change the preview image
1. The preview image is displayed before you play your video.
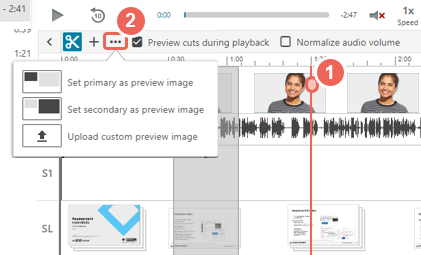
2. In your timeline, click (1) to place the red bar at the location you want to select the new preview image.
3. On the editing tool bar, select the three dots (2), then chose the location of the image, either:
- (a) set primary as preview image (presenter),
- (b) set secondary as preview image (presentation), or
- (c) upload custom preview image.
4. To save changes, select Apply from the top tool bar.
5. To learn more, see How to Change a Video's Thumbnail Image, by Panopto.
1.2 Automatic Preview Image
If you do not select your own preview image, Panopto will automatically select one for you in this order:
- The image will be the first slide (if there is a slide stream).
- The image will be chosen from .5 seconds into the first secondary video.
- The image will be chosen from .5 seconds into the primary video.
Add a table of contents
1.1 Using a table of contents (TOC)
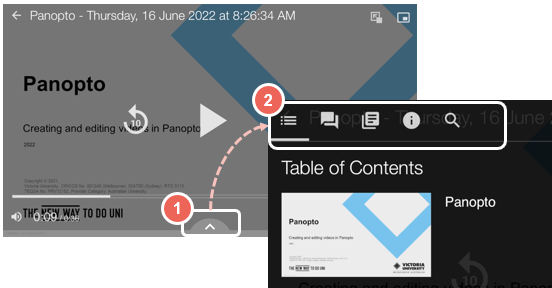
1. When viewing a video, you can navigate directly to sections with a Table of Contents.
1.2 Adding a table of contents (TOC)
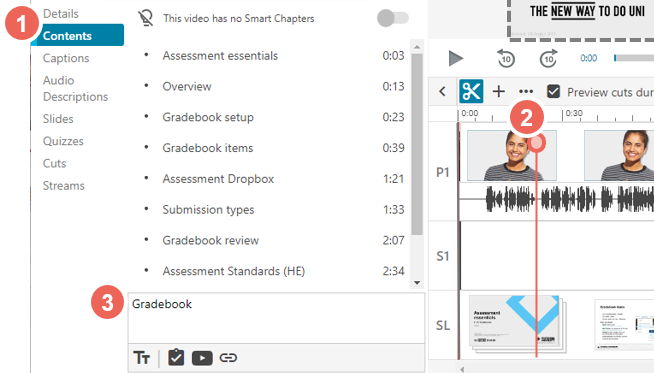
1. Go to the Contents (1) tab in the video controls.
2. Click (2) on the timeline, to place the red bar at the location you want to add a new TOC item.
3. In Contents, add your TOC item (3), then press enter to save.
4. To save changes, select Apply from the top tool bar.
5. To learn more, see How to Add, Edit, and Delete Table of Contents Entries in a Video, by Panopto.