Marking Assessments in the Dropbox
This guide shows how to mark assessments in the Dropbox.
Related guides
- Marking Rubrics in the Dropbox.
- Student Guide - Submit and view the feedback, in the Assessment Dropbox
- Student Guide - Turnitin Similarity Report
Step One: Access Assessment Dropbox Folder
1. In a unit space on the main menu, select Assessments, then Dropbox
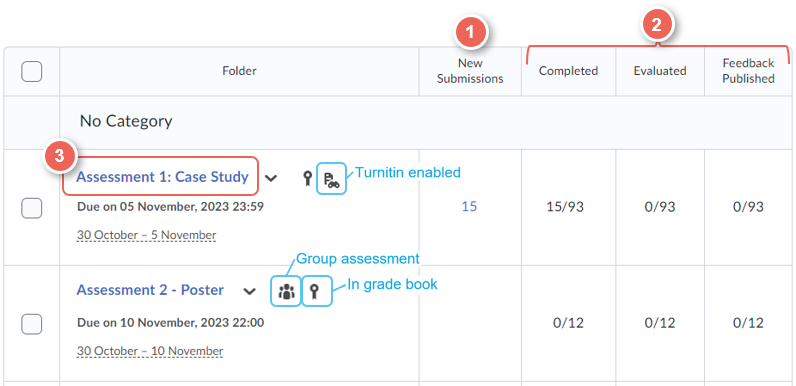
2. View the list of dropbox folder, and submission summaries:
- New ungraded submissions (1)
- Completed, evaluated and feedback published submissions (2) - number of submission out of total (individual or group) expected.
3. Click the Assessment Dropbox (3) title, to view submissions
Step Two: Access the Evaluate Submission Page
Filter by Class or Assessment Group, or Search by name
Filter to a Group
To filter by Class or Assessment group, select Groups (1) > Group Category (2) > Group (3) i.e. Brisbane Class01-Group 01
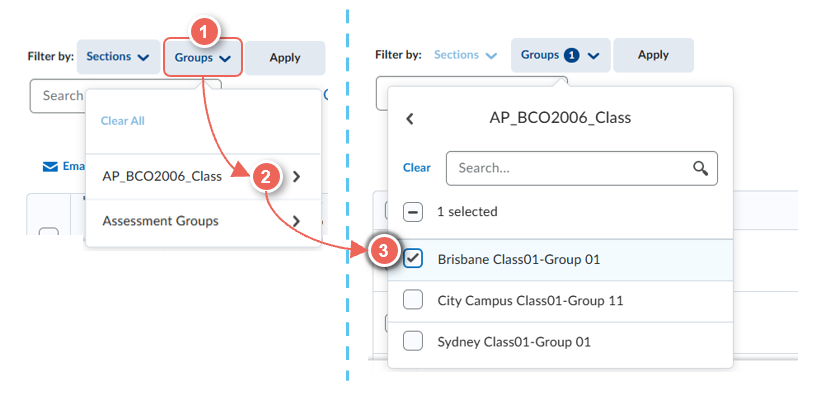
Search by name
Additionally, you can search (5) for individual students by name, or expand the Show Search Options (6), for additional search options.

View submissions
1. In the Assessment folder you will see a list of students and their submissions. Select the submission file name to enter the evaluation view.

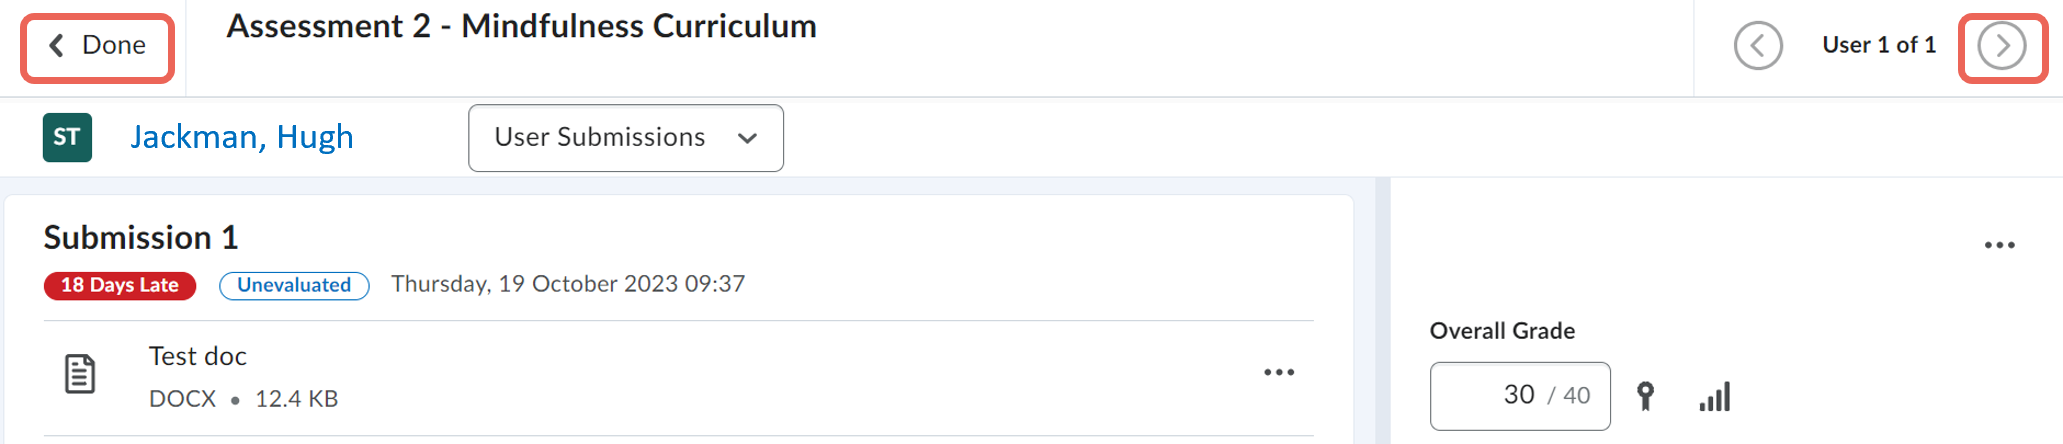
2. After selecting an assignment name, the evaluation screen will open to one like the picture below.
- Name of the current Assessment Dropbox and Delivery Space.
- Student name and their submission title.
- Annotation tool that allows teachers the ability to annotate a submission directly onto the assessment. Features include: draw, highlight, add notes, texts, shapes, print, search bar (keywords), download option and a full-screen view function.
- Rubric to evaluate assessments based on criteria.
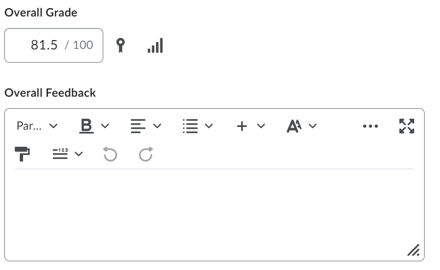
- Overall Grade: If there is no rubric to complete, place the score here manually.
- Overall Feedback: Enter and provide further feedback for the student in texts, audio and video formats.
- If this is the first time you will provide the student with an evaluation, you will see the options: Save draft and Publish. Click Save draft to save all the information but to keep it hidden from students. Click Publish to save the information and show it to students.
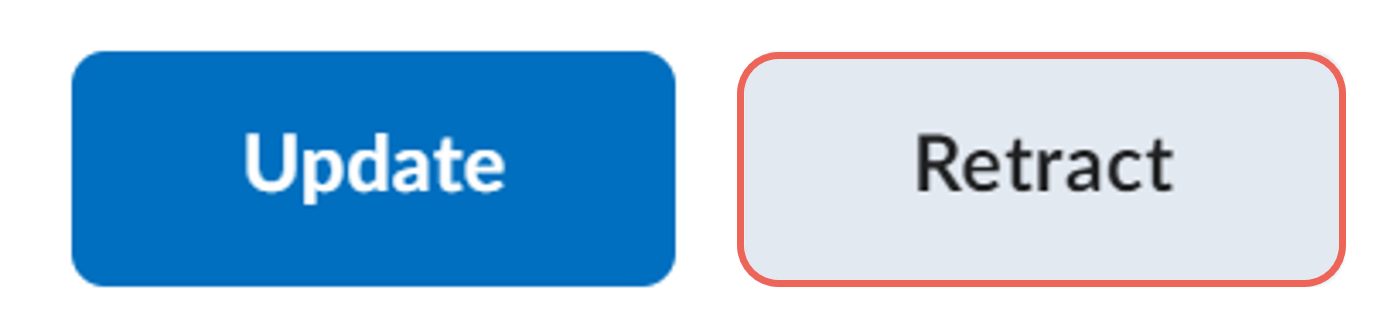
- If you have already evaluated the submission and published it to students, the following options will appear: Update and Retract. Click Update to save any changes. Click Retract if you would like to retract the evaluation.
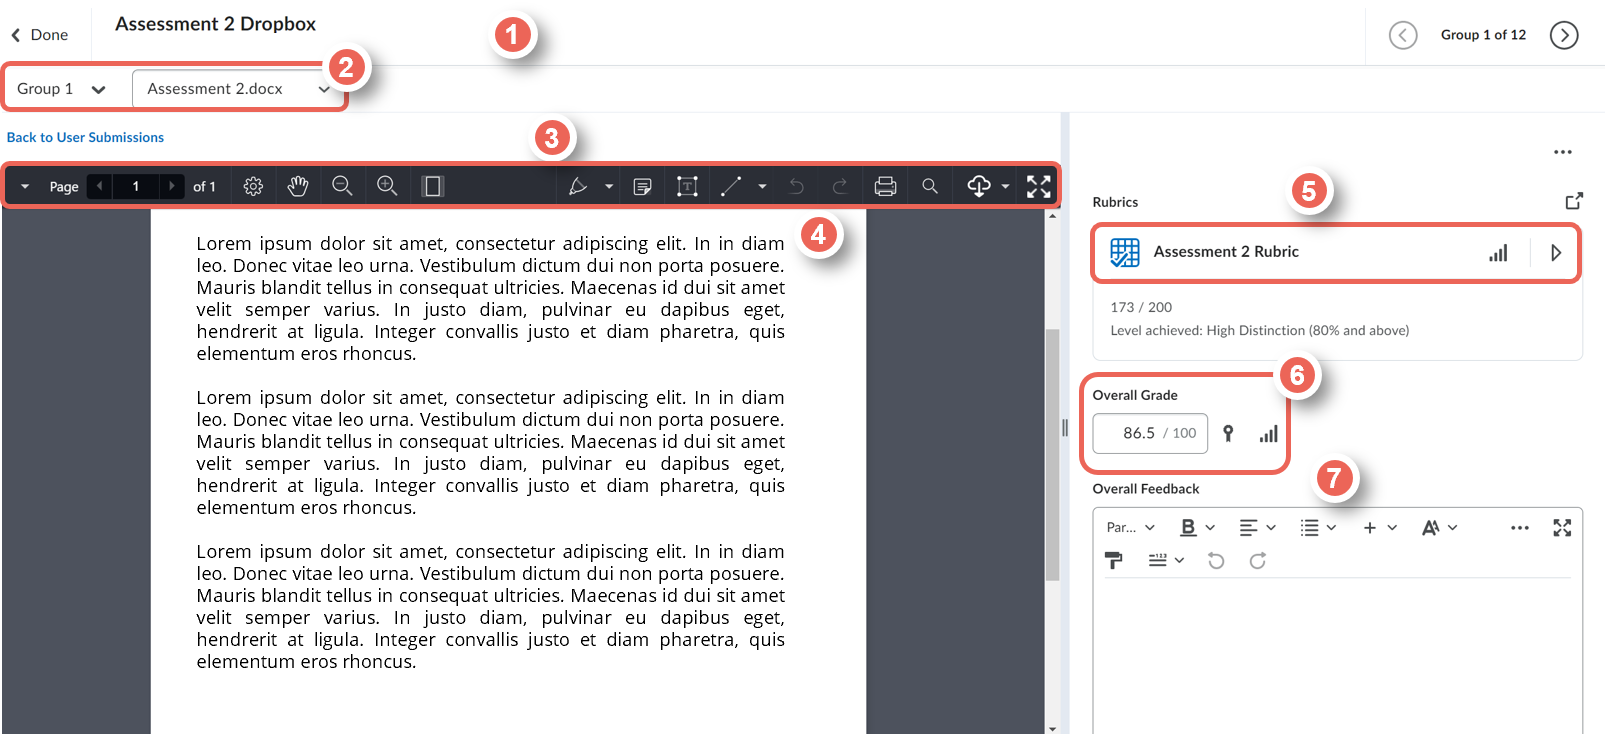
3. To download the submission, from the Download Original icon select either (1) Down Original or (2) Download Annotations.
Step Three: Providing Feedback
3.1 Rubrics
There are two options to view and mark with a rubric:
- Expand view (1) - view and mark with the rubric in-line with the assessment submission
- Pop-up window view (2) - view and mark with the entire rubric in a new pop-out window
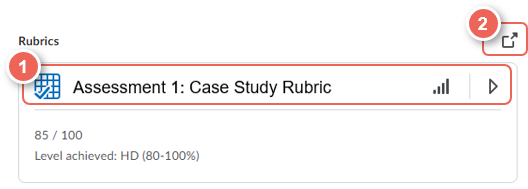
Expand view
1. Click the Rubric name or arrow to expand.
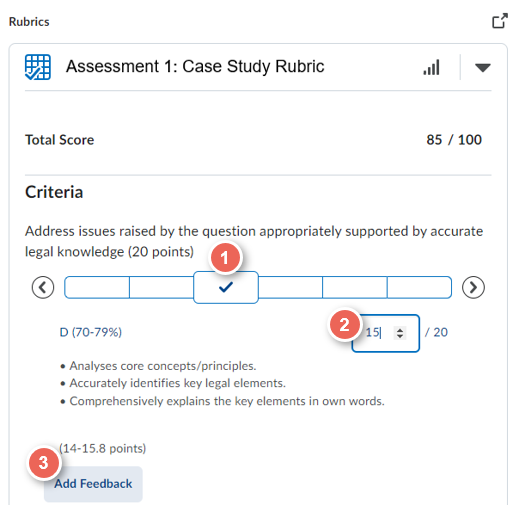
2. For each criterion, hover over the scale levels to read the description.
3. Click to select the performance level (1) achieved.
4. If required, click on the score to then increase or decrease (2).
5. Optionaly include feedback (3).
Pop-up Window view
1. Click the Pop-up Window icon, to open the rubric in a new window.
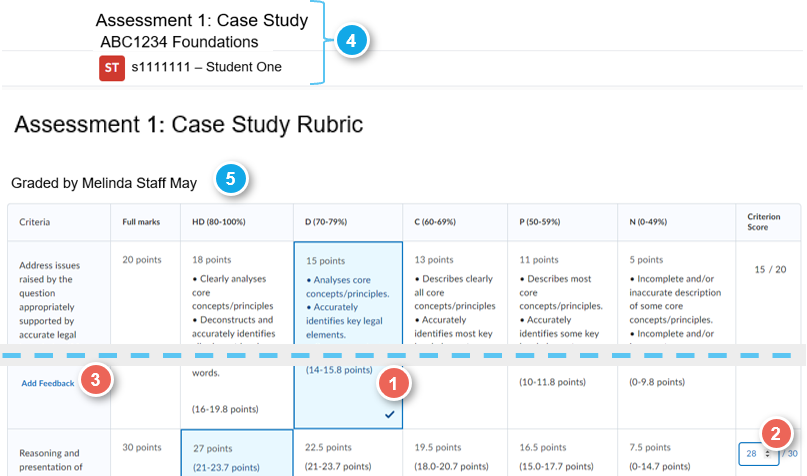
2. Click to select the performance level (1) achieved.
3. If required, click on the score to then increase or decrease (2).
4. Optionaly include feedback (3).
5. In this view the assessment, unit and student details (4) are displayed.
6. And once saved, the name of grader (5) is also displayed.
3.2 Overall Grade and Feedback
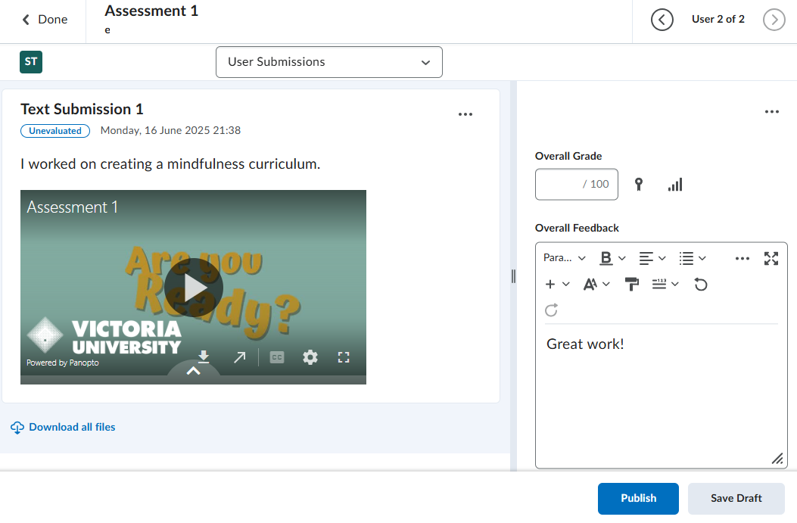
You can enter a numerical value in the Overall Grade field. This is only necessary if you have not used the associated rubric, as the rubric automatically transfers the score.
You can provide qualitative feedback in the Feedback field. You are also able to include photos, URL links and other multimedia elements in the HTML editor.
Step Four: Publishing or Saving Feedback
Save or publish feedback
Scroll to the bottom of the page and, select either
- Save Draft ( the rubric will be saved with the allocated mark; however, the student will not be able to view their result ).
Submissions should be saved as draft until moderation is complete. - Publish ( the student will see their mark and the grade will be transferred to the grade book)
Unit Convenors, after moderation will publish the grades and feedback.

Retract (unpublish) feedback
If grades have been unintentionally published, you can select Retract to return to Save as Draft.
Complete or Continue evaluations
1. Click Done to exit the submission, or Next Student icon to continue grading.
To prevent students from viewing feedback prematurely, Save Draft for each submission. Then, when ready, Bulk Publishing Feedback in VU Collaborate for all students allows them to view their feedback and the grade values to be sent to the Gradebook.
Providing Feeback for On Paper Submissions or Observed in Person Assessments
1. Assessment dropboxes can be setup for Text submission, On paper submissions or Observed in-person submissions.
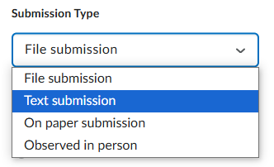
Text Submissions
2. For evaluating Text Submission Dropboxes, view and grade in the document viewer.
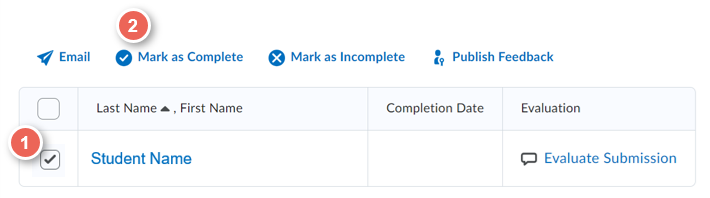
On Paper Submissions
4. To evaluate On Paper Submission and Observed in Person dropbox types, you can tick all students (1) and select Mark as Complete (2) or provide further feedback through Evaluate Submission.
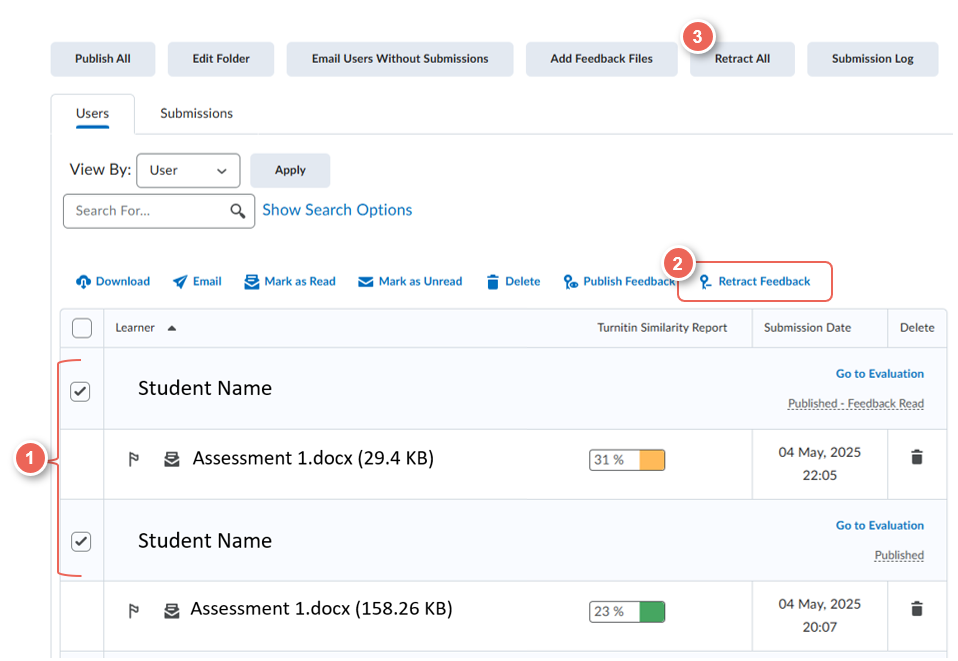
Retracting Published Feedback in VU Collaborate
Retract Feedback and Retract All options now available!
If grades and feedback have been published unintentionally, you can retract feedback individually in grading view, or in bulk in the submission view.
- In your VU Collaborate space on the navigation bar, click Assessments then Dropbox
- Click the Assessment Dropbox name to view the list of submissions.
- To retract either:
- Tick to select sumissions (1), then click Retract Feedback (2), or
- Click Retract All (3)