Using Awards (Badges and Certificates)
The Awards tool can be used to design, issue, and manage learner Badges and Certificates to reflect achievements and milestones within a course offering.
Student Awards can be issued manually, or automatically after requirements (release conditions) have been achieved.
This guide explains how to create awards in VU Collaborate.

Related guides
- badge.design by Accredible
- Badge logo maker, by Canva
- Creating a Custom Certificate, by D2L BrightSpace
Step One: Access Awards
1. In your unit space on the navbar, select Tools, then Awards.
Step Two: Create a new Award
Create a new Award
1. Select Course Awards, then Add Award to Course.
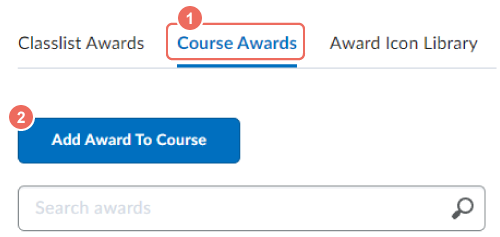
2. Select Create.

Award Details
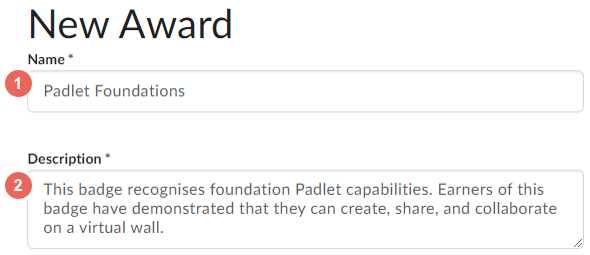
3. Fill in the Name and Description of the award.
Award type
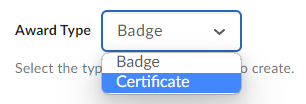
4. Select the required award type (Badge or Certificate) from the dropdown menu.
- Badges - Awarded to students for accomplishments or academic mastery, based on a given criteria.
- Certificates - Also awarded to students, like badges, for achieving a given criteria. In addition, students can print a PDF certificate.
Availability
5. Select to make the award available to use in (a) all your units, or (b) available to use by all instructors in all units, (c) all instructors in selected units.
In most cases, it is recommended to make the award only available to your units.
Expiry date
6. Select when the award expires, in most cases, it is recommended to make the award never expire.
- Never: This Award has no expiry.
- Fixed Date: Standard fixed date for expiry.
- Relative Time Period After Earning the Award: i.e. One year after receiving the award.
- Relative Day of Month: Relative expiry after the date the award is initially received.
You can also select whether to notify students of the expiry.
Badge or Certificate Image
7. Select an award image from existing library or create and upload a new icon.
Create badge images with Canva, badge.design by Accredible or your preferred application.

Certificate Template (certificates only)
8. Select a certificate template from existing library or create and upload a new template.
See Creating a Custom Certificate, by D2L BrightSpace

Issuer
9. The Issuer Information will be automatically generated as Victoria University. You can leave it as default or insert other contact details.
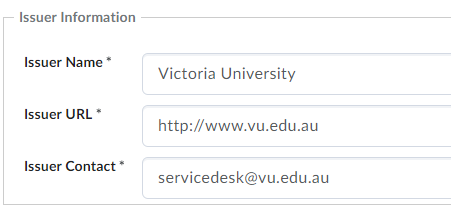
10. Select Use this award in your space, then select Save and Close.

Step Three: Add an Award to a unit space
Once you have created an Award, you need to add it to the Unit Space. You can also select to add Awards created by others.
Adding Awards
1. Select Course Awards, then Add Award To Course.
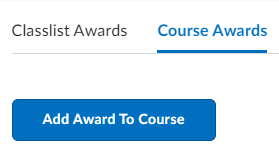
2. Locate the required award, then select Add.

Editing Awards
3. Edit to update:
- Award details - such as name description or image, select Edit Award.
- Automatic issue conditions - such as module completion, or quiz completion with a 100% score. Select Edit Properties and then add Release Conditions.

Step Four: Issue and Revoke Awards
Issuing Awards
Automatically issuing Awards
If a release condition has been applied, awards will be issues automatically to students, once the condition has been met.
Manually issuing Awards
If no release conditions have been set, then awards will need to be manually issued to each student.
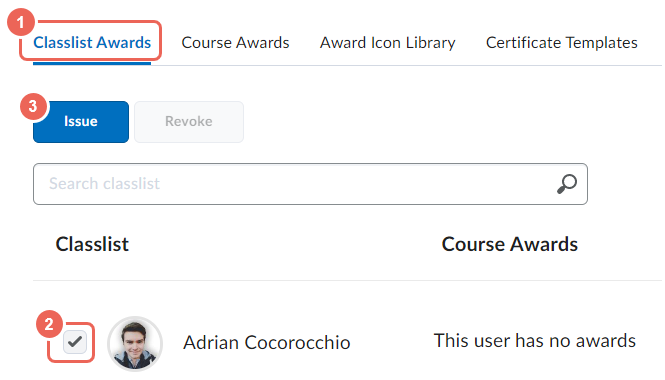
1. Select Classlist Awards, locate and tick to select students, then select Issue.
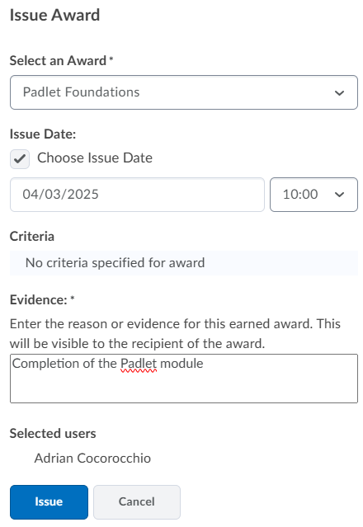
2. Select the award, choose an issue date (if required), in the Evidence, enter the reason the award is being granted, then select Issue.
3. In the Classlist, you will now see the awards that have been issued to students.

Revoke Awards
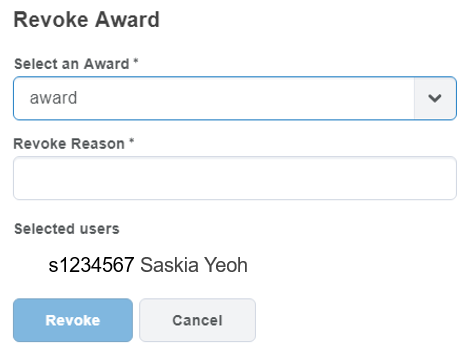
1. To revoke an Award, tick to select the student and then select Revoke.
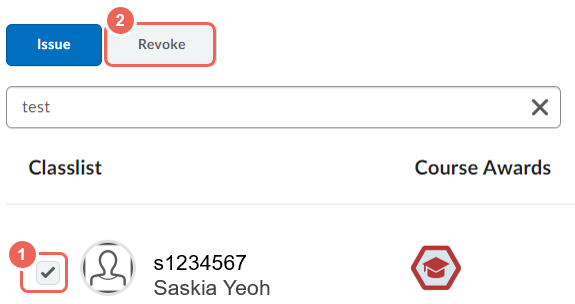
2. In the pop-up window, select the Award you are revoking. Enter the reason the award is being revoked, then select Revoke.
