

Using Breakout Rooms in Zoom
Breakout rooms are sessions that allow you to split students into separate groups and rooms (up to 100 breakout rooms can be created) for collaboration, discussion, and group work. As a host or co-host, you can create and manage and move between breakout rooms. Breakout room participants have the same permissions as in the main room, so make sure you set those up before sending people to a breakout room.
On this guide:
Zoom Video on Using Breakout Rooms
Review Settings
To review and update breakout room settings:
1. Access victoriauniversity.zoom.us and sign in and log in with your Staff ID and Password.
2. In the navigation menu, select Settings (1), then select or scroll down to In Meeting (Advanced).
3. Check that Breakout room - Meetings is toggled on (2), then review all settings (3).
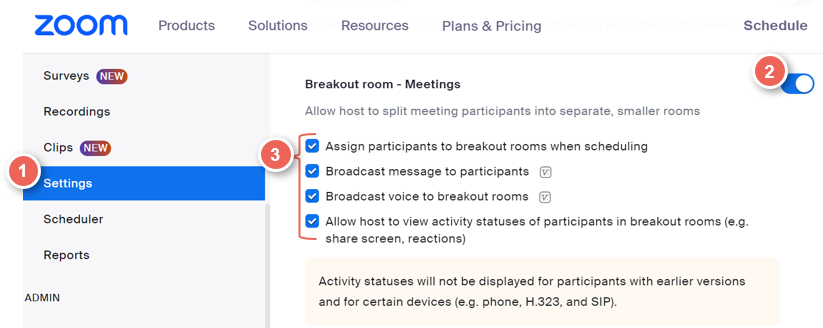
Selecting allows the host to view the activity status of participants in breakout rooms,
and will allow you to see student activity, including sharing screens, and an active mic or camera.
Create Breakout Rooms during the meeting
Create breakout rooms
1. When in a meeting, as a host or co-host, on the meeting toolbar, select Breakout Rooms.

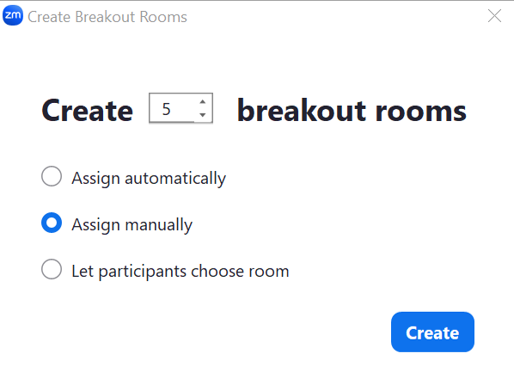
2. Select the number of rooms to be created, and the assignment method, either automatically, manually or let participants choose.
In this example, we will create 5 breakout rooms, assign manually, then click Create.
Assign students to groups
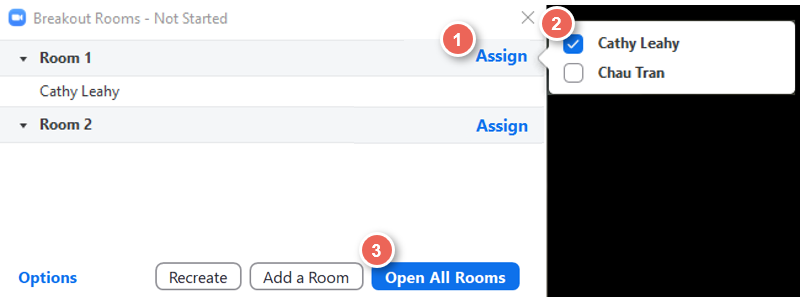
3. For each room, select Assign, then tick to select participants.
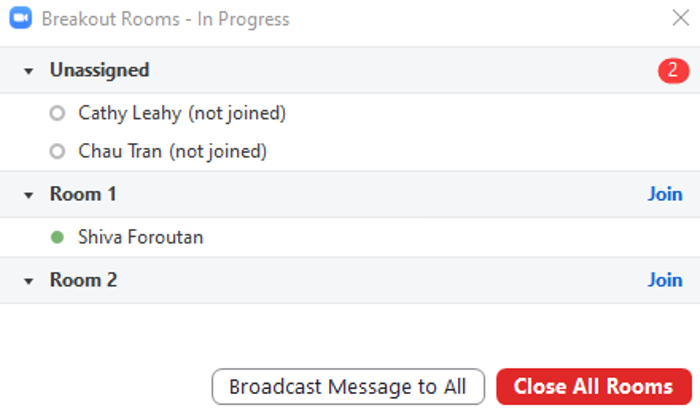
4. When all participants have been assigned to rooms, click on Open All Rooms to invite your participants to join in.
Running room tips:
- If a student has not joined a session, they will be listed with (not joined) next to their names.
- To send a message to all rooms, select Broadcast Message to All, enter your message and then click Broadcast. The message will be displayed for 3-5 seconds.
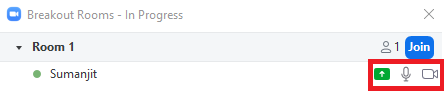
- To visit a room, select join.
- If students Ask for Help, a help request message will be displayed. Click Join Breakout Room to enter the room.
5. Once participants have completed their activities or you wish to invite everyone back into the main session room, select Close All Rooms so they can come back to the main room. Participants will be given 60 seconds (or less if you choose) to leave the breakout room and join the main session before the breakout rooms are closed.
Note:
- Some students may join your class as guests (i.e. not a VU Student Zoom account), so you may find that some students do not automatically get assigned to a breakout room. You will need to input them manually.
- If a student arrives late to class and Breakout Room Sessions have already begun, Zoom does not automatically send them to their assigned Breakout Room. Instead, the host must assign the students manually to their Breakout Rooms. To learn about this, read the manually assigning participants section.
Pre-Assigning Breakout Room in Zoom (Authenticated Users)
Enable Breakout Room pre-assign
Creating Pre-Assigned Breakout Groups in Zoom will require a list of student VU email addresses.
This can be downloaded from your gradebook, see Exporting and Importing Gradebook Data
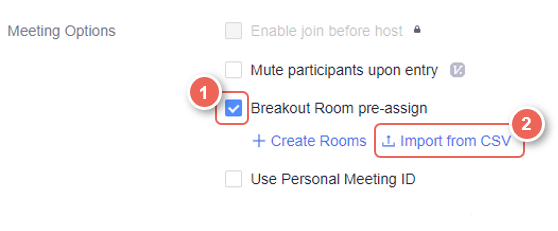
1. When scheduling a Zoom Classroom session,
scroll down the page and select Breakout Room pre-assign (1) from Meeting Options.
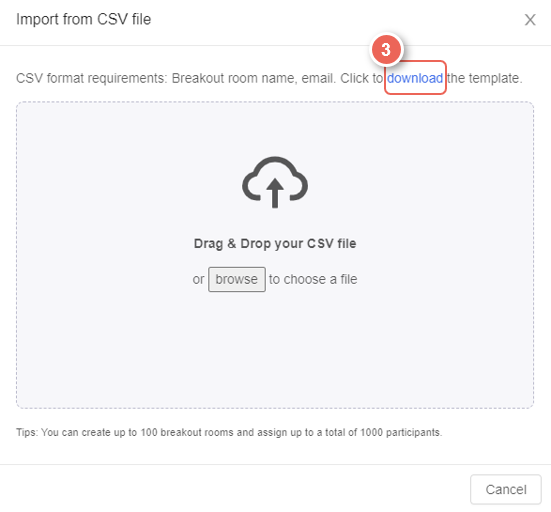
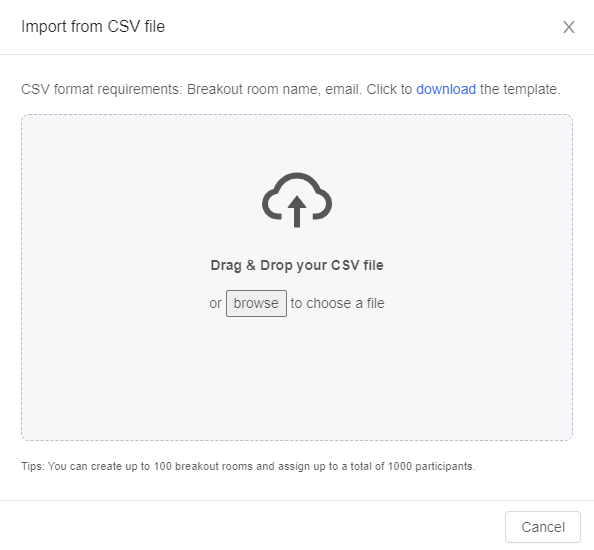
2. Select Import from CSV (2) to upload your file,
or click on the Download (3) link to download the breakout room template.
Enter Details in the CSV File Template
1. Open the CSV File now located on your computer device. This file will open within the Excel application.
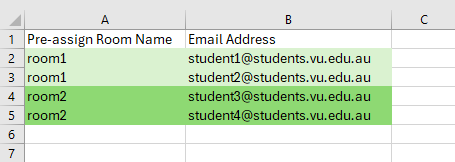
2. The formatting for the Breakout room is as follows:
| Pre-assign Room Name | Email Address |
|---|---|
| room1 | This email address is being protected from spambots. You need JavaScript enabled to view it. |
| room1 | This email address is being protected from spambots. You need JavaScript enabled to view it. |
| room2 | This email address is being protected from spambots. You need JavaScript enabled to view it. |
| room2 | This email address is being protected from spambots. You need JavaScript enabled to view it. |

3. Replace the sample test emails with your students' emails.
4. To split students into separate breakout rooms, assign them to a room by giving them a pre-assign Room Name.
You may add colour codes to the room numbers to make it easier to see who is in what pre-assigned breakout room.
You can create up to 100 breakout rooms and assign up to a total of 1000 participants.
5. Once all students have been assigned, Save the CSV File Template.
Upload the CSV File to a Zoom Classroom
1. Go back to your Zoom Classroom scheduling,
then drag & drop, or upload the CSV template file.
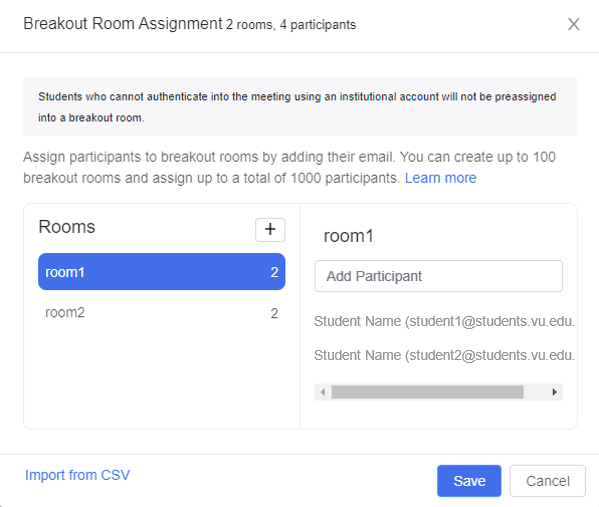
2. Check the details to ensure all students are allocated to the correct breakout rooms.
3. Once done, select Save.
Zoom also provides a short video to demonstrate steps for Pre-assign Breakout Rooms when scheduling a meeting below: