Granting Student Extensions in Assessment Dropbox Folders
When students receive special consideration for an assessment, changes may need to be made to allow for an extension date. This guide shows you how to modify an Assessment Dropbox to extend the submission time for one or more students, while the details for the rest of the class remain the same.
Managing special access can only be done by a Block Convenor or Block Instructor in the Delivery Space.
Below are steps to extend the submission time for one or more students:
- Edit the Assessment Dropbox
- Go to the Availablity settings
- Grant Special Access for individual students
- Review, save and close
Step One: Edit the Assessment Dropbox
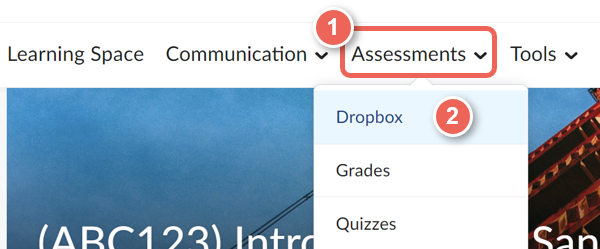
1. In a space on the navbar, select Assessments (1), then Dropbox (2).
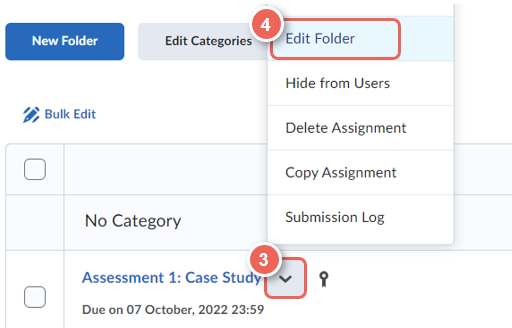
2. Either edit an existing Dropbox, by selecting the Dropbox menu (3), then Edit Folder (4),
Or create a new Dropbox, see Creating an Assessment Dropbox.
Step Two: Go to the Availablity settings
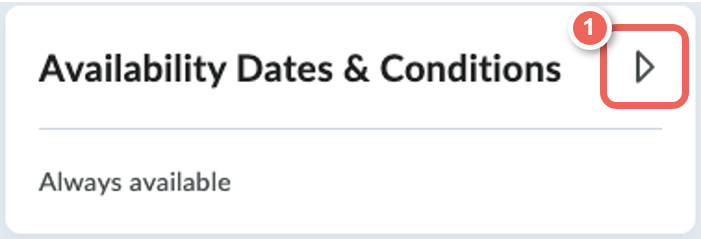
1. In the Assessment Dropbox folder, expand Availability Dates & Conditions (1).
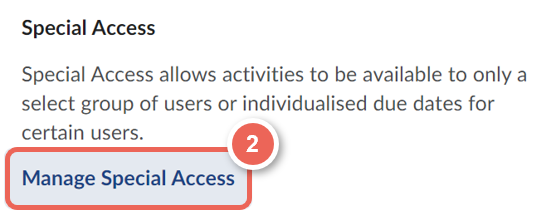
2. Scroll down and select Manage Special Access (2)
Advanced Availablity settings
1. Select (1) Allow users with special access to submit files outside the normal availability dates for this folder.
Note: selecting Allow only users with special access to see this folder, will mean that only the selected users will be given access.
2. Then click (2) Add Users to Special Access.

Step Three: Grant Special Access for individual students
Add Special Access to Dropbox allows you to alter any individual setting. You can change:
- Users and Groups: students who will have special access
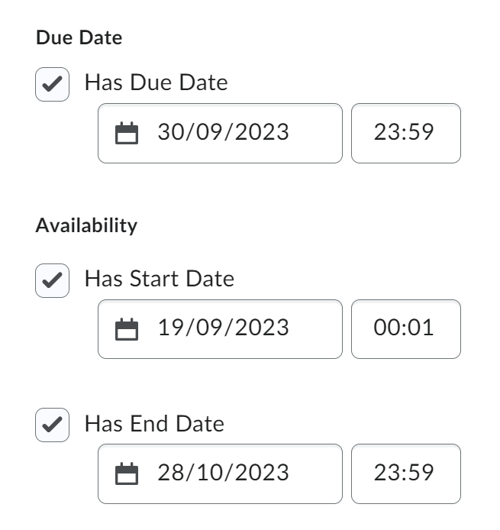
- Dates: due date and availability date and times
Note: Be sure to add users to special access before updating date and time options.
Users
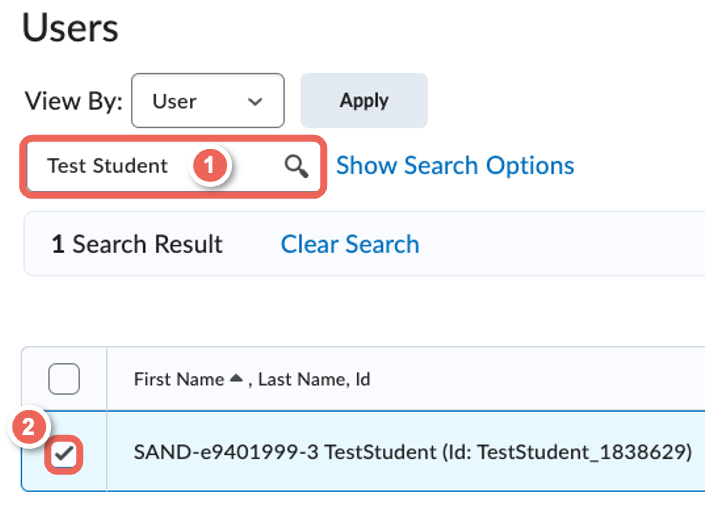
1. (1) Search or scroll down and (2) tick to select the students who will be granted special access.
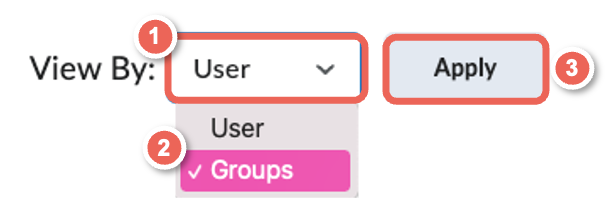
2. To filter users by class group select (1) View By and filter by (2) Group and then (3) Apply.
Dates and Time
3. Enter the new due, start and end dates and times if required.
Step Four: Review, save and close
When ready save your special access requirement for your selected student.
1. Click Save to close the settings.
2. Review the listed student's settings.
Select the (1) pen icon to edit the settings, or select (2) remove to delete the access.
Once done, select Save and Close.


