Virtual Classrooms

Enable remote learning and encourage student participation in a fully online environment.

Configuring Personal Settings in Zoom

Zoom profile allows you to update your user information, including your name, personal meeting ID, email address, and more. Some of this information is displayed to other users in the account, such as name, department, and job title. Additionally, you can change the meeting settings according to your preferences and needs through the Zoom profile. 

This guide covers:


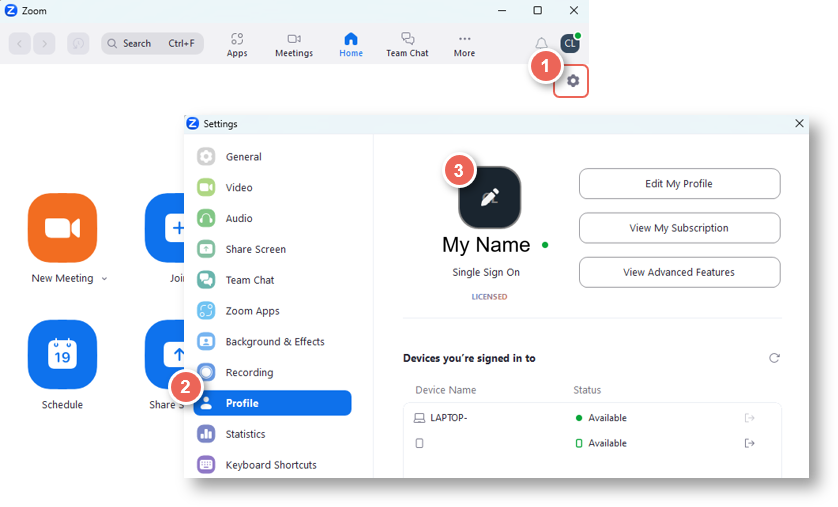
Setting up your Profile Picture


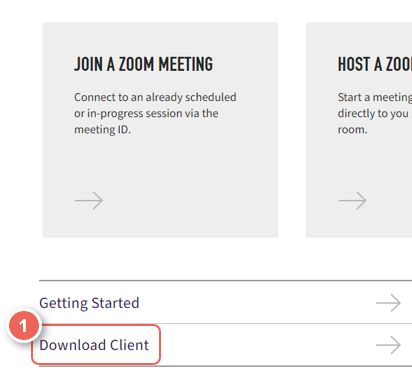
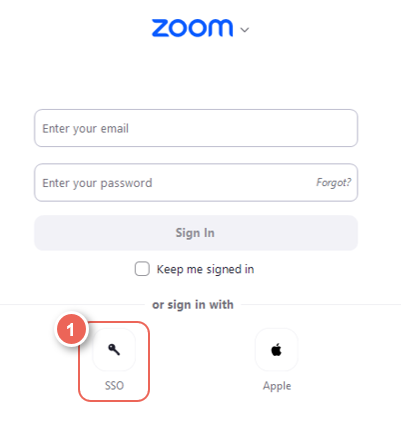
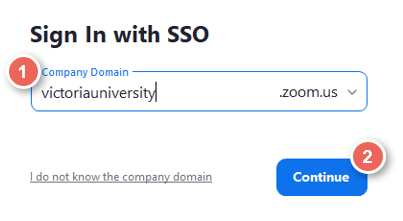
Please refer to the Zoom Essentials Help Guide, Accessing Zoom step 2.1, to learn how to log into your VU Zoom Staff Account correctly.

1. Log in to the Zoom Web Portal following step 2.1 in the Zoom Essentials Help Guide.

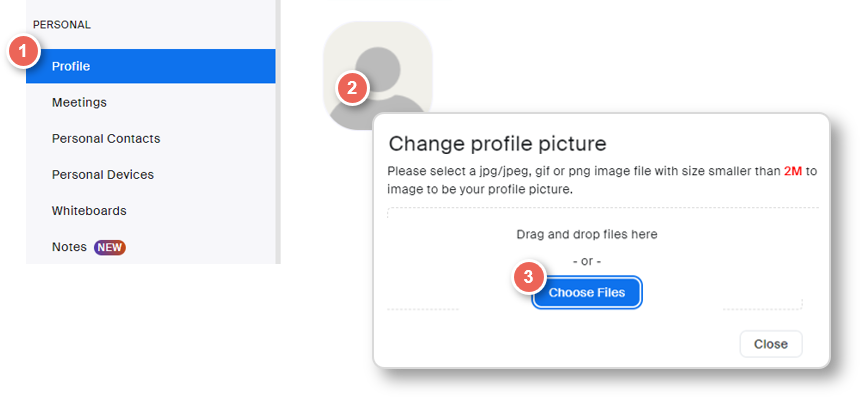
2. Once you have logged in, select Profile located on the left side of your screen. To add or change your profile picture, select Change.

Configuring personal settings in Zoom profile settings

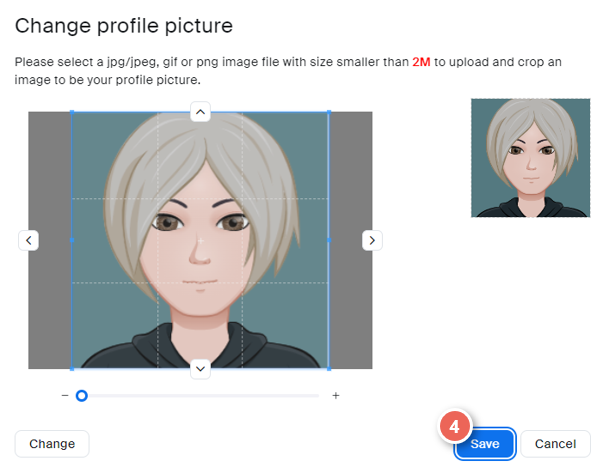
3. Upload an appropriate picture, adjust the crop area and select Save

setting profile picture

4. You can also delete your profile picture by selecting Delete.

 onfiguring personal settings in Zoom delete picture


Personal Meeting ID


A Personal Meeting ID is located below your profile picture, and it can be used for joining and creating instant meetings.

Zoom meeting ID


Accessing and Editing Meeting Settings


1. On the left sidebar of the screen, navigate to and select Settings, then select Meeting.

settings in meeting


 3.1 Scheduling Meeting Settings


 1. Host video: Choose to start meetings with the video on or off. As the host, you can still use in-meeting controls to enable or disable the video. Select to toggle a setting on or off (blue is on and grey is off).

host video settings

2. Participants video: Choose to start meetings with the participants' video on or off. Participants can still use in-meeting controls to enable or disable their video. Select to toggle the setting on or off (blue is on and grey is off).

participants video settings

3. Audio Type: Determine how participants can join the meeting's audio. Leave the default setting of telephone and computer audio so that participants can join using a computer or by calling in (for when there is no internet access).

audio type settings

4. Join before host: Allow participants to join the meeting before the host joins. If disabled, participants can only join after the host starts the session. Select the toggle to turn this on so that students cannot begin in the room without the host/teacher.

join before host settings
 

5. Upcoming meeting reminder: Receive desktop notifications for upcoming meetings. Reminder time can be changed in the Zoom Desktop Client. Select the toggle to turn this on or off.

Configuring personal settings in Zoom upcoming meeting reminder


 3.2 In Meeting Settings


 1. Chat: Allow participants to use in-meeting chat and to send public messages only. Select the toggle to turn this setting on or off.

Due to security, privacy, and copyright concerns, VU will not record any Zoom classroom sessions and chat conversations moving forward. Changes to the Chat permissions preventing private Chats between students during a class will also be introduced for similar reasons.

2. File Transfer:  In-meeting file transfer allows you to send files to other meeting participants during the meeting through the in-meeting chat. Select the toggle to turn this setting on or off.

 file transfer

3. Co-Host: The co-host feature allows you to share hosting privileges with another user in a meeting or webinar. This can be useful to allow another user to manage the administrative side of the meeting, such as muting participants or starting/stopping the recording. Select the toggle to turn this setting on or off.

co host settings

4. Polling: The polling feature for meetings allows you to create single choice or multiple choice polling questions for your meetings. You will be able to launch the poll during your session and gather the responses from your attendees.

You also can download a report of polling after the meeting. Polls can also be conducted anonymously if you do not wish to collect participant information with the poll results.

To learn more about polling, read Creating a poll in a Zoom classroom. Select the toggle to turn this setting on or off.

polling settings

5. Screen Sharing: Zoom allows for screen sharing on desktop, tablet and mobile devices running Zoom. The host and attendee can screen share by clicking the Share Screen icon.
The host does not need to grant screen share access for another participant to share their screen. The host can prevent participants from accessing screen share. Select the toggle to turn this setting on or off.

This can be changed during a meeting/class.


Configuring personal settings in Zoom screen sharing settings

6. Annotation and Whiteboard: Meeting participants can annotate on a shared screen as a viewer or the one that started sharing your screen. You can also use annotation tools when sharing or viewing a whiteboard. The whiteboard feature will allow you to share a whiteboard that you and other participants can annotate on. Select the toggle to turn this setting on or off.

annotation and whiteboard settings


 3.3 In Meeting Advanced


 1. Waiting room: The Waiting Room feature allows the host to control when a participant joins the meeting. As the meeting host, you can admit attendees one by one or hold all attendees in the waiting room and admit them all at once. When admitting participants into the session, you can see their names, so you can remove them if they are not a student on the class list. Select the toggle to turn this setting on or off.

settings waiting room

 2. Participants will see the following screen when joining a meeting with Waiting Room enabled:

participants screen

 3. Virtual background: The virtual background feature lets you display an image or video as your background during a Zoom Meeting. You can also upload your own images or videos as a virtual background.
To enable the Virtual Background feature for your use:

  • Sign in to the Zoom web portal;
  • Click My Meeting Settings;
  • Navigate to the Virtual Background option on the Meeting tab and verify that the setting is enabled;

virtual background


Limit the Session only to VU Students & Staff 


For classroom (and other online activities), you may find it helpful to limit the session only to allow VU Students and Staff participants. All participants will need to sign into Zoom using their VU account (e-number or s-number) to join.

Refer to the Ensuring Privacy & Security in Zoom Help Guide, step Limit the sessions to only VU Students & Staff, to learn about limiting the session to only VU Students & Staff.


Setting Schedule Privileges


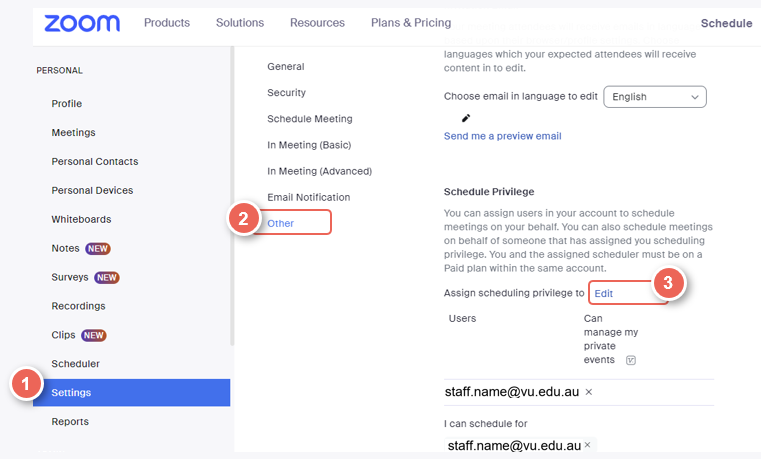
1. Select Settings on the top left-hand corner of the webpage.

zoom settings

2. Select Other under Meeting settings.

other settings

3. To assign schedule privileges, go to the bottom of the screen and click on + next to Assign scheduling privilege to. 

schedule privilege

4. Fill in the VU email address of the person you want to assign the privilege to and click on Assign.

assign schedule

 The email address of the people you can assign privileges to will appear under the Assign scheduling privilege to as shown in the above photo.
 To find who enabled schedule privileges for you, look under what I can schedule for.

5. After you have been added to schedule a meeting on behalf of somebody else, the option will show up under the heading Advanced Options, as shown in the picture below. 

scedule privilege option in meedint scheduler


Removing Schedule Privileges


To remove schedule privileges that you assign to other users or those you have been assigned to, click on x. This will automatically remove the users you no longer want privileges assigned to or remove yourself from others' profiles.
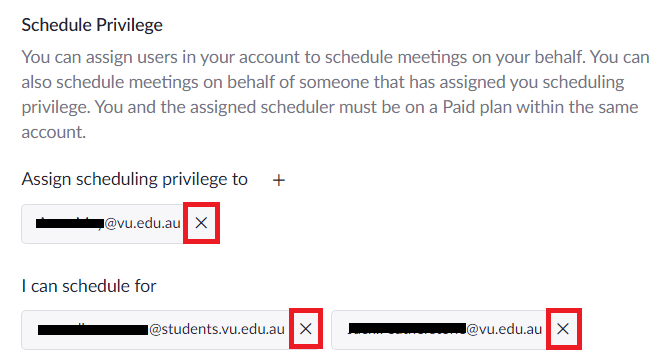
cross schedule


Adding an Alternative Host to a Meeting you Schedule


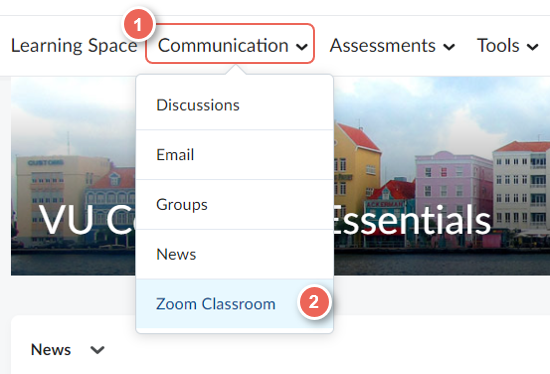
1. Go to the relevant VU Collaborate delivery space and click on Communication, then Zoom classroom

zoom communications

2. When you are directed to the Zoom classroom, click on Schedule a meeting

schedule a new meeting

For meeting schedule instructions, go to Schedule a new class on Zoom, then add the following as the last part of the process.

3. At the bottom of the page, click on the title Advanced Options.

advanced options for scheduling

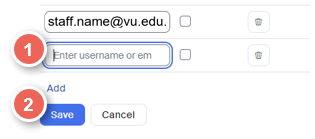
4. Type the person's email address into the Alternative Hosts bar the click Save.

added alternative host


Further Support

Contact us This email address is being protected from spambots. You need JavaScript enabled to view it., for information and resources on technology-enhanced learning, or visit VUCollaborateHelp.vu.edu.au.
Contact ITS Service Desk on (03) 9919 2777 or via self-service servicedesk.vu.edu.au for technical support.


Admin Only