Setting up the Feedback Fruits - Group Member Evaluation Tool
The Group Member Evaluation function of FeedbackFruits allows students to evaluate their peers’ contributions to the group assessment within VU Collaborate space. Teachers can lay down specifications of how the feedback should be provided within the activity.
- Add a Group Member Evaluation to a Module
- Introductions
- Choose the Options for Giving Feedback
- Received Reviews and Grading Configuration
- Monitoring Student Progress
- Checking Grades for the Peer Evaluation
You can also see this video from Feedback Fruits on Group Member Evaluation
FeedbackFruits Group Member Evaluation: How-To from FeedbackFruits.
Step One: Add a Group Member Evaluation to a Module
1. In a unit space navigate to the Learning Space then into a Module (or Sub-Module) you would like to add the activity.
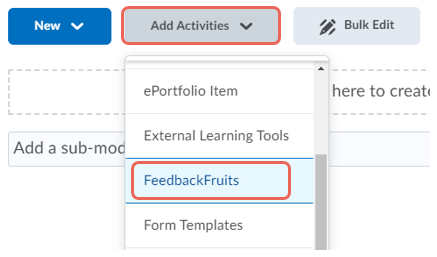
2. Select Add Activities then FeedbackFruits.
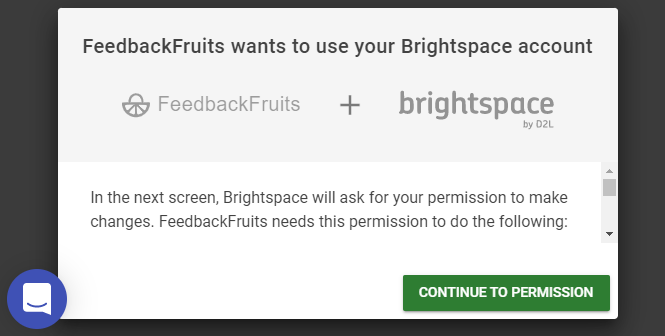
3. When the FeedbackFruits tool is selected, a pop-up window as shown below will appear on your screen. You must grant the software access by selecting Continue To Permission.
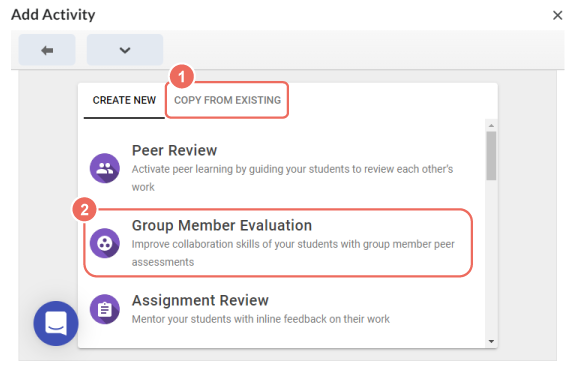
4. If you want to create the activity using your existing activity layouts and descriptions, select Copy From Existing.
To create a new activity, scroll through the available activity options and select Group Member Evaluation.
Step Two: Introductions
1. Firstly, add a title to the FeedbackFruits - Group Member Evaluation Activity.
2. Use the instructions module to provide introductions on how students should use the tool. Students should understand what they need to complete and how they are to give feedback to their peers using this tool.
3. You may attach a file, images or audio to the instructions if needed by selecting the audio mic symbol and the attached clip symbol.
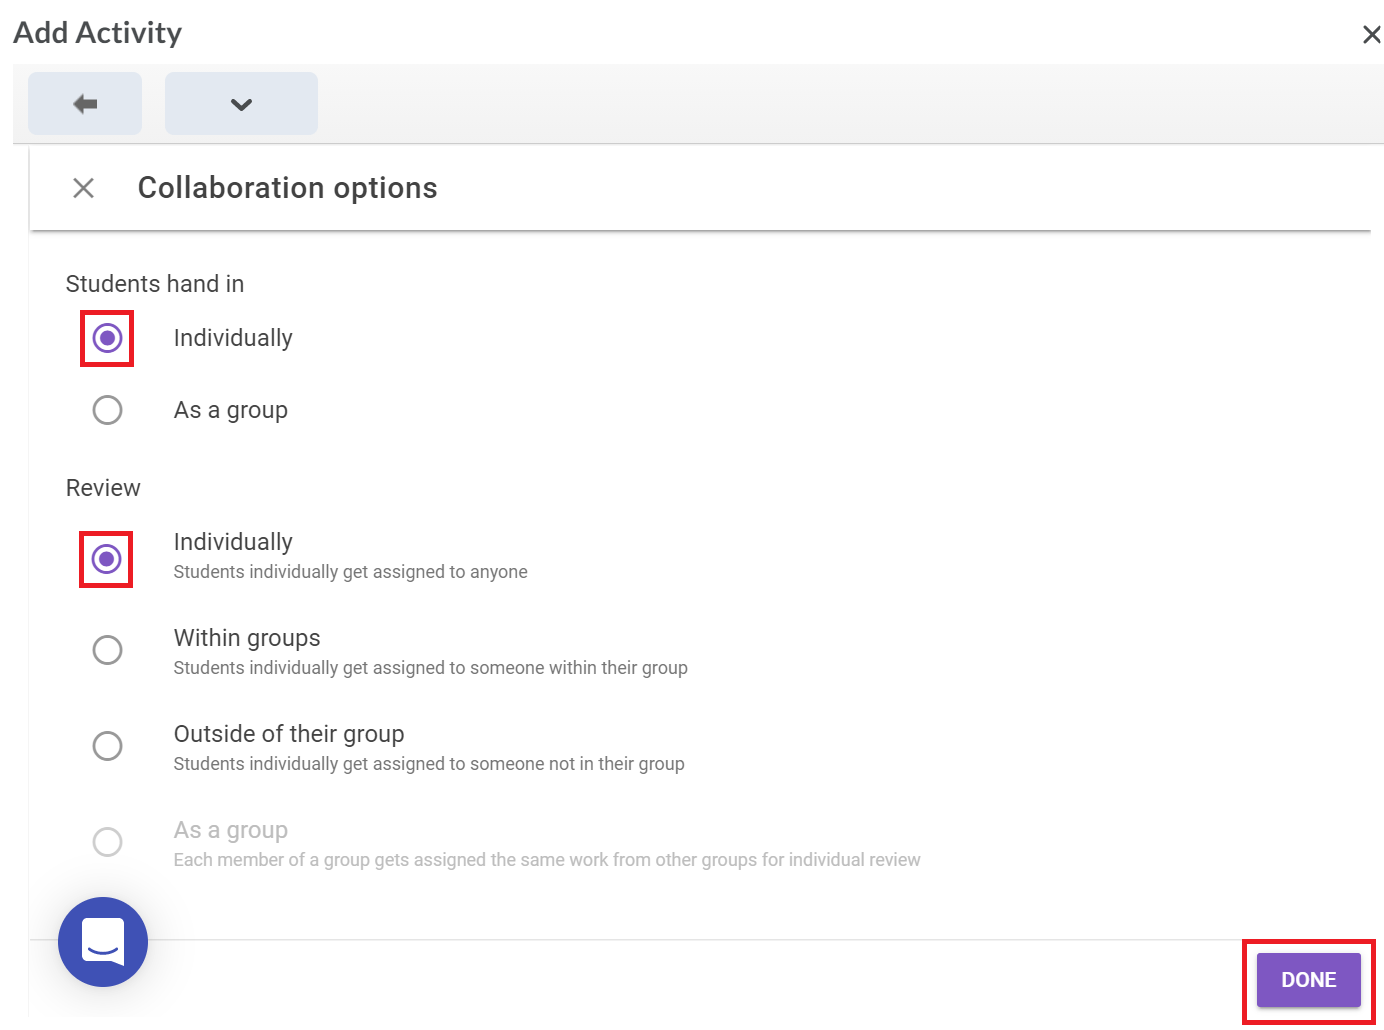
You may select Change to edit the peer review type from an individual-based review to a group-based review (see step 2.4).
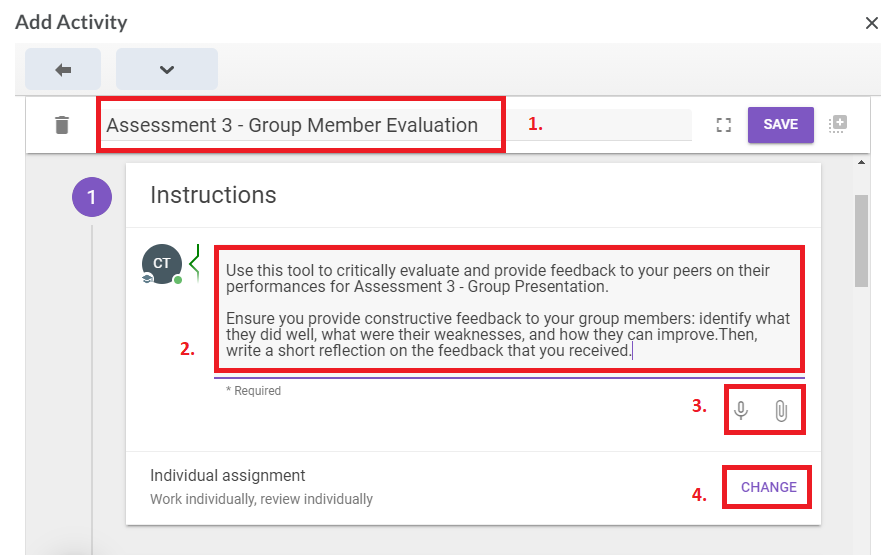
4. Individual assignment is the default setting. However, this option can be changed to one of the following options:
Step Three: Choose the Options for Giving Feedback
Use this section to set up how students get allocated and how feedback is presented. There are several options available to customise how the feedback criteria are provided to students.
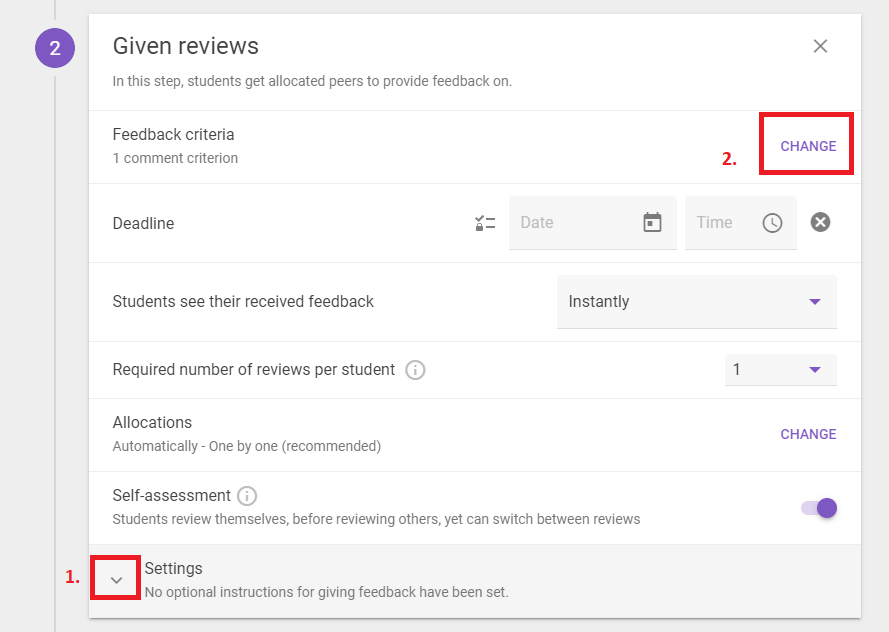
1. Once a deadline has been selected; there are multiple options available to customise how students give and receive feedback. There is an information icon next to each of the options which explains what they do.
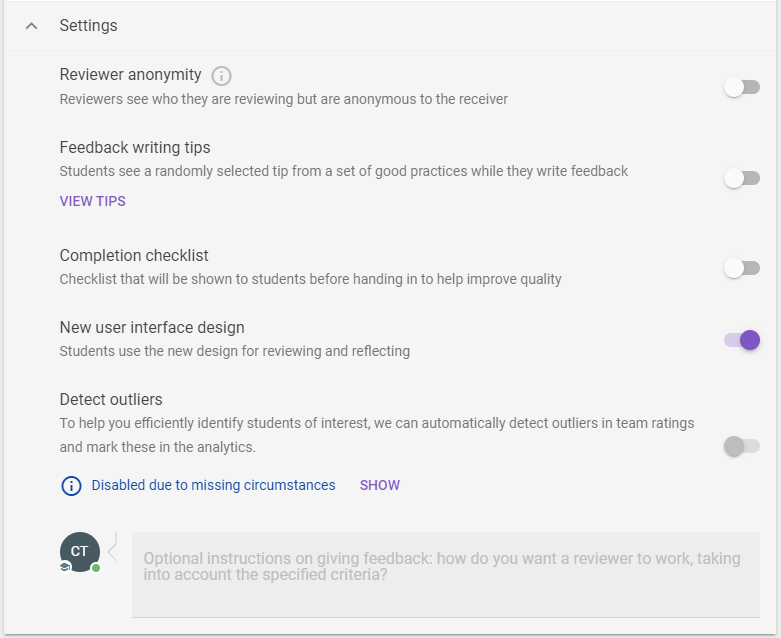
Optional Instructions from the Settings dropdown menu provides you with additional setting options such as Reviewer anonymity, Feedback writing tips, and Completion checklist.
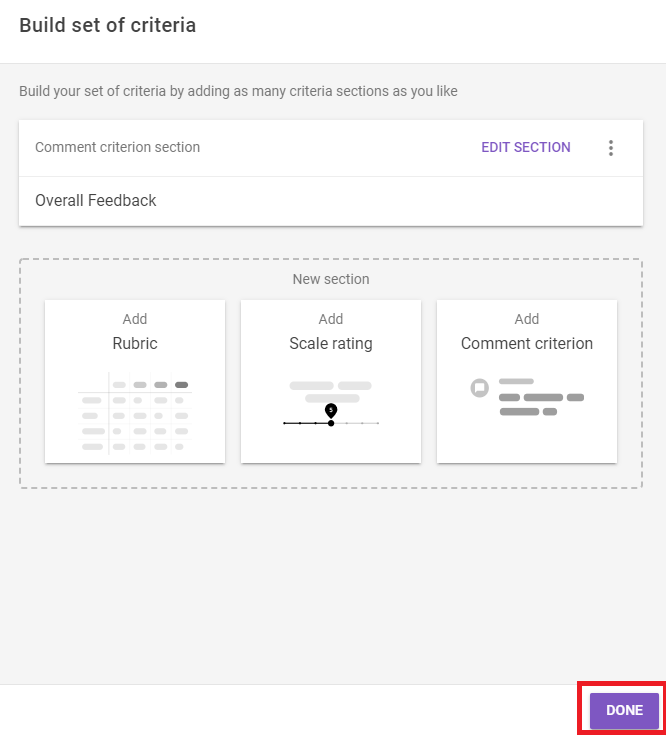
2. Next step is to establish the feedback criteria and how they will be captured (Rubric, Scale rating and Comments). You can build your own set of criteria by selecting the Change button on the Feedback Criteria (refer to step 3.1 if you cannot find this section).
The selection(s) made here will assist the students with providing the feedback uniformly. You can have more than one criterion type and section. Select Done to save your set of criteria and navigate back to the activity settings.
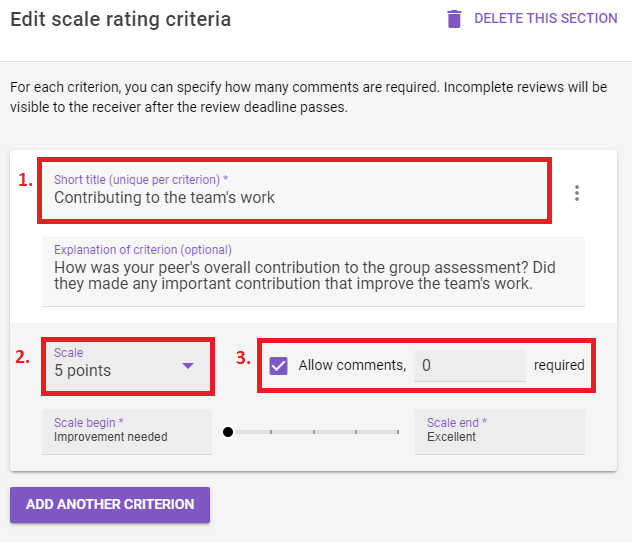
3. The scale rating option gives students the ability to assign a numerical value to their peer's performances.
When adding scale rating criteria, you can customise the criteria name and how many points are on the scale (3, 5, 7 or 10 points). You can also enable students to add additional comments/feedback on each criteria.
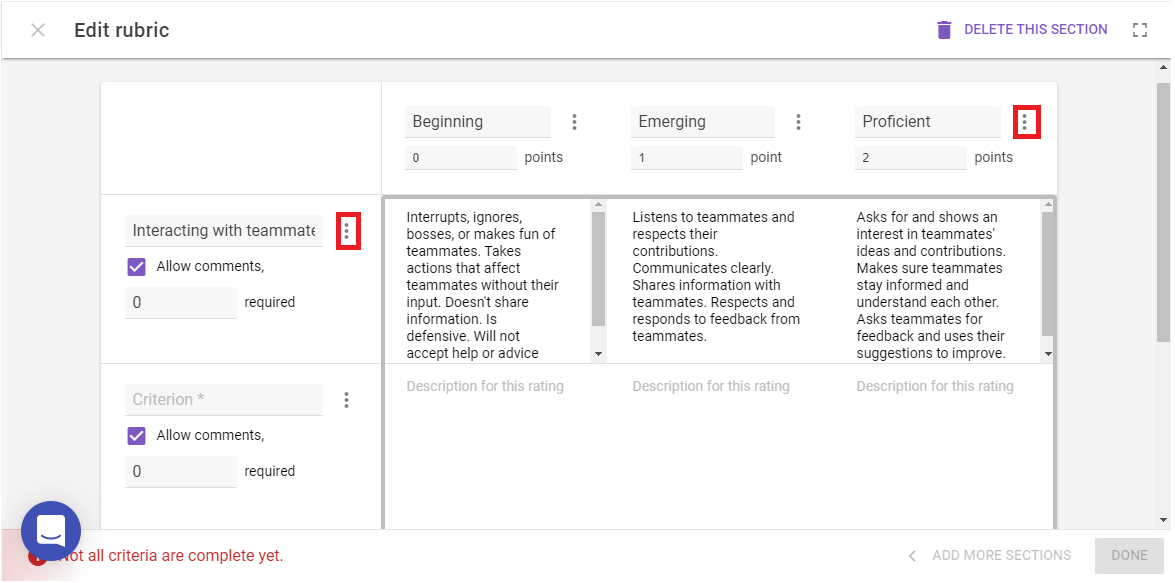
4. The rubric will need to be created here. Similar to rubrics created for assessments, these rubrics will need to be separated by increments with descriptions of each means.
The rubric provides options to customise each descriptor, criteria levels and point. You can also reduce criteria levels by selecting the three dots next to the descriptor.
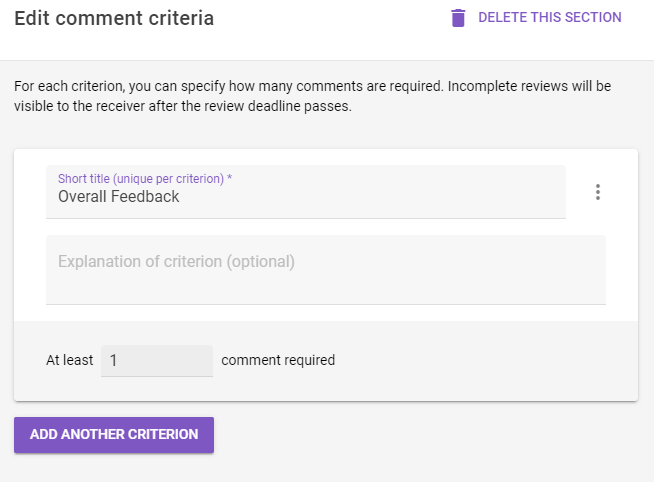
5. The comments section can be allocated and regulated to provide specific information to the student.
Step Four: Received Reviews and Grading Configuration
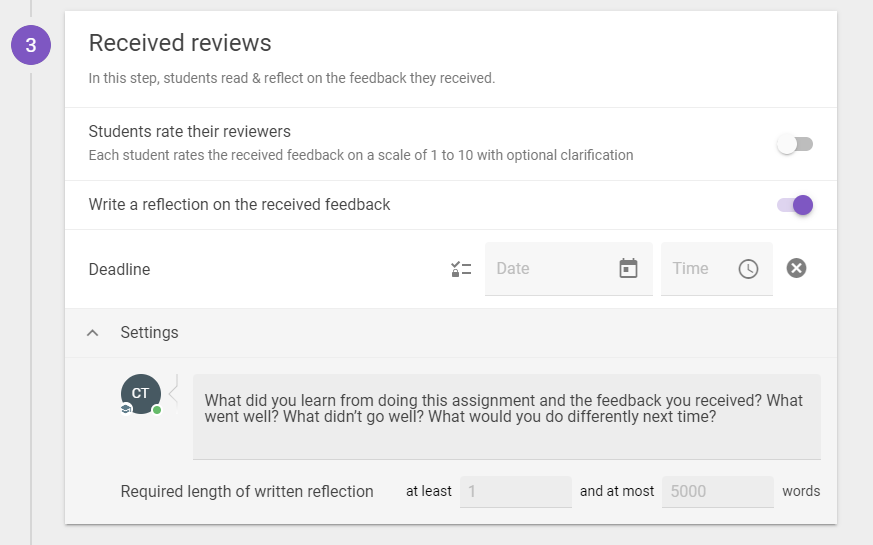
1. This section allows teachers to set up optional requirements for students to complete after receiving their feedback. Some options are rating their reviewers on a scale of 1 to 10 and write a reflection on the feedback they have received.
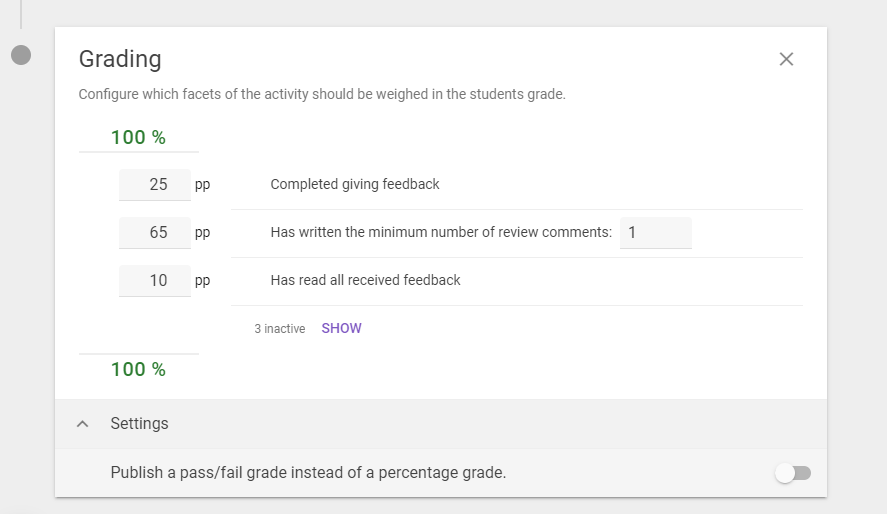
2. Next step is to configure activity grading. If you cannot find this section, select the + button in purple at the end of number 3 in the set-up. These grading settings are defaults and you can adjust the points for each.
Step Five: Monitoring Student Progress
1. The progress and overall statistics of each student will appear for the teacher once the peer review is fully set up.
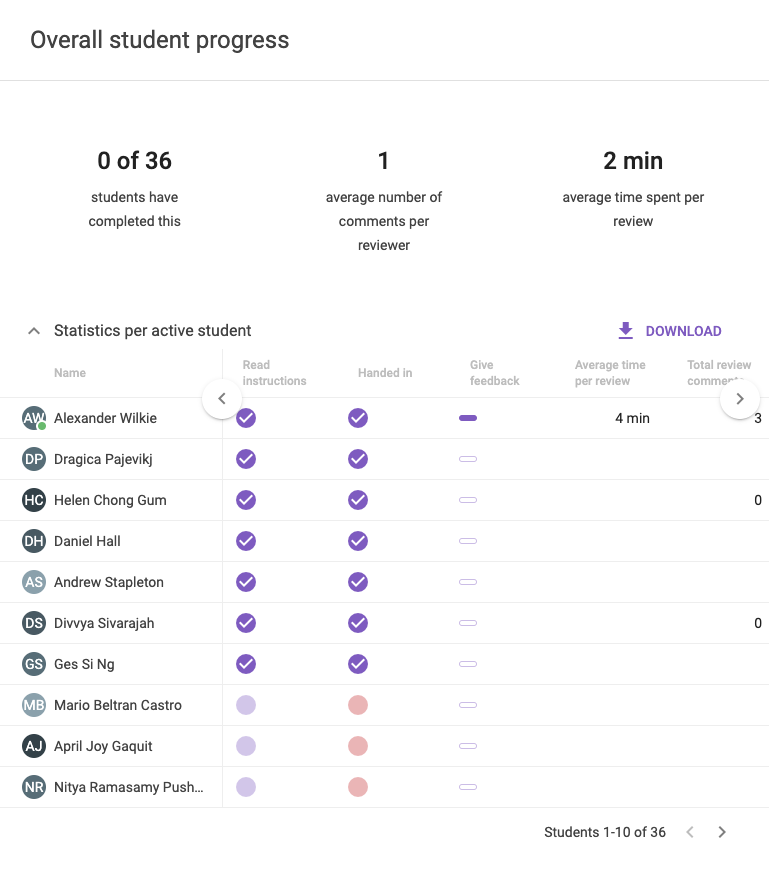
2. The progress of the students will be visible as soon as they start using it. The dashboard will display how many have been completed and how many are in the process in each required activity.
The dashboard will also display completion statistics per student and for the cohort.
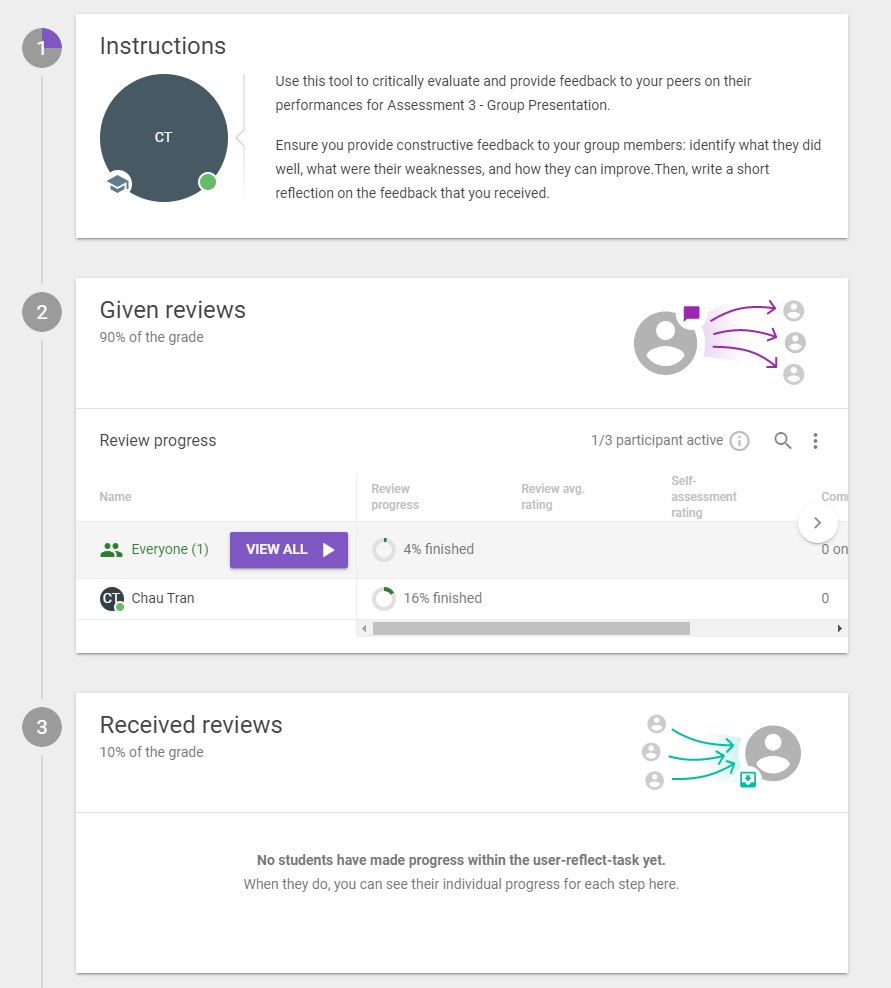
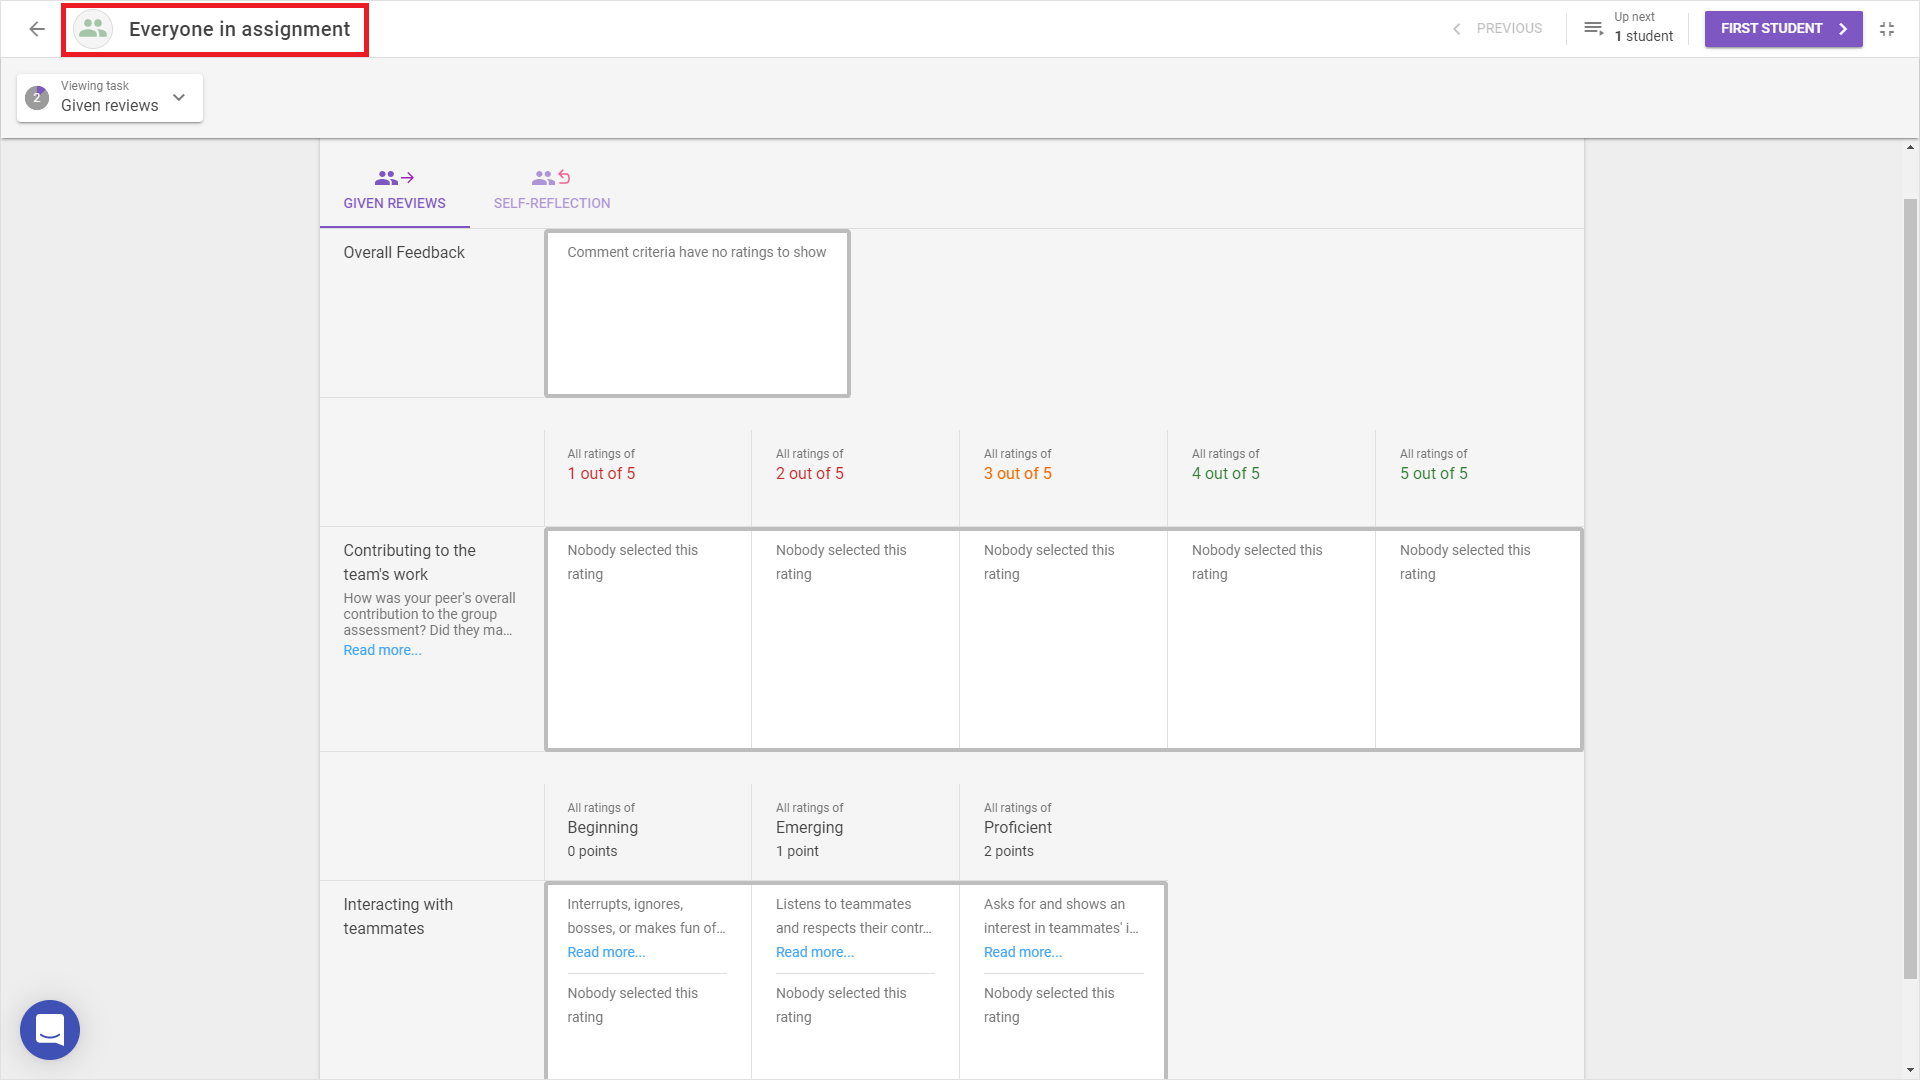
3. It is also possible to view overall reports of what students have been answered in their respective criteria when you select View All from step 5.2.
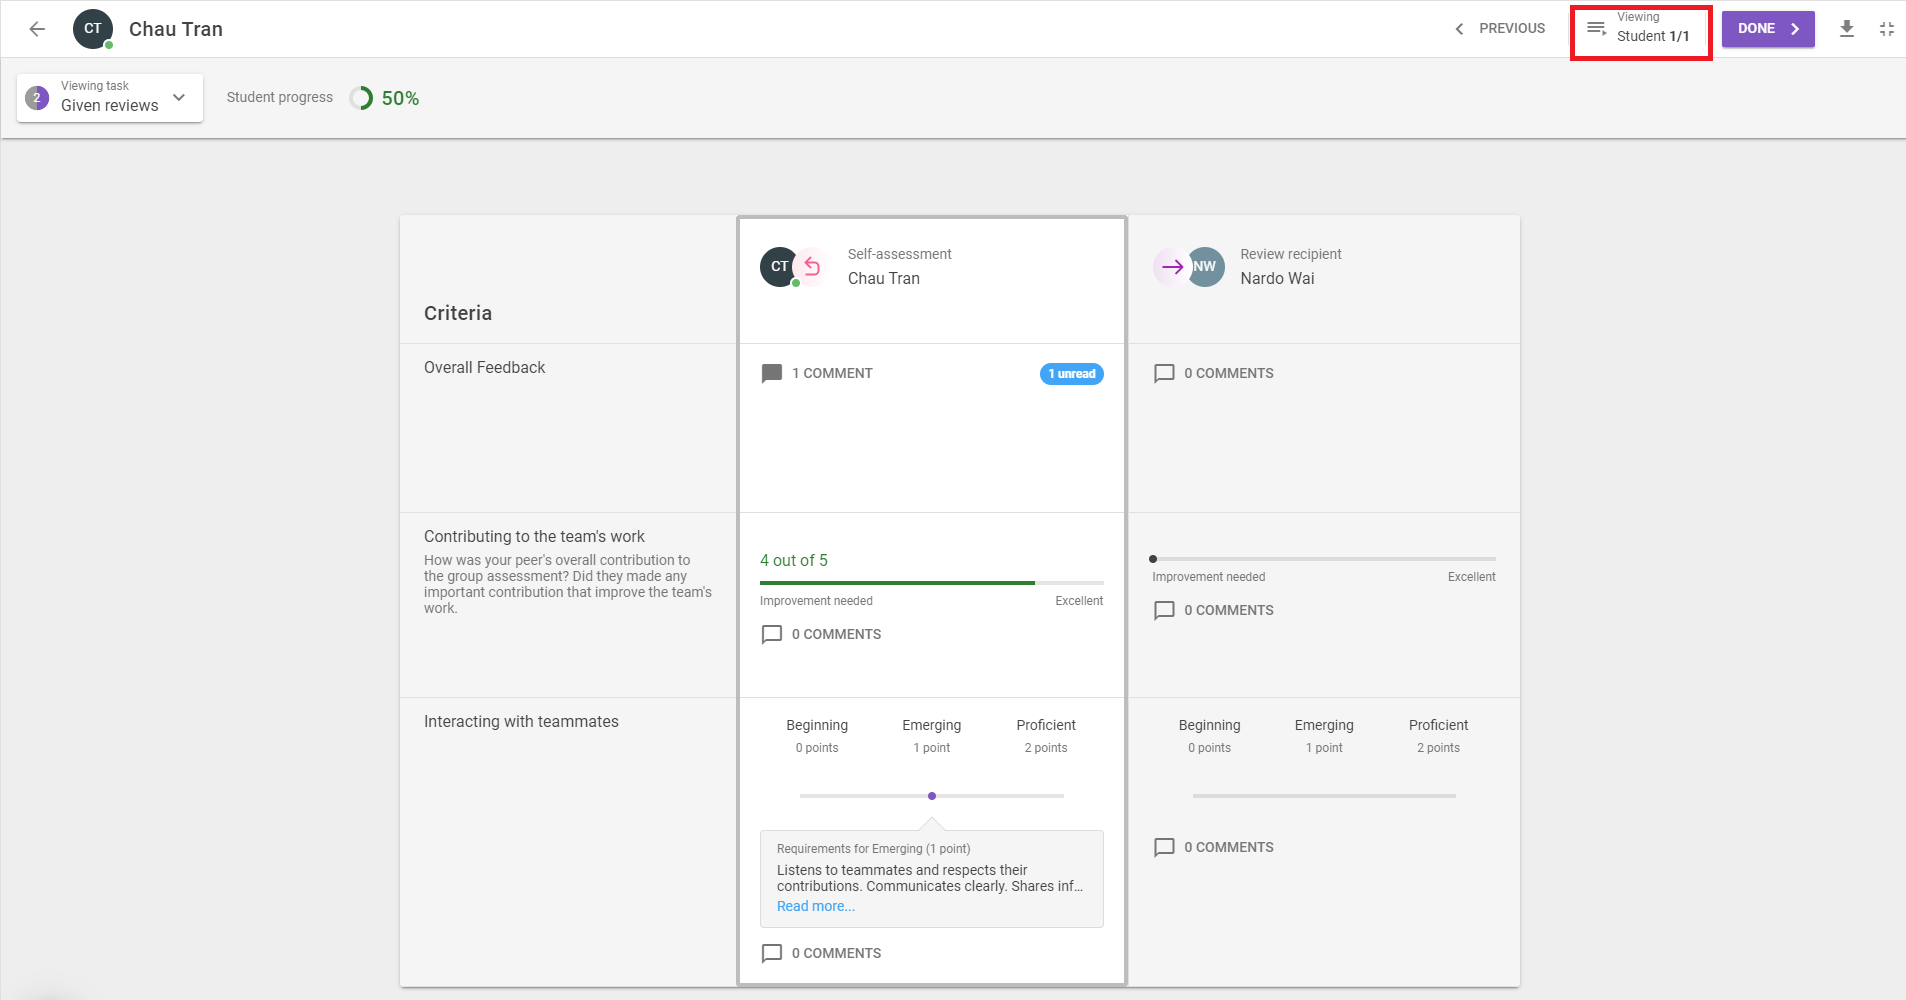
In addition, an option to view each individual student response and process is available as a report.
Step Six: Checking Grades for the Peer Evaluation
1. In the Gradebook, there needs to be a Grade Item set up for the peer evaluation. It will show up as being associated with an External Learning Tool.
To learn how to create a grade item, see the guide Creating a grade item.
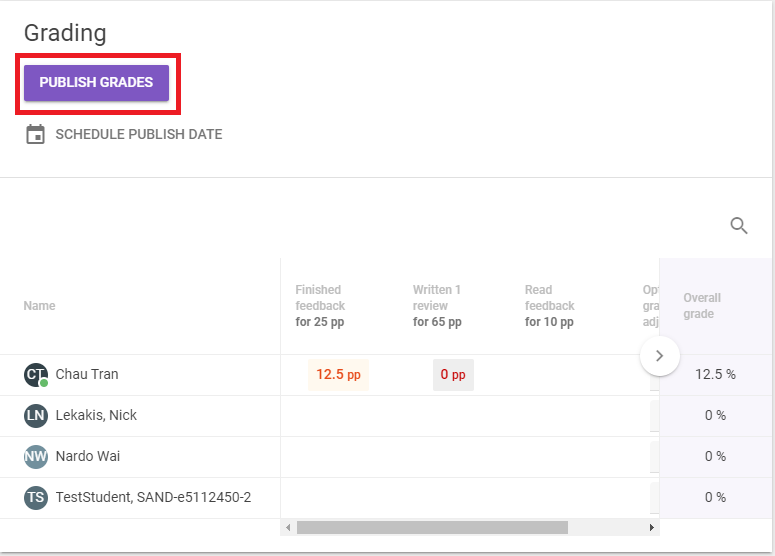
2. Once the peer evaluation is closed, select Publish in section 3 under Received Reviews, and the grades will get automatically entered into the Gradebook. You will be able to see these by going to Grades then to Enter Grades.


