

Using Office365 to Share Documents
All VU staff and students have access to Office 365, an online cloud-based service from Microsoft, allowing users to collaborate for free with online versions of Microsoft Word, PowerPoint, Excel, and OneNote and access to Outlook SharePoint and other productivity apps. In addition, you can save documents, spreadsheets, and presentations online and choose to share files and folders with another person (or groups of people).
Below are the steps on how to create a Shared Document:
- Access Office 365
- Access and Navigate OneDrive
- Uploading your Files or Folders to OneDrive
- Sharing a Document
- Sharing a OneDrive Document
- Sharing a OneNote Document
Step One: Access Office 365
To access and share Office 365 documents with staff and students, it's recommended that you follow the following steps.
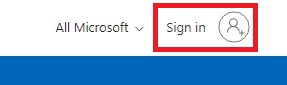
1. Go to https://www.office.com/ and select Sign in.
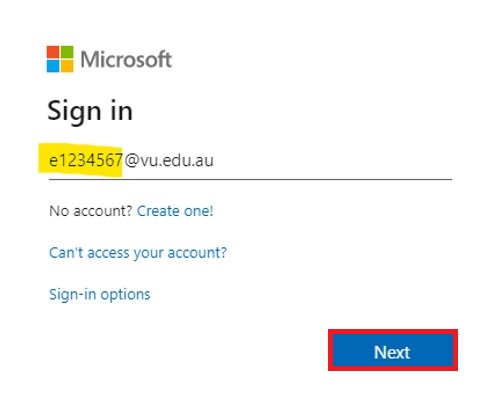
2. Connect your VU account to Microsoft by signing in with your Staff ID@vu.edu.au. Select Next once completed.
3. If you have signed into Microsoft Office before, you can select one of your current accounts connected to VU.

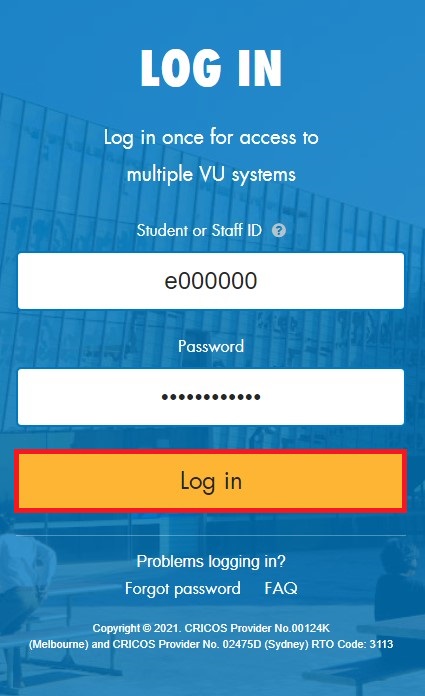
4. Once your account is selected, or you need to connect your VU account to Microsoft, you will be asked to Log in to VU using your Staff ID@vu.edu.au ( e.g. e1234567@vu.edu.au ). Select Log in once you have typed in your VU ID and Password.
Step Two: Access and Navigate OneDrive
1. Once logged into Microsoft Office 365, navigate to any documents, spreadsheets or presentations you have created within Office365 (Word, Excel and PowerPoint). To do this, you can search for specific documents by type. For example, you can select the Word icon in the navbar on the left-hand side of the page to look through all your Word documents specifically.
Select the Home symbol to showcase all file types.

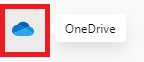
2. If you have never saved anything to Office365 before or wish to upload a specific file or folder, navigate to OneDrive on the navbar once logged in. This is where all your personal documents will be located and stored.
If you have never saved a document within Office365, this is where these documents will be stored once shared and saved online for backup purposes.
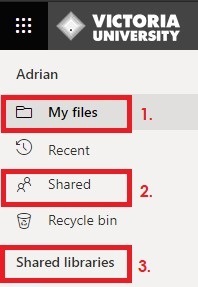
3. There are three sections of OneDrive you should be aware of:
- My files: This is your document storage, just like on your computer or USB; you will find all your files and shared files within this folder.
- Shared: Is where you’ll find any files or folder other people have shared with you.
- Shared libraries: This is a list of any SharePoint groups or sites you are a member of.
Step Three: Uploading your Files or Folders to OneDrive
1. To add an existing file or folder to your OneDrive, select the Upload Dropdown Arrow in OneDrive, then select either Files or Folder. This will make a new copy of the file or folder you are uploading onto the cloud storage.
The original file or folder on your computer device will still be there.
![]()
![]()
You can create new documents directly in OneDrive by selecting New and then one of the many office365 programs.
2. Once Files or Folder is selected, you will be prompted to find the file or folder from your current computer device. Browse through your computer to find and select what you wish to create an online copy of. Press Open at the bottom right of the browser to upload the document.
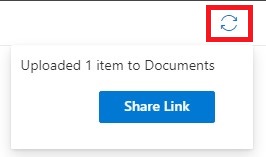
3. The file will upload onto OneDrive. You will notice a loading symbol near the top right of the page indicating this process.
4. A newly uploaded document will have three blue lines located on the left of the first letter of the file, as seen below.
![]()
Step Four: Sharing a Document
There are multiple ways to share your file or folder; here are the two main choices.
4.1 Sharing a OneDrive Document
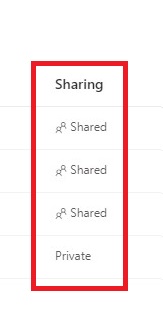
1. You can identify if a file is shared or not by the Sharing Column. If a file is set to Private, you can change the file or folder to Shared via a few steps.
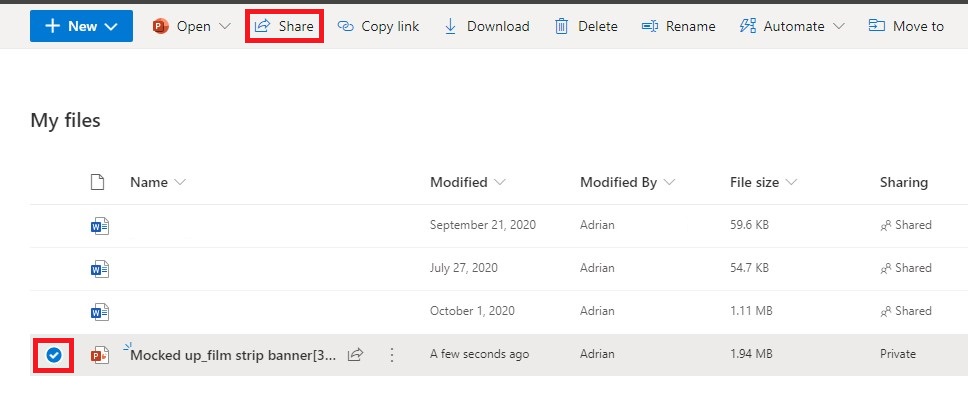
2. You may hover your mouse over the file you wish to share; this will cause a share button to appear near the middle of the saved file. Press the Share button to activate the share settings.

3. The most common method includes the following step. You can select the Radio button next to the file of choice on the left-hand side and select Share on the top navbar to activate the share settings.
The Radio button is only tickable when hovering over a file or folder of choice.
Once the Share button is selected in any of the methods suggested above, the Send Link settings will activate, allowing you to turn the file or folder into a sharable online source for others to participate in.
4. Press on People you specify can view to edit the share settings of the file.
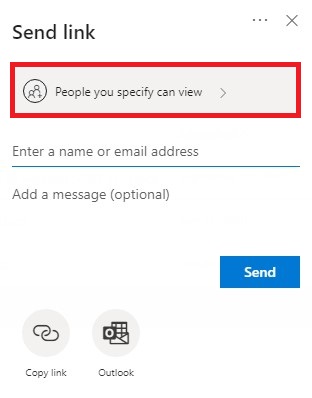
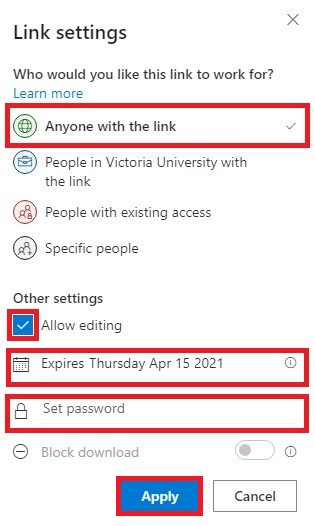
5. Select Select Anyone with the link to allow all who receive access to this file to access it online to allow all who receive access to this file to access it online.
The following settings are optional:
- You may tick Allow editing to allow anyone with this access the ability to edit the file. (This option is recommended).
- You may press the Date of Expiry to edit the date to your liking. However, this will cause all who have received access to lose access on the date of choice.
- You may press Set Password to type in a password to secure the file.
Once Select Anyone with the link has been selected and all optional settings have been decided, select Apply.
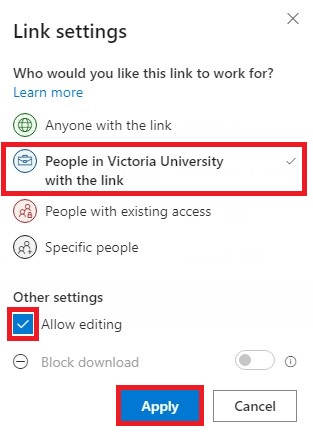
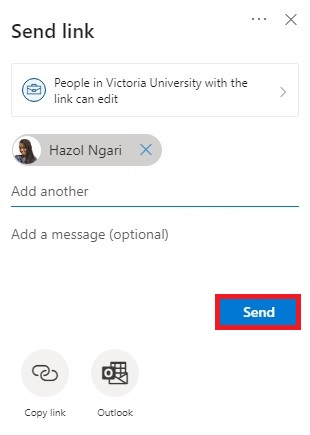
6. If you prefer to share a file for a long time without expiry with participants and staff from VU, in particular, you can select People in Victoria University with the link to allow access to staff and students within VU to access this file instead.
The following settings are optional:
- You may tick Allow editing to allow anyone with this access the ability to edit the file. (This option is recommended).
Once People in Victoria University with the link has been selected, and all optional settings have been decided, select Apply.
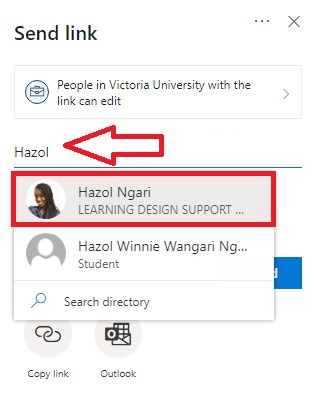
7. Start typing the name of the person you would like to share the file or folder with, and a list of VU people will appear within the search bar. Select the person.
You can add as many people as you like.
8. When finished, select Send, and the person or people will get an email notifying them you have shared a file or folder with them.
9. If the users you wish to add are not from VU or are not showing up within the search bar, you can select Outlook instead. This will open Outlook for you to send an email through your own doing.
There is a possibility that sometimes even going to Outlook won't work. In this rare case, select Copy Link to get a link to send to others instead. All users will be able to access your file once the link is selected on their end.
4.2 Sharing a OneNote Document
1. Open the OneNote application.
2. Open the Notebook you would like to share.
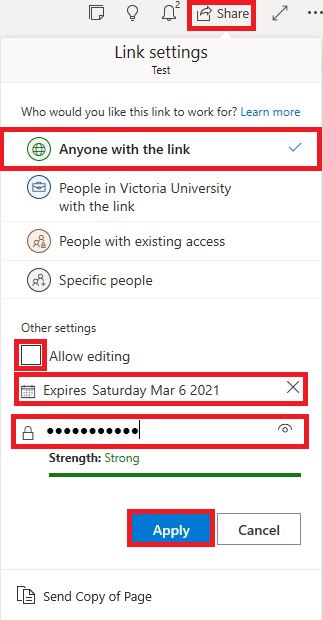
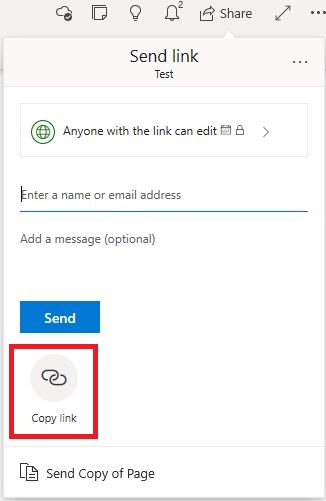
3. On the right-hand side of the Notebook screen, select Share. Select Anyone with the link. Under the Other settings, you will be able to allow editing rights, create an expiration date and create a password for the Notebook. Confirm by selecting Apply.
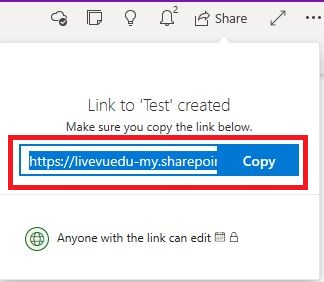
4. Select Copy Link. A new pop-up window should appear; select Copy. Share this link through email or within VU Collaborate.
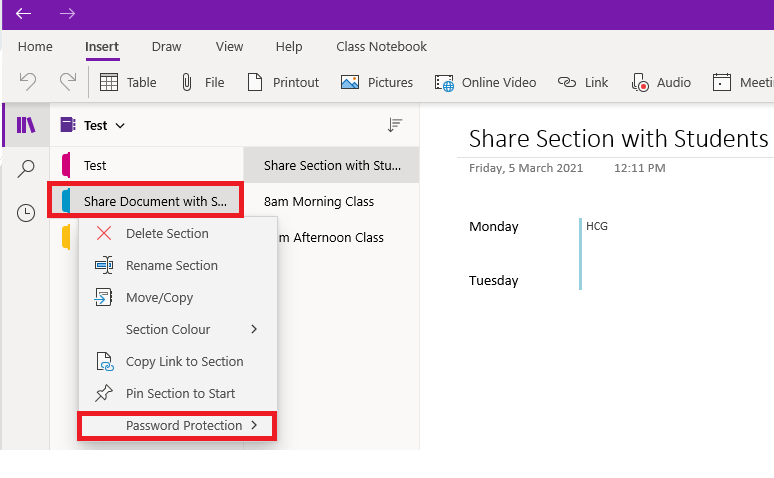
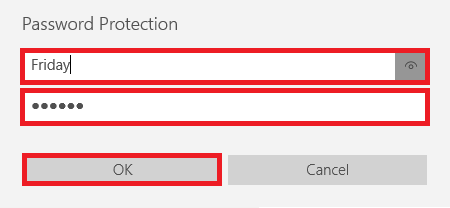
5. To share only one section of the Notebook, right-click the specific tab, select Password Protection, and select Add Password. Once a password has been created, select OK. This is the password you will share with your students.
If you would like to ensure students do not have access to other sections of the NoteBook, create a different password for the remaining sections.
Further Support
Contact us VUCollaborateHelp@vu.edu.au, for information and resources on technology-enhanced learning, or visit VUCollaborateHelp.vu.edu.au.
Contact ITS Service Desk on (03) 9919 2777 or via self-service servicedesk.vu.edu.au for technical support.