Create WordPress Class and invite Students
This guide will walk you through how to create a WordPress Class for your unit site and invite students into your Class.
Note that - you must have a WordPress site to create a Class. If you don't have any existing site or would like to create a new site, refer to our guide: Create a WordPress site
Navigate to the section using the link below:
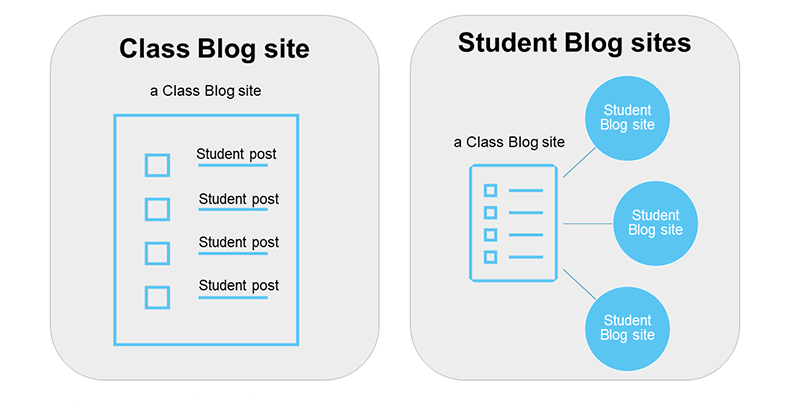
Class Blog vs Student Blogs
There are two ways that you can set a blog activity or assessment on WordPress:
- Class Blog site - where students all post to the one Class Blog site.
- Student Blog site - where students manage their own blog site that is attached to the general Class Blog.
Create a Class
Change your Site to a Class Site
1. Log in to your VU WordPress account and navigate to your desired site.
2. On the Admin bar, from your WordPress site, select Dashboard.
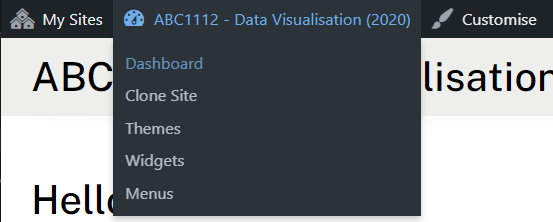
3. Under the site Dashboard, click on the My Class tab, then select Create a Class.
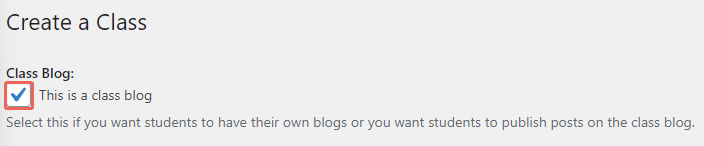
4. To allow your selected site becomes a class blog, tick on This is a class blog option.
Select Class Blog Settings
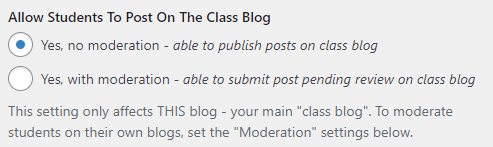
5. Select if you would like students to be able to post to the class blog.
This will depend on the purpose of the activity, options for a Class Blog site and Student Blog sites are given below.
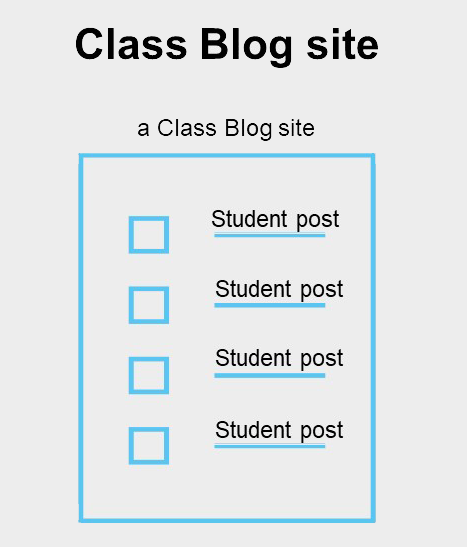
Class Blog Site
If you would like the students to post directly on your current site and/or work collaboratively, select either of the options below:
- Yes, no moderation - able to publish posts on class blog
- Yes, with moderation - able to submit post pending review on class blog
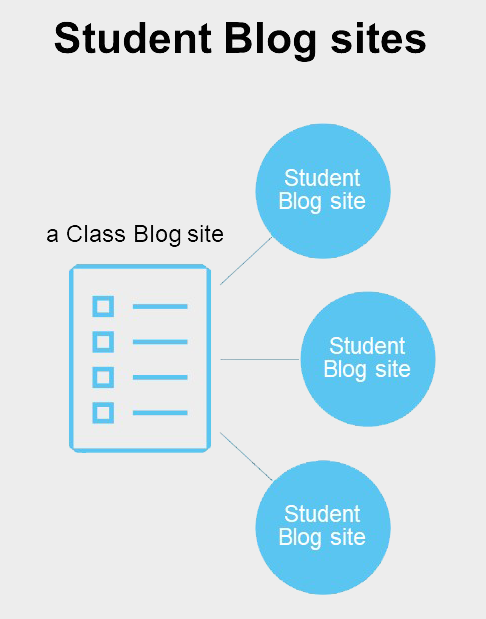
Student Blog Sites
If you would like to allow the students to individually create and post on their own blogs, select the option 'No - use if you want them to publish posts on their student blog'.

(Optional). If you selected option No - use if you want them to publish posts on their student blog and would like to moderate student posts and/or comments, tick on the options below.

Select class teachers
6. Within the Teacher field, you can select who will be the teacher of your class blog.
Note that - only administrators of your site can become a teacher. If you're unable to view your colleague's name here, please ensure that you have granted them access to your WordPress site. If they haven't been added to the site, refer to Add Users guide.

Select Student Permissions and Save
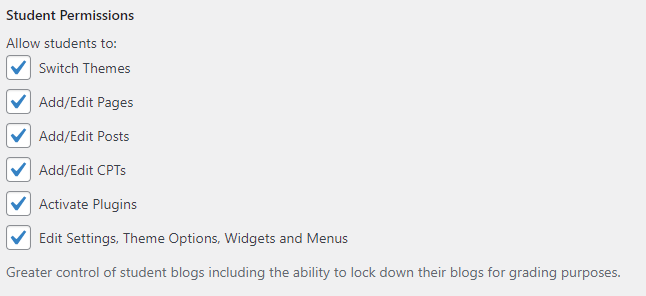
7. By default, the system will allow class blog students to have permissions as shown below. You can untick any option to disable the student permissions.
For example, you can unselect Add/Edit Posts and Add/Edit Pages, to prevent students from making changes during grading.
8. Click Save to apply all the changes and create your first class blog.
You can always go back and change the settings if applicable. Access from My Class, select Settings.
Invite Students into your Class Blog
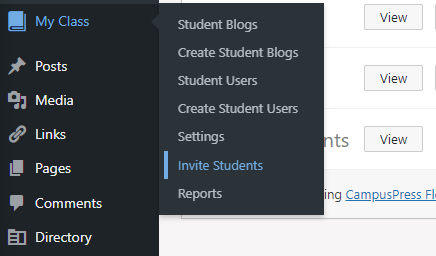
1. Navigate to My Class under your site Dashboard, then select Invite Students.
2. To add a new invite code, enter the link name in the Invite Code textbox using only lowercase letters (a-z) and numbers.
For example, to generate code for students, you can name it abc1234students, with abc1234 as your unit code and students to mark this link as for student login only.

3. Under the Site Creation section, select the options that match your class settings (Class Blog Site or Student Blog Sites).
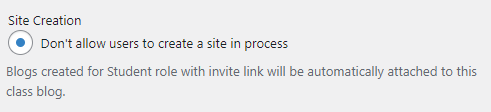
Class Blog Site
If you selected the option to allow students to publish or submit posts on the class blog, you can select 'Don't allow users to create a site in process'.
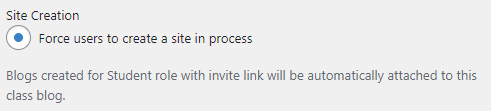
Student Blog Sites
If you selected the option to let students publish posts on their own student blogs, then select 'Force users to create a site in process'.
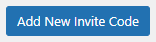
4. Once you finalised the invite link settings, select Add New Invite Code button.
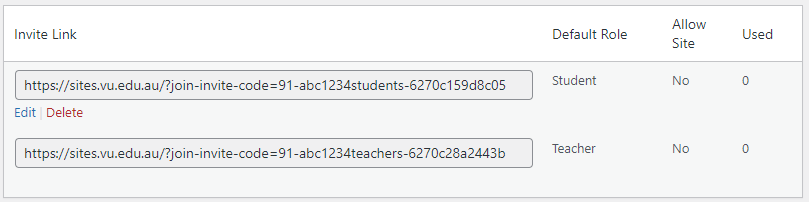
5. The invite link will be generated and added to your Invite Link list on the right-hand side. To modify the invite link or remove them, from the Invite User page, hover over the Invite Link that you want to modify.
6. Select Edit or Delete to complete the action.
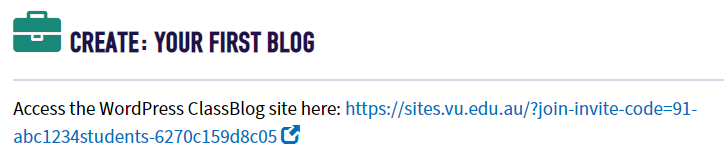
7. To invite students to your Class Blog, simply copy the invite link and paste them into your VU Collaborate space or email it to students.
There are two methods to insert the invite link on VU Collaborate space: (1) Insert a link directly within a learning module, or (2) insert a quicklink in your HTML document.
Once the student clicked on the invitation link, they will be asked to log in using VU Collaborate credentials and join the WordPress class blog.