

Record a video with Panopto Capture (Web Browser)
Record audio, video or your computer screen, with the Panopto web browser recorder (Panopto Capture).
On this page:
Related guides:
- How to Record a Video by Panopto
- How to Download and Install Panopto for Mac, by Panopto
- How to Record with Panopto for Mac, by Panopto
- How to Download and Install Panopto for Windows, by Panopto
- How to Record with Panopto for Windows, by Panopto
- How to Use the Build a Session Feature, by Panopto
New unit navigation bar available in H2B3 2025
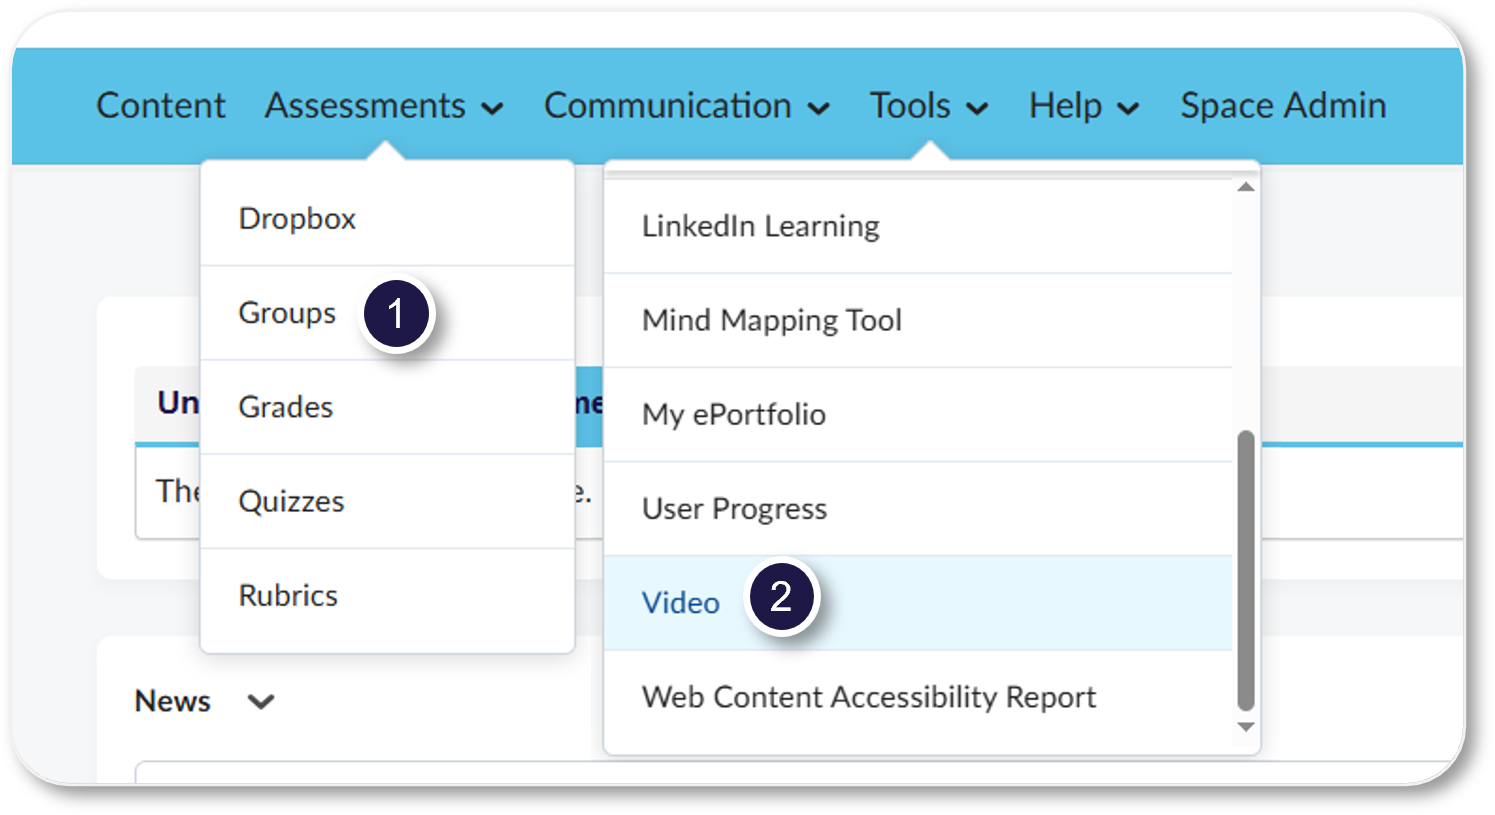
Groups are moving to Assessments and Video is moving to Tools!
Record a Video
Play this video to learn how to record a video on Panopto.
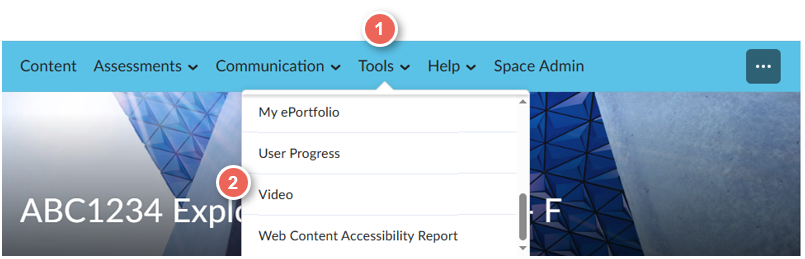
Before you begin, in a VU Collaborate space on the Navigation Bar, select Tools then Video (or Video) to open Panopto.
Getting Started: Record a Video, by Panopto
Step One: Launch Panopto
1. In your VU Collaborate space on the navigation bar, click Tools then Video, (or Video).
Choose recording location
2. After Panopto opens in a new tab, select the file location (1) either
- remain in the current VUC space folder (a) (videos will be visible to all students in the space), or
- select My Folder (b) (videos will only be visible to you).
3. From the top menu select + Create (2) then select Panopto Capture (3).

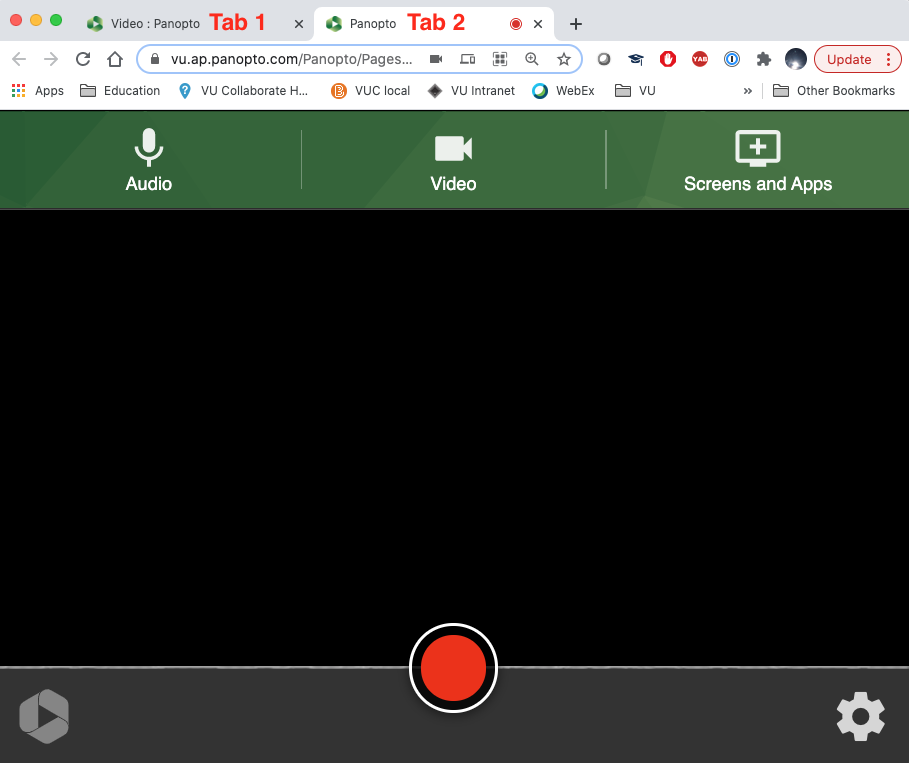
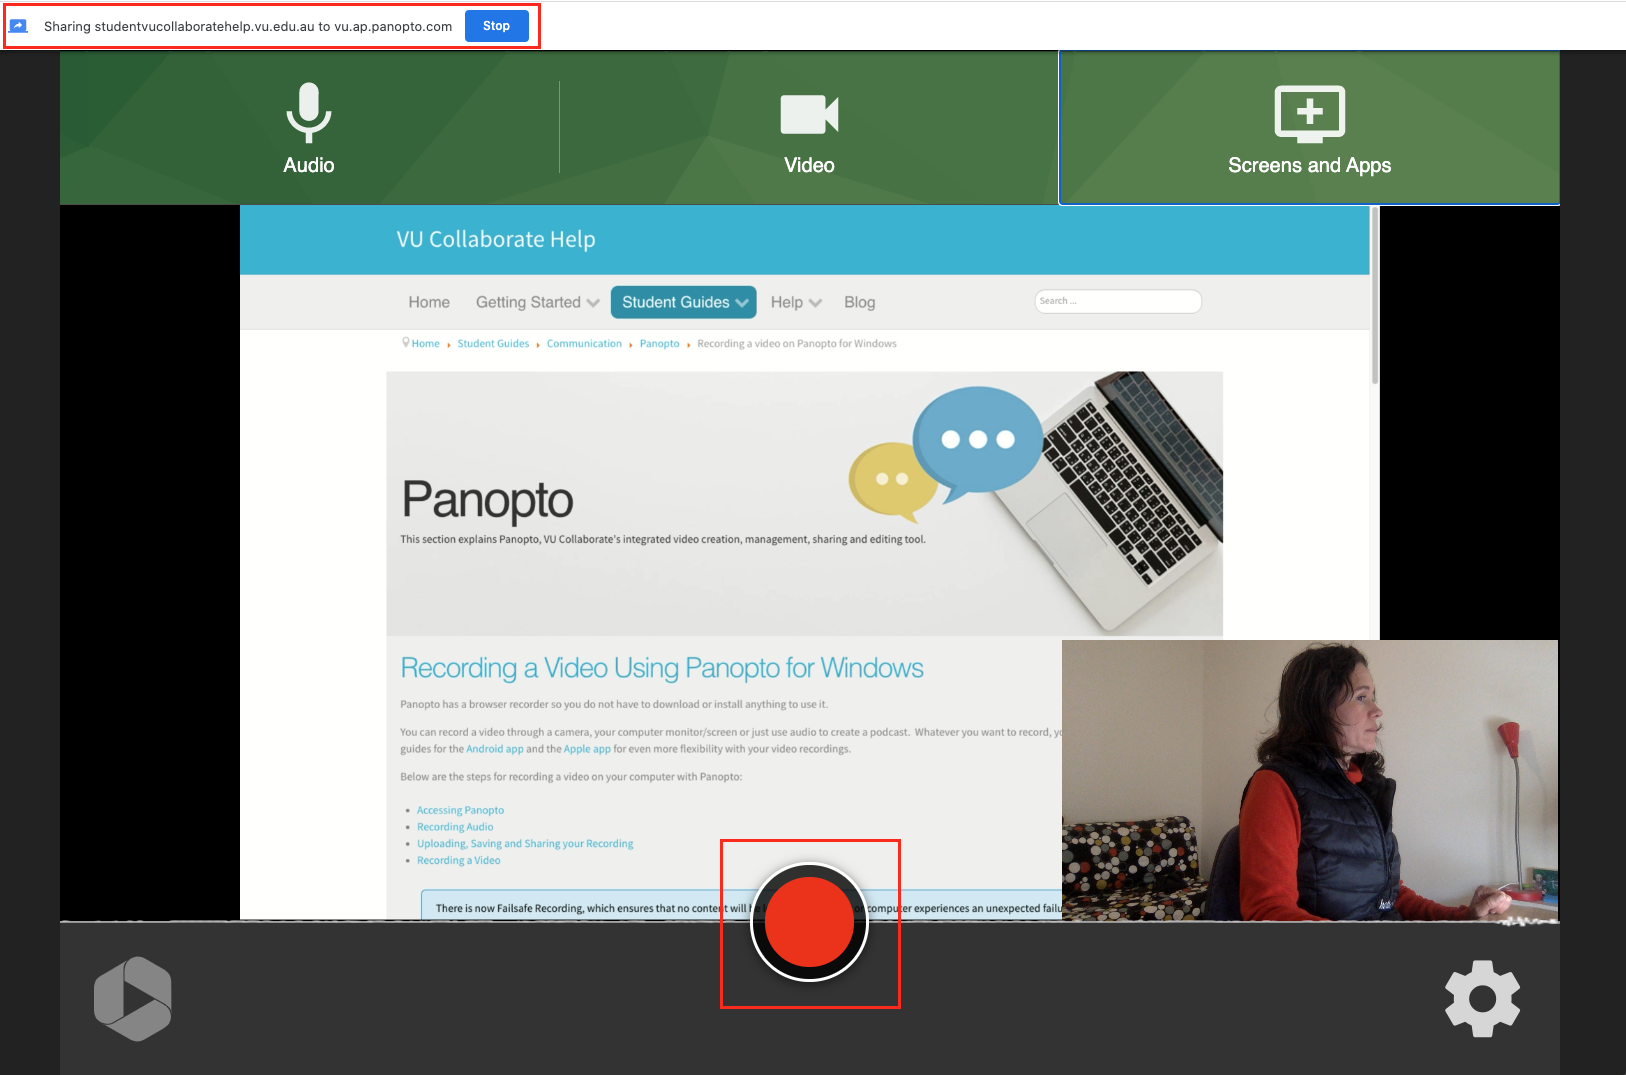
4. A new tab will open in your web browser. This tab provides options to record Audio, Video, Screens and Applications.
Step Two: Select recording options
You may have choices with your Video, audio and screen-sharing recordings depending on the equipment you are using.
Audio options
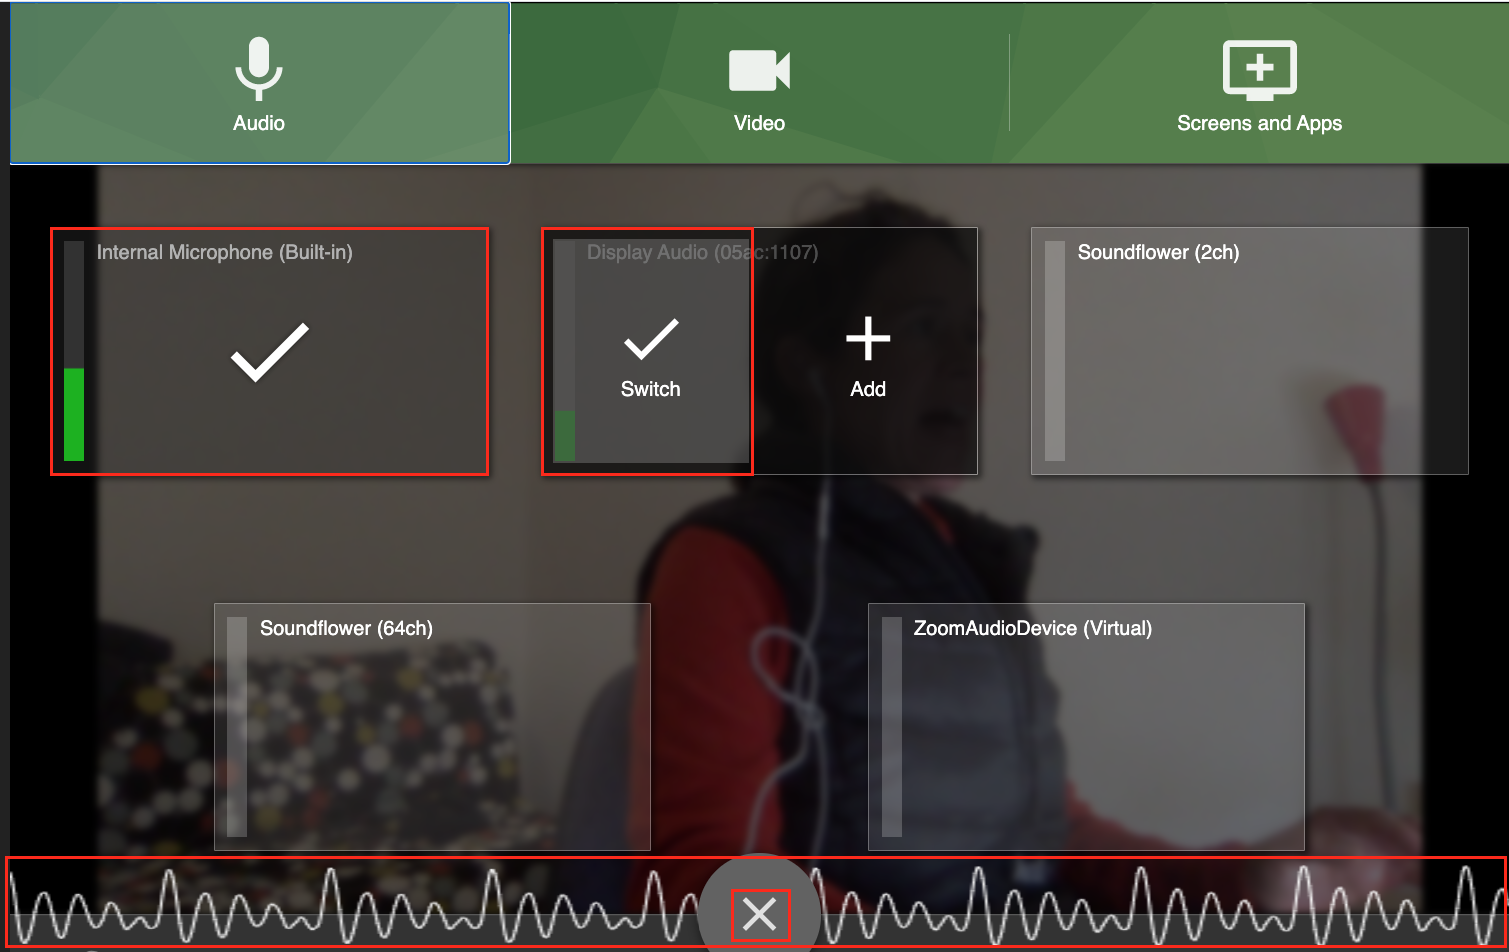
- To select your audio, click on the microphone ( audio ) option on the left.
Panopto will automatically detect the audio equipment available to use ( select Allow in the pop-up first ). - A tick will show in the centre of the audio option you are using.
If you want to use another one, hover your mouse over the rectangle of the option you want to use and then select Switch.
Once an option is selected, you can see how well the audio is working by the vertical green line in the box and the moving waves at the bottom of the window. - Once you are satisfied with your audio selection, click on the X at the bottom centre of the window.
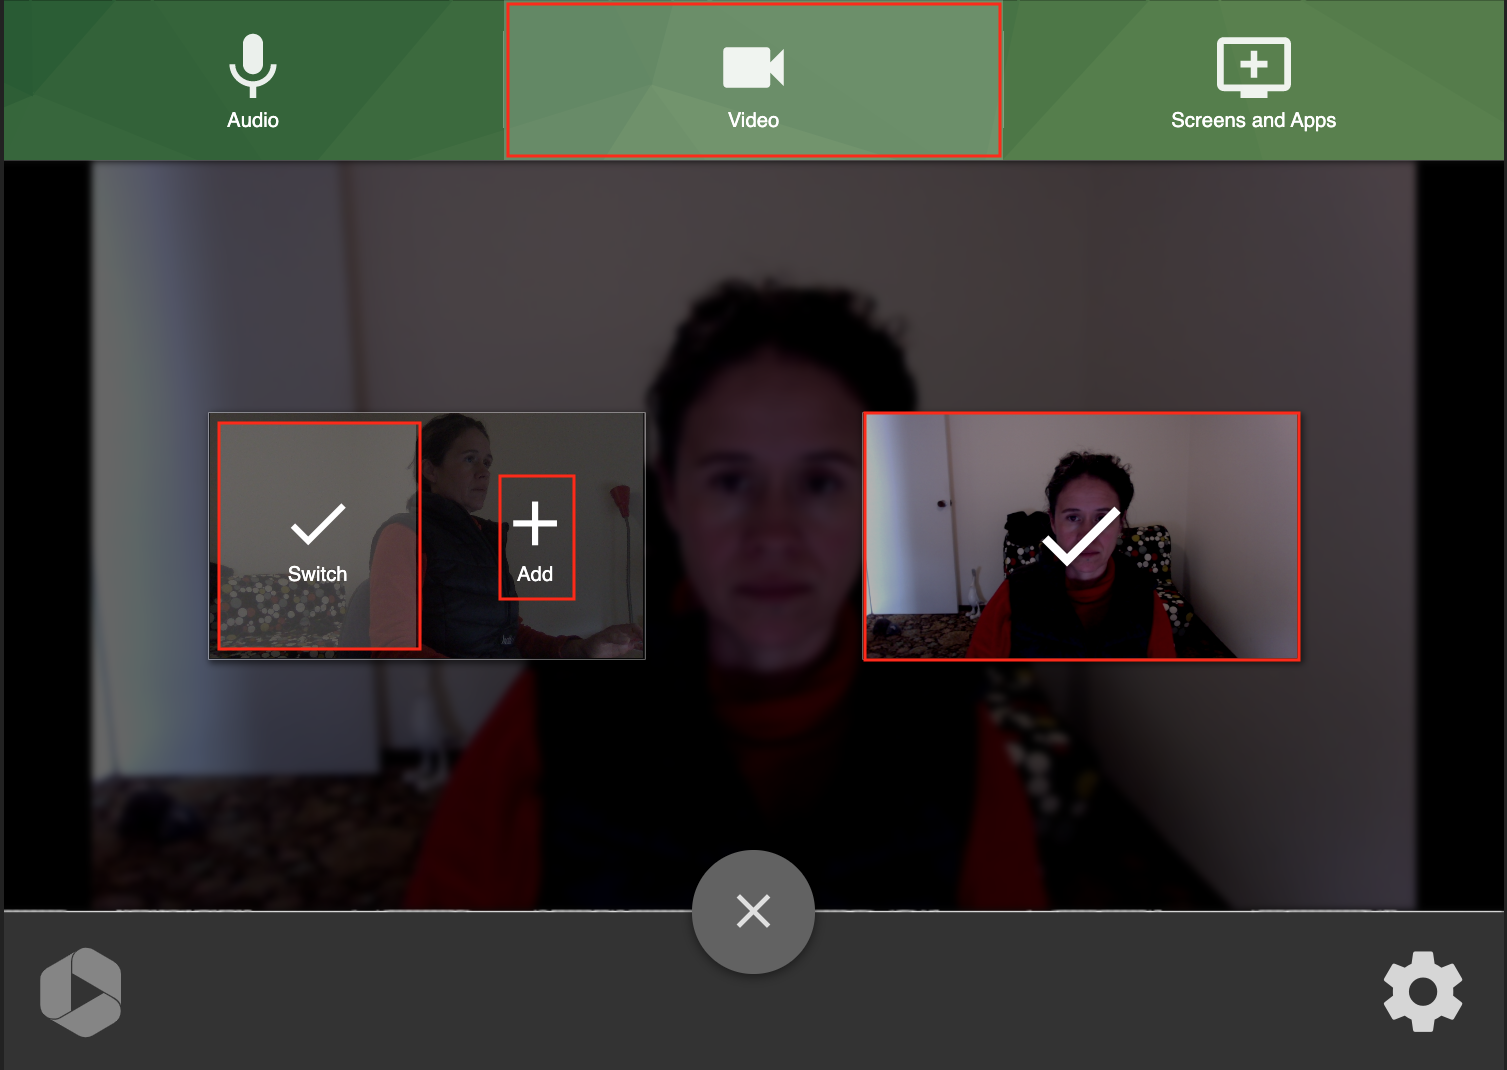
Video options
- To select your Video, click on the video option in the top middle of the window.
Panopto will automatically detect the recording equipment available to use ( select Allow in the pop-up first ). - A tick will show in the centre of the video option you are using.
If you want to use another one, hover your mouse over the rectangle of the option you want to use and then select Switch.
If you're going to add another option, click on the + icon instead.
You can see how well the video is working by the view available to you on the screen. - Once you are satisfied with your audio selection, click on the X at the bottom centre of the window.
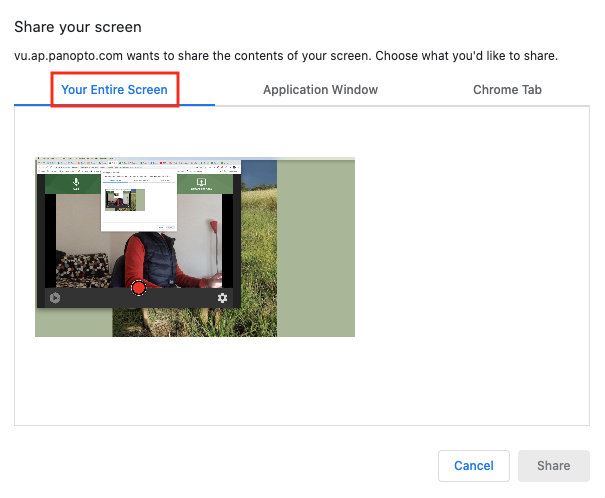
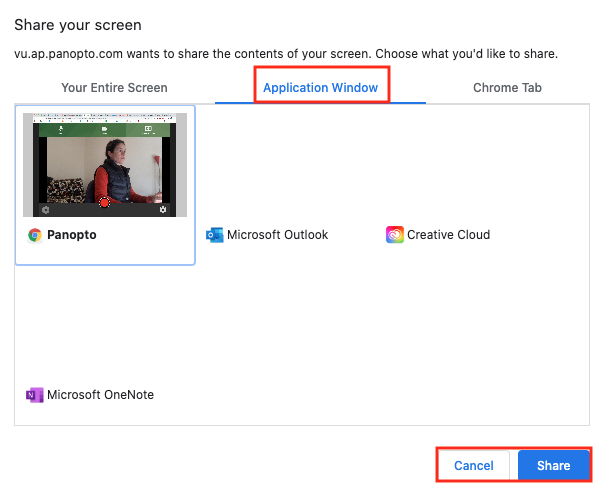
Share screen options
Many people create screencasts with videos, which usually show how to do something on a computer ( like the Video at the beginning of this guide ). You can share more than just your computer monitor, though.
- Select the Screens and Apps option at the top right of the window.
- You will then have three options; 1) Your Entire Screen, 2) Application Window, and 3) Chrome Tab ( or another browser you use ).
- Make your selection by clicking on it, select Share audio if you intend to show a video that you want to be heard, and then select Share.
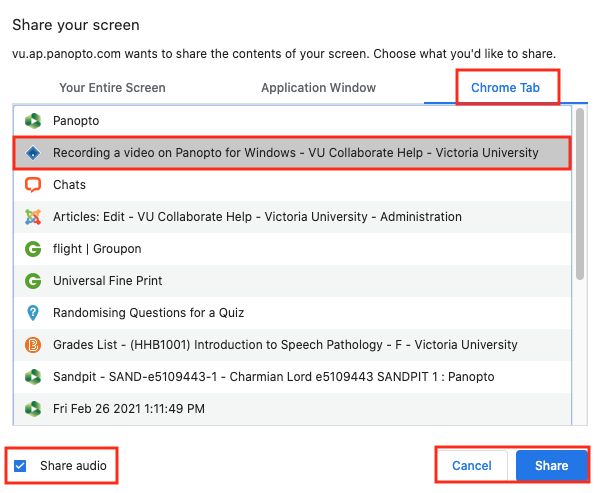
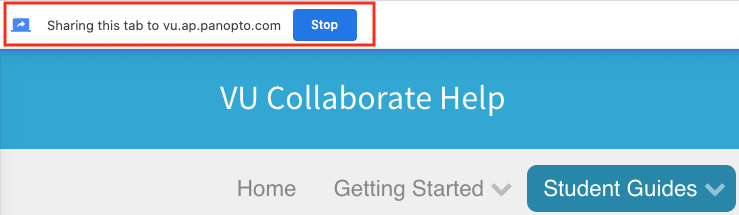
If you select to share the Chrome tab, you can see which tab is being shared by the blue box, and you won't lose the Panopto tab as it has the red circle on it.
![]()
You can stop sharing the Chrome tab at any time by selecting Stop.
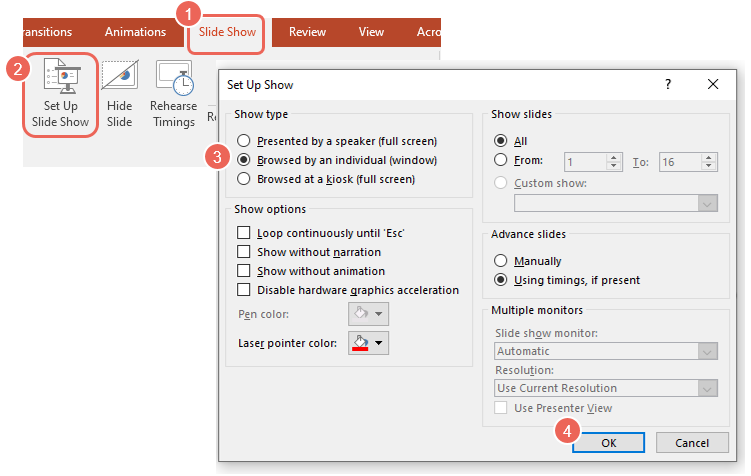
Recording a PowerPoint presentation
To record a PPT presentation, you may need to select the browse by an individual window option.
To do this in PPT go to:
- Slide Show tab
- Select Set Up Slide Show
- In show type, select Browsed by an individual (window)
- Select OK to confirm your changes
Step Three: Record your video
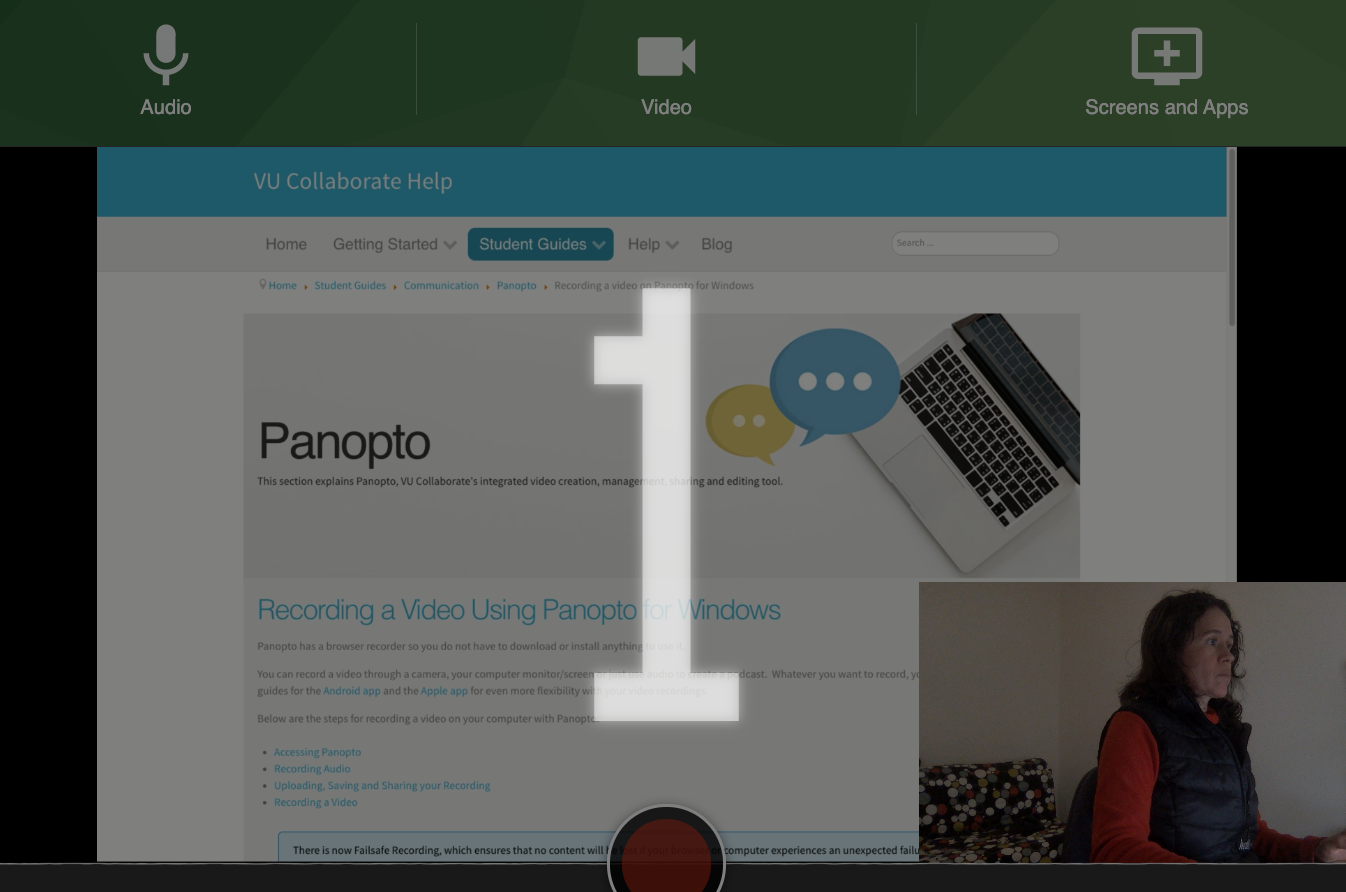
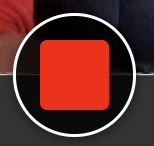
1. Once you are ready to start recording, click on the red circle in the bottom middle of the screen.
2. A countdown of 5 seconds will appear just before the recording starts. If you have chosen the Entire Screen or Application Window sharing options, you now have five seconds to ensure everything looks as it should for your Video. Don't worry, though; you can always edit out anything you don't like after the video is saved.
3. When you have finished your recording, click on the red square.
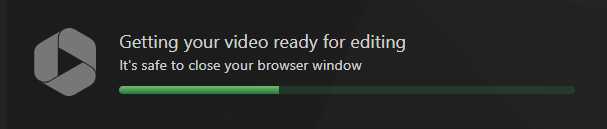
4. You can then see a green line moving to the right to show that the Video is processed.
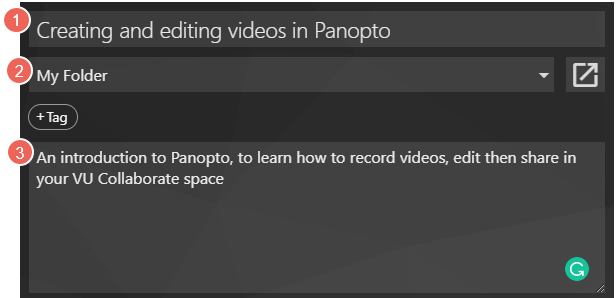
5. Enter the (1) name of the Video and (2) select which folder it will be stored in.
If you started the recording in your version of My Folder, Panopto will naturally opt to save the Video there.
You also have the option to (3) add a description of your Video beneath that.
6. Once the message states that it is safe to close the browser, close the tab you were using that had the red circle on it.