Creating a Discussion Forum and Topics
This guide provides step-by-step instructions for teachers on how to create a discussion forum in VU Collaborate. By setting up a discussion forum, you can centralise student questions and comments, and foster interactive and engaging discussions among students.
The three main parts of a discussion forum are:
- Forum: A place to list related discussion topics, for example, “Assessment Discussion”.
- Topic: A subject or question, where a conversation take place. This is where students can post, for example “Assessment 1”.
- Posts: The conversation itself. It starts with a thread, and responses are called replies
Step One: Create a Discussion Forum
Forums organise topics. Create a forum first, then add topics where posting and replying occur.
Access Discussions
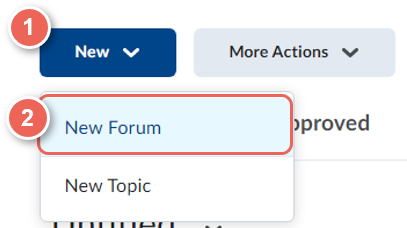
1. In a unit space on the navbar, click Communication then Discussions.
2. From New, select New Forum to create a discussion forum.
Enter Title and Descriptions
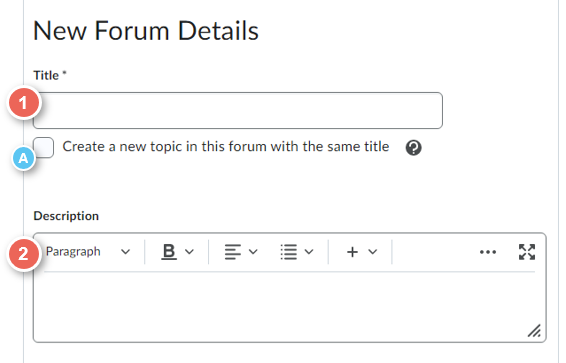
3. Enter the Forum Title and Description.
Optional: You can create a discussion topic within this forum by selecting the 'Create a new topic option', or proceed to Step 2 to create a topic separately.
4. Once done, select Save and Close.
Step Two: Create or Edit a Discussion Topic
You can create new discussion topics and optionally select options to enable grading, which will be entered and sent to the grade book.
Create a New Topic
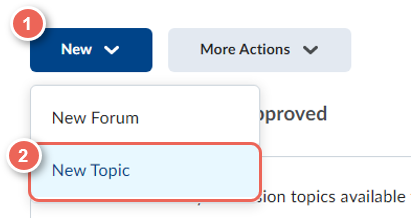
Scroll to the top of the page, and from New, select New Topic.
Edit an existing Topic
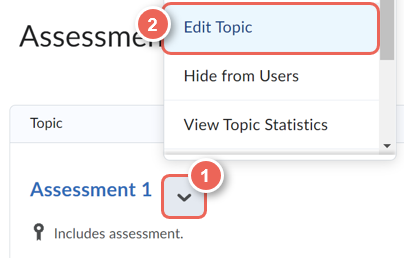
From the Topic name menu, select Edit Topic.
Step Three: Set Topic Properties
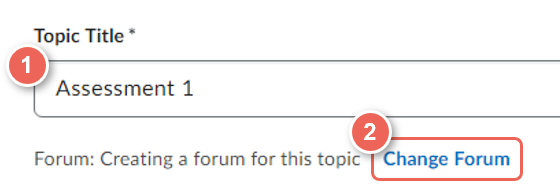
1. Enter the Topic Title, using the same name as the grade item and rubric.
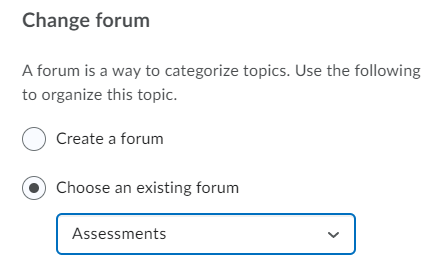
2. If you haven't created a forum for this topic, select Change Forum to assign the topic to
- an existing forum, or
- create a new forum with the same title.
Link to a grade item
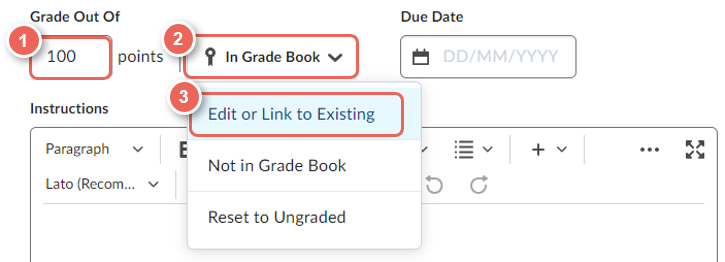
3. In Grade Out Of, enter the Total Points (1) the discussion will be marked out of.
Total points may differ from the total weight, for example, an assessment marked out of 100 points, can have a total weight of 25% for the unit.
4. From, In Gradebook (2) select Edit or Link to Existing (3).
5. (Optional) Set a Due Date.
6. Description: where you add additional information or instructions for the students.
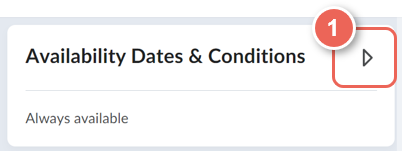
Step Four: Set Availability Dates & Conditions
1. Click on the Availability Dates & Conditions to open the dropdown settings.
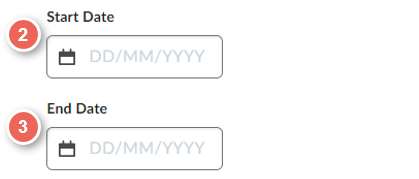
Adding a Start Date and End Date will determine when the topic is available to students.
- Start date (2) is when students will see the discussion topic, and
- End date (3) is when it will become hidden from them.
You can always go back and change them later.
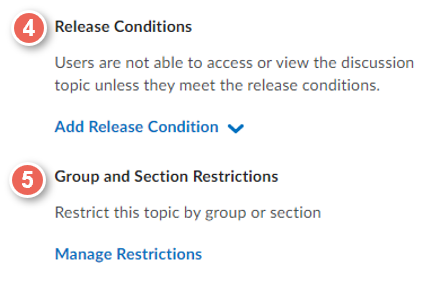
Release Conditions and Restrictions (set in Delivery Space)
4. Set release conditions students cannot access or view the topic until the release conditions are met.
Refer to Using Release Conditions for more information.
5. Set Group and Section Restrictions allow a topic to be available to only a select group of students or course and unit sections.
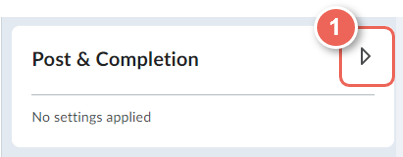
Step Five: Set Post & Completion
1. Click on Post & Completion to open the dropdown settings.
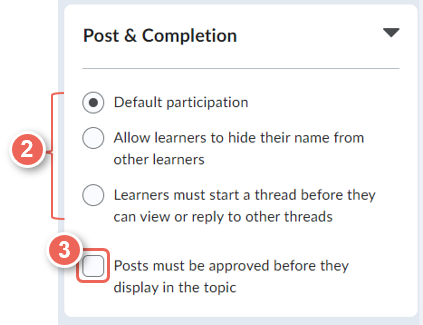
Participant options (2)
- Default participation.
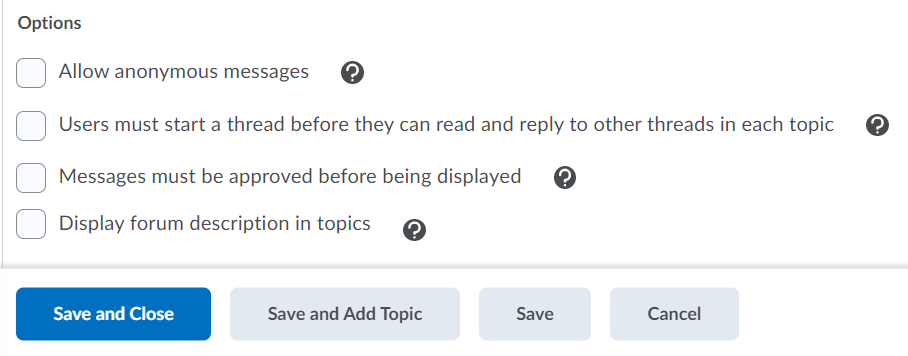
- Allow learners to hide their names from other learners: allow students to hide their names and post anonymously on the topic.
- Anonymous messages are displayed with the message author 'Anonymous' in the Message List.
- Learners must start a thread before they can view or reply to other threads: require each student to start a new thread before viewing or replying to other threads on that topic.
Moderation (3)
- Posts must be approved before they display in the topic: moderate messages or posts created within this topic are to be approved before they are published to other students.
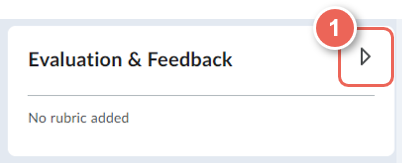
Step Six: Set Evaluation & Feedback
Add a rubric
To assist in the evaluation, marking, and providing feedback for student submissions, you can use a Rubric or enable other evaluation settings.
1. Click on Evaluation & Feedback to open the dropdown settings.
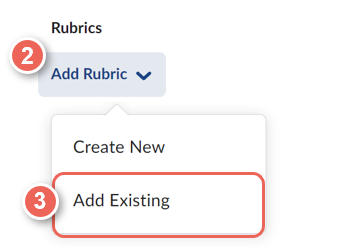
2. You can also add a marking rubric to assess and provide feedback on the discussion topic.
Refer to this guide: Linking a Rubric to an Assessment Dropbox Folder
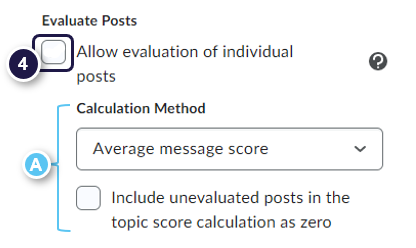
Optional Evaluation
Allow evaluation of individual posts: manually assign marks to each discussion post and reply.
- Calculation Method: click on the dropdown to select a relevant method.
- Include unassessed messages in the calculated score as zero:
- automatically assign all not yet evaluated student posts as zero.
Important - Only use this option if you are not marking using a rubric and the students are required to post multiple discussion threads within that topic.
Allow learners to rate posts: allow students to rate their peer posts in the unit. Option includes:
- Five-Star Rating.
- Up Vote/Down Vote Rating.
- Up Vote Only Rating.

Once complete, select Save and Close.
To learn how to grade the discussion topic, see Assessing and Grading Discussions.
Subscribing to a discussion
Subscribe to your discussion list to get notified every time students respond to selected discussion topics and/or threads.
There are three options:
- Subscribe to a Discussion Forum: receive a notification on all topics or thread activities within that discussion forum.
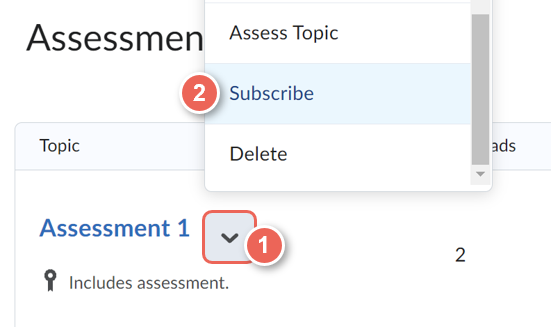
- Subscribe to an individual Discussion Topic: receive a notification on that topic activities.
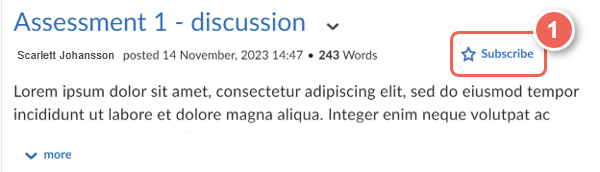
- Subscribe to an individual Topic Thread: receive a notification when students reply that thread.
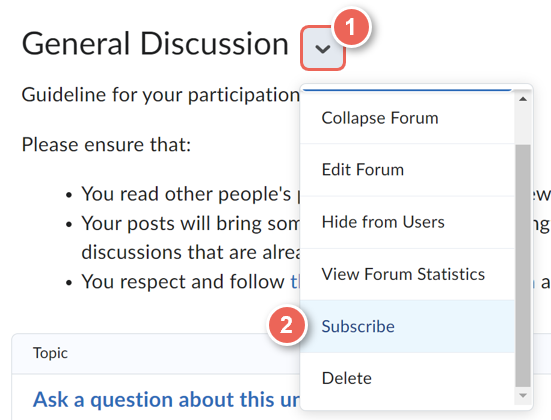
Option 1: Subscribe to a Discussion Forum
Option 1: Subscribe to a Discussion Forum
Allow you to receive a notification when students respond to any topics or threads belonging to that discussion forum. Once you subscribed to the Forum, the system will automatically subscribe you to each topic and thread under that Forum.
1. Navigate to the Discussion Forum, it normally appears as a large black heading text above the topic box.
2. Select Subscribe from the dropdown list.
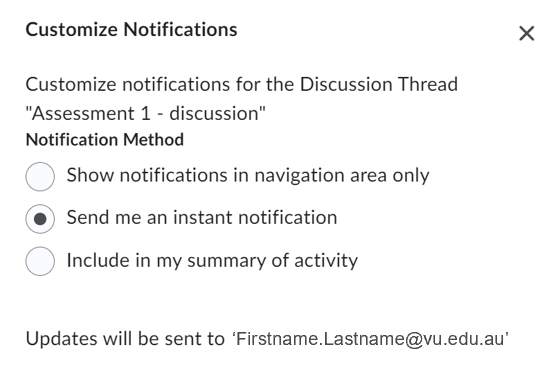
3. In the Customize Notifications pop-up window, select your Notification Method.
- Show notifications in navigation area only - display the notification through the chat icon on top right

- Send me an instant notification (selected by default) - send you an instant email and notification whenever there is a new update.
- Include in my summary of activity - include in your Summary of Activity email, which can be sent daily or weekly.
For more details on how to set up or check if you can receive instant notifications/email, refer to Setting Up Instant Notifications.
4. Once done, select Subscribe.